It is very straightforward nowadays to create popups for your website with popular tools available online. But you have to keep in mind whether they are actually converting visitors into potential customers – what is the conversion rate?
To help you with that question, a high-converting popup will grab users’ attention, and persuade them enough to take specific action.
Now the challenge is: how do you create such popup?
In this guide, I will provide step-by-step guidelines to create a popup that converts while also covering all the nitpicks about it – so that you can start collecting leads for your website right away.
What Are Popups and Why You Should Use Them?
A popup is an interactive widget that appears on a webpage to grab the visitor’s attention and prompt an action. Unlike static banners, popups overlay the main content, making sure it is noticed by users. You can use it for various purposes like collecting leads, promoting products, or showing important announcements.
Common Use Cases for Popups
So, you might ask, for what purposes should the popups be used? Popups can be displayed to achieve different goals but these are the most notable use cases:
Grow Email Subscribers: You can display a newsletter signup popup (with exit-intent trigger) to collect user information like emails. Use a multi-step popup to gradually collect user information without overwhelming them.
Promote Products & Boost Sales: Also, you can highlight your new or underselling products through a popup. Offer exciting discounts or seasonal deals with countdown timers to further encourage customers to check out the products.
Enhance User Engagement: Popups are great for increasing engagement on your site. For instance, you can showcase popup after users have scrolled a page or stayed inactive for a time. Test with different types of popups to see which ones resonate with your target audience the most.
Types of Popups You Should Implement on Your Site
You will see different types of popups on websites on the internet. However, there are some common types that you must implement on your website.
Here are some of the most effective popup types:
Exit-Intent Popup
An exit-intent popup tracks users’ mouse movement and gets triggered when they are about to leave your website. These popups help you turn visitors into potential clients and boost conversion rates.
For example, you can display a popup saying: “Get the FREE guide on creating a successful WooCommerce store” and collect the user’s email in exchange.
Coupon Popup
A coupon popup displays a discount code that users can apply to their purchases. This works great for reducing cart abandonment and encouraging customers to complete their orders.
For example, you can show a popup on the cart page specifically for first-time customers saying, “Welcome! Enjoy 15% off your first order. Use code WELCOME15.”
Newsletter Popup
A newsletter popup encourages visitors to subscribe to your email list in exchange for exclusive content, discounts, or updates.
Example: “Join our newsletter and get a free SEO guide”.
This is a very popular method of collecting information about potential customers and you should definitely implement it on your website.
Video Popup
A video popup displays an embedded video to engage visitors with product demos, testimonials, or promotions without redirecting them to another page.
It is a great way to engage with your audience and increase the dwell time on your website.
Example: “Here’s a quick product walkthrough of our latest product.”
There are many other types of popups you can implement on your website to grow your business. However, the above ones are the most common ones.
Must-Have Elements of a High-Converting Popup
What makes a great popup that captivates visitors? A high-performing popup must have some essential elements or let’s say characteristics. These factors will ensure the popup actually leads to conversion not just a simple announcement.
Here are the factors you should ensure when making a popup:
⭐ Compelling Headline: Your popup should have a catchy headline. It should immediately grab attention and clearly communicate the value of the offer.
For example: “Get 20% Off – Limited Time Offer!”
⭐ Clear & Concise Message: Keep the text in the popup short, direct, and persuasive. Focus on showing benefits rather than promoting heavily.
For instance: “Subscribe now and receive exclusive deals straight to your inbox!”
⭐ Eye-Catching Design: It is recommended to use contrasting colors, bold typography, and high-quality images to make the popup stand out.
Tip: Experiment with different designs and check analytics on which one performs the best. But, in general, you should aim for a minimal and uncluttered design.
⭐ Strong Call-to-Action: The CTA button should be clear and action-oriented. You should keep it concise to avoid confusion.
Examples: “Claim Your Discount”, “Get My Free Guide”, “Subscribe Now” and so on.
⭐ Add A Lead Capture Form: If your goal is to collect information from visitors, you must add an opt-in form. However, keep the form fields minimal. Usually, name & email are enough to get started.
⭐ Exit or Close Option: You should allow users to easily dismiss the popup if they’re not interested.
The popup should include a visible “X” button or a “No, Thanks” link.
7 Easy Steps to Create A Popup That Converts
Truth be told, creating a popup is very easy these days. All you need is a WordPress plugin and you are done in just a few steps.
But you need to ask yourself – are these popups actually encouraging customers to perform the actions you want them to?
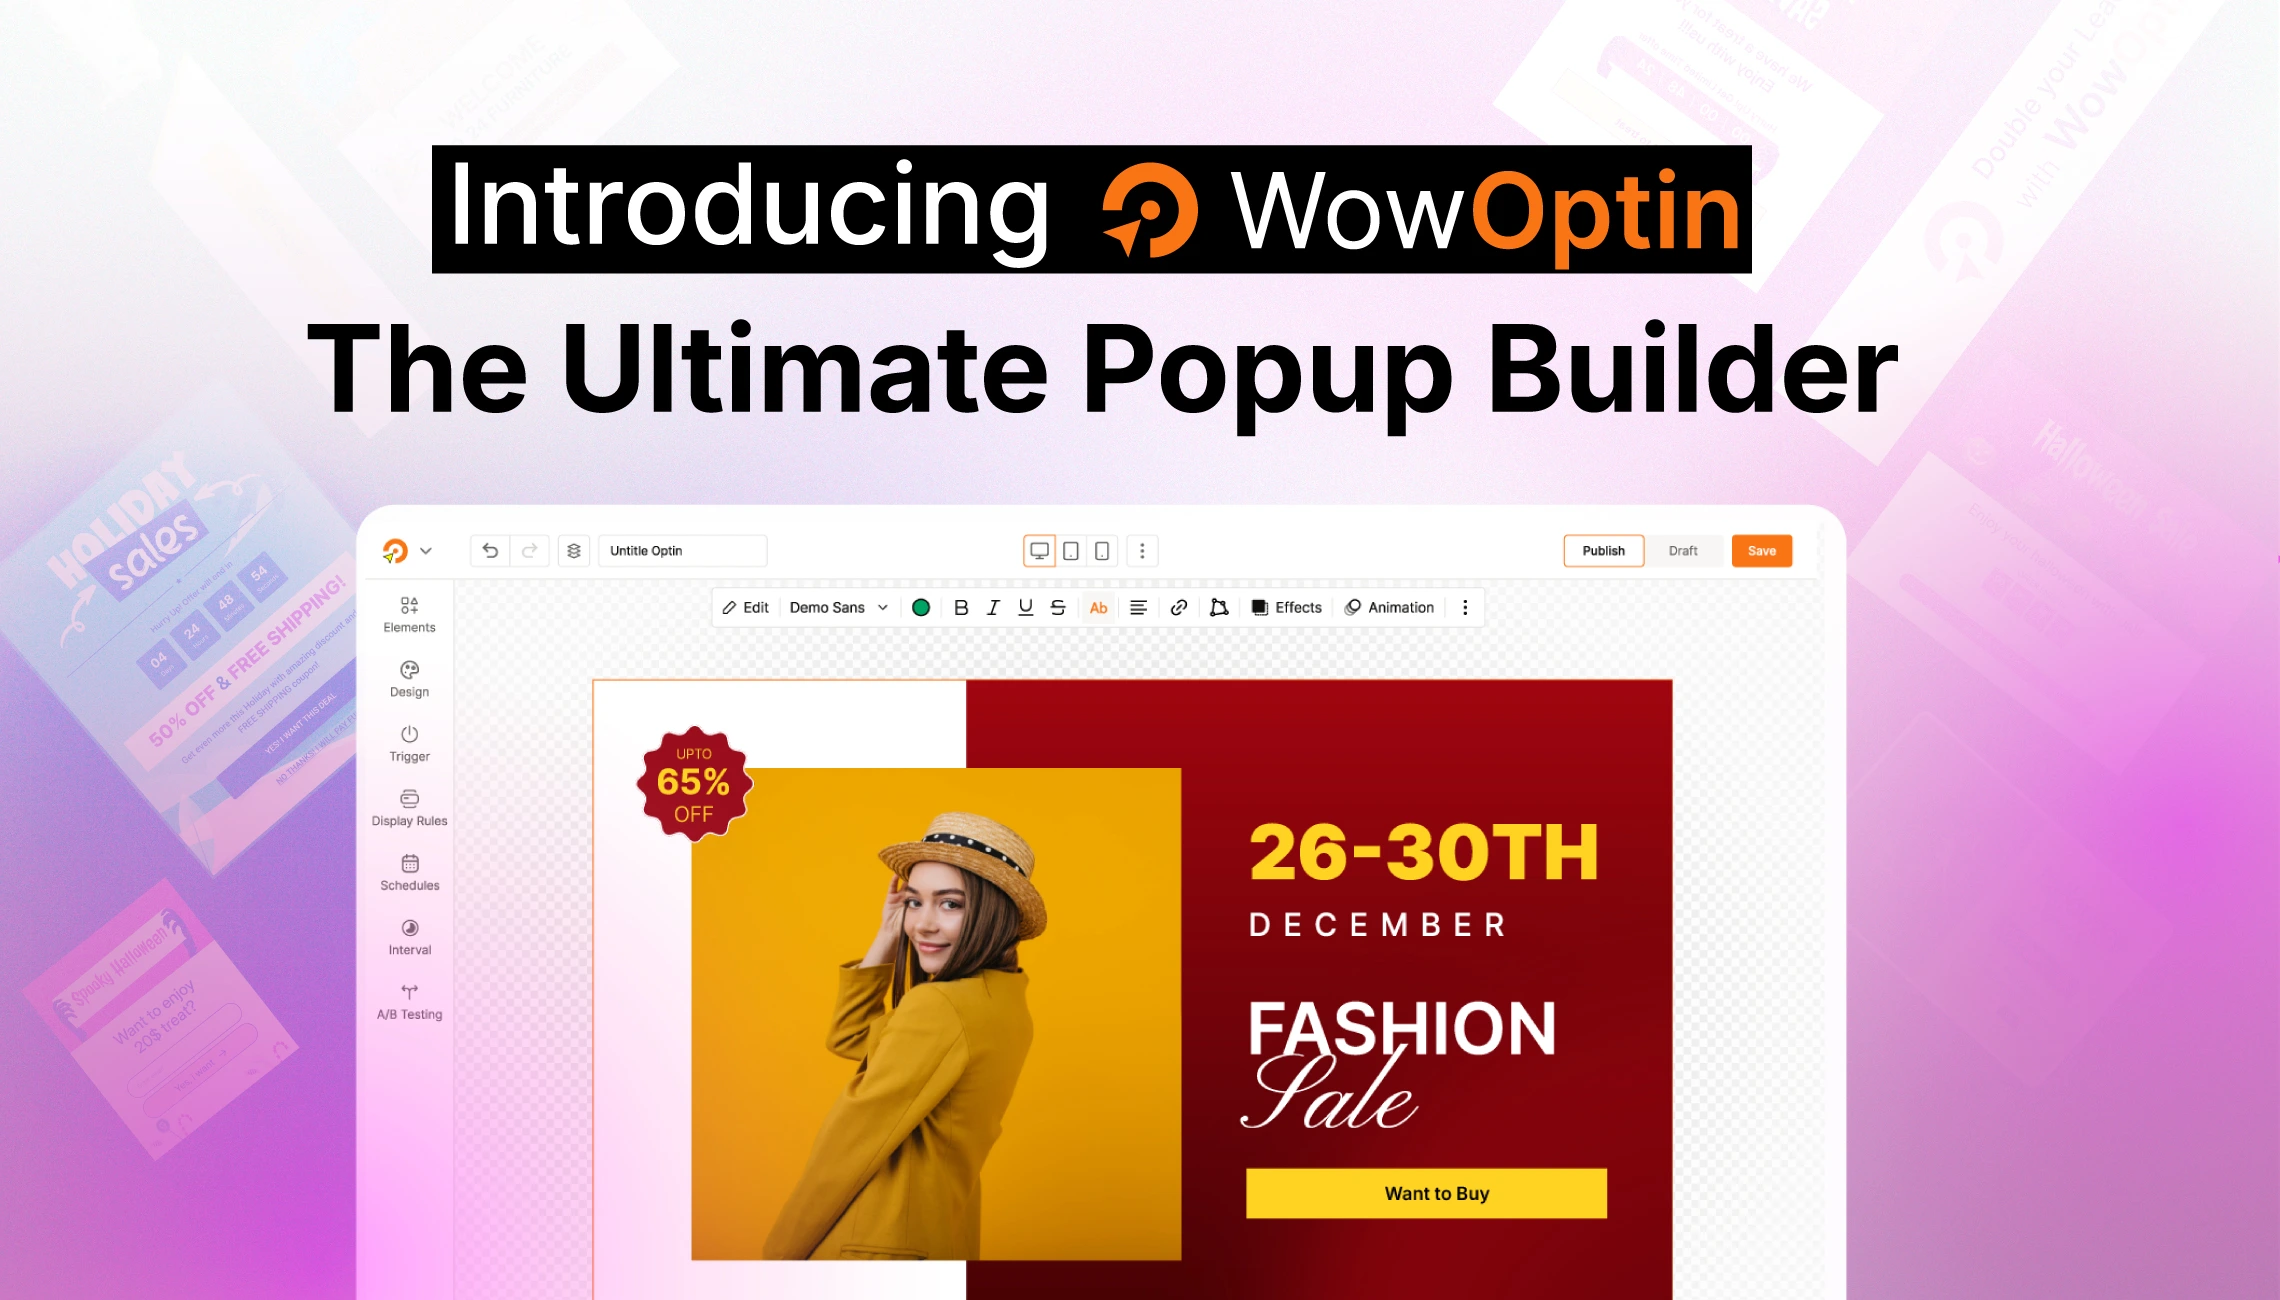
That’s why we will use the WowOptin plugin – a user-friendly tool that not only makes popup creation easy but also helps turn random visitors into high-valued customers.
Pre-requisites: Before creating the popup, you will need to install and activate the WowOptin plugin. The detailed installation steps can be found in this documentation.
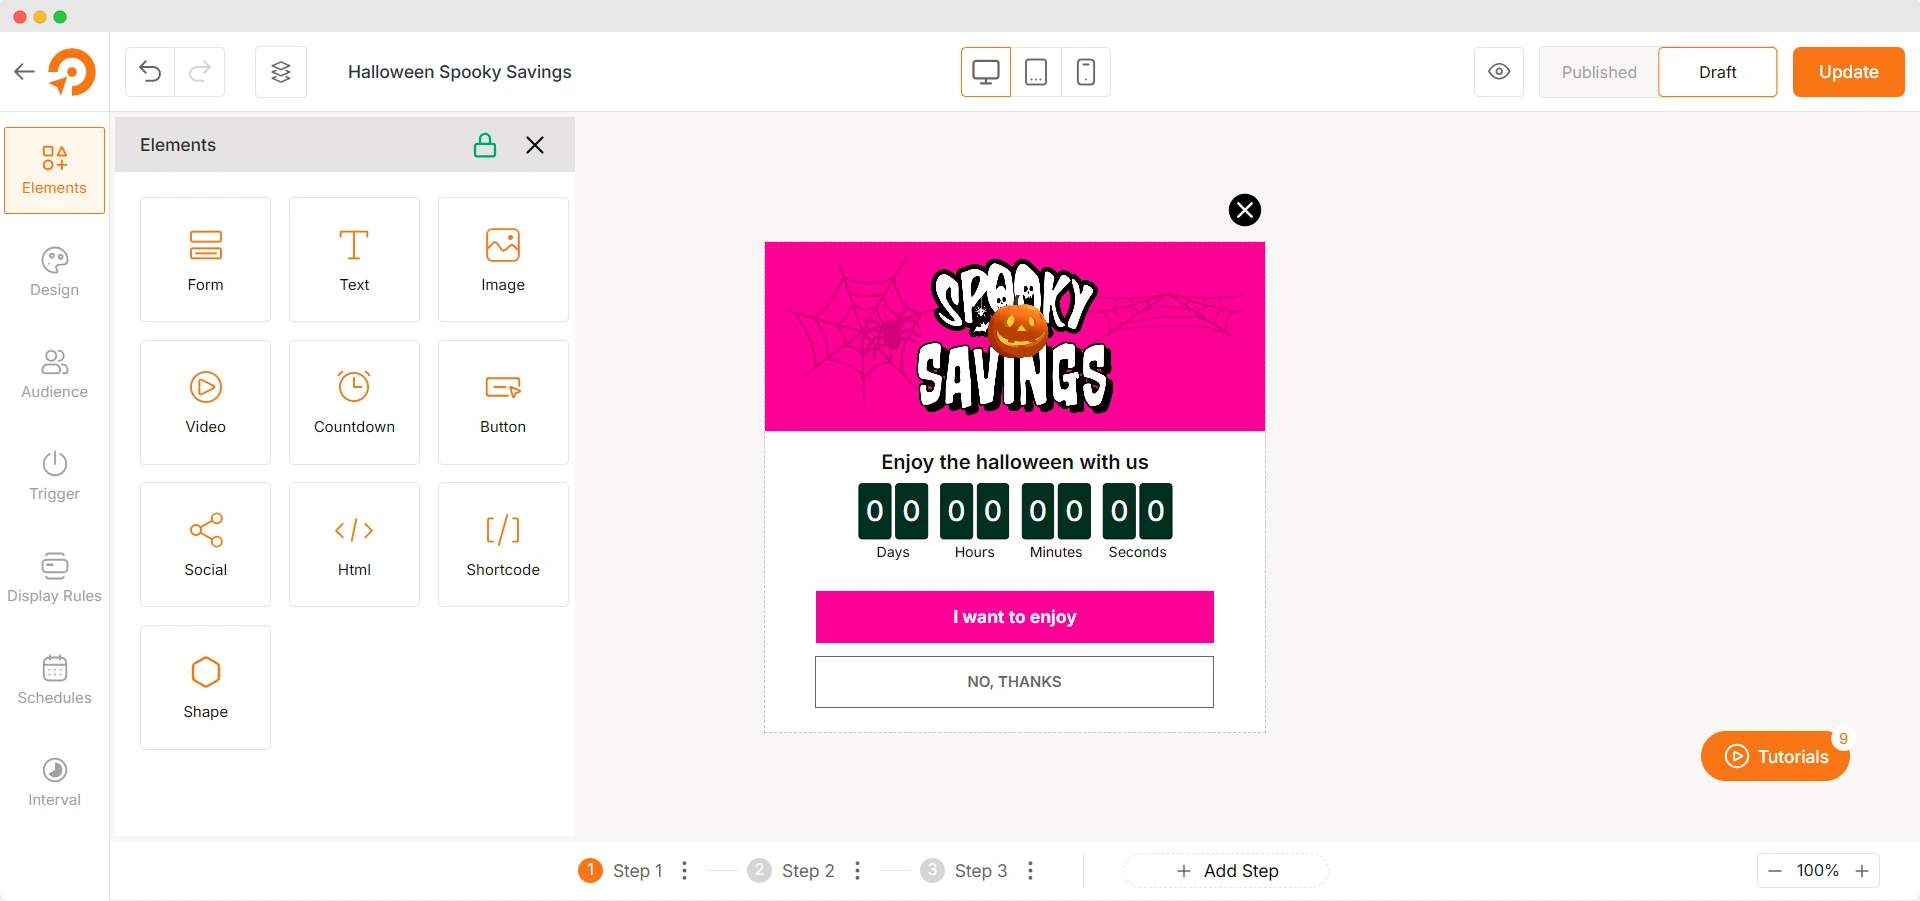
Step 1: Add Essential Elements to the Popup
With WowOptin installed, navigate to its dashboard and click on the Create New Optin button. It will direct you to a new page where you can Start from Scratch or choose a premade popup template.
If you prefer the Start from Scratch option, in the next window, choose the Popup as your opt-in type.
Now you will land on the popup creation page. From here, you can add different elements, set audience and triggers, and optimize other settings.
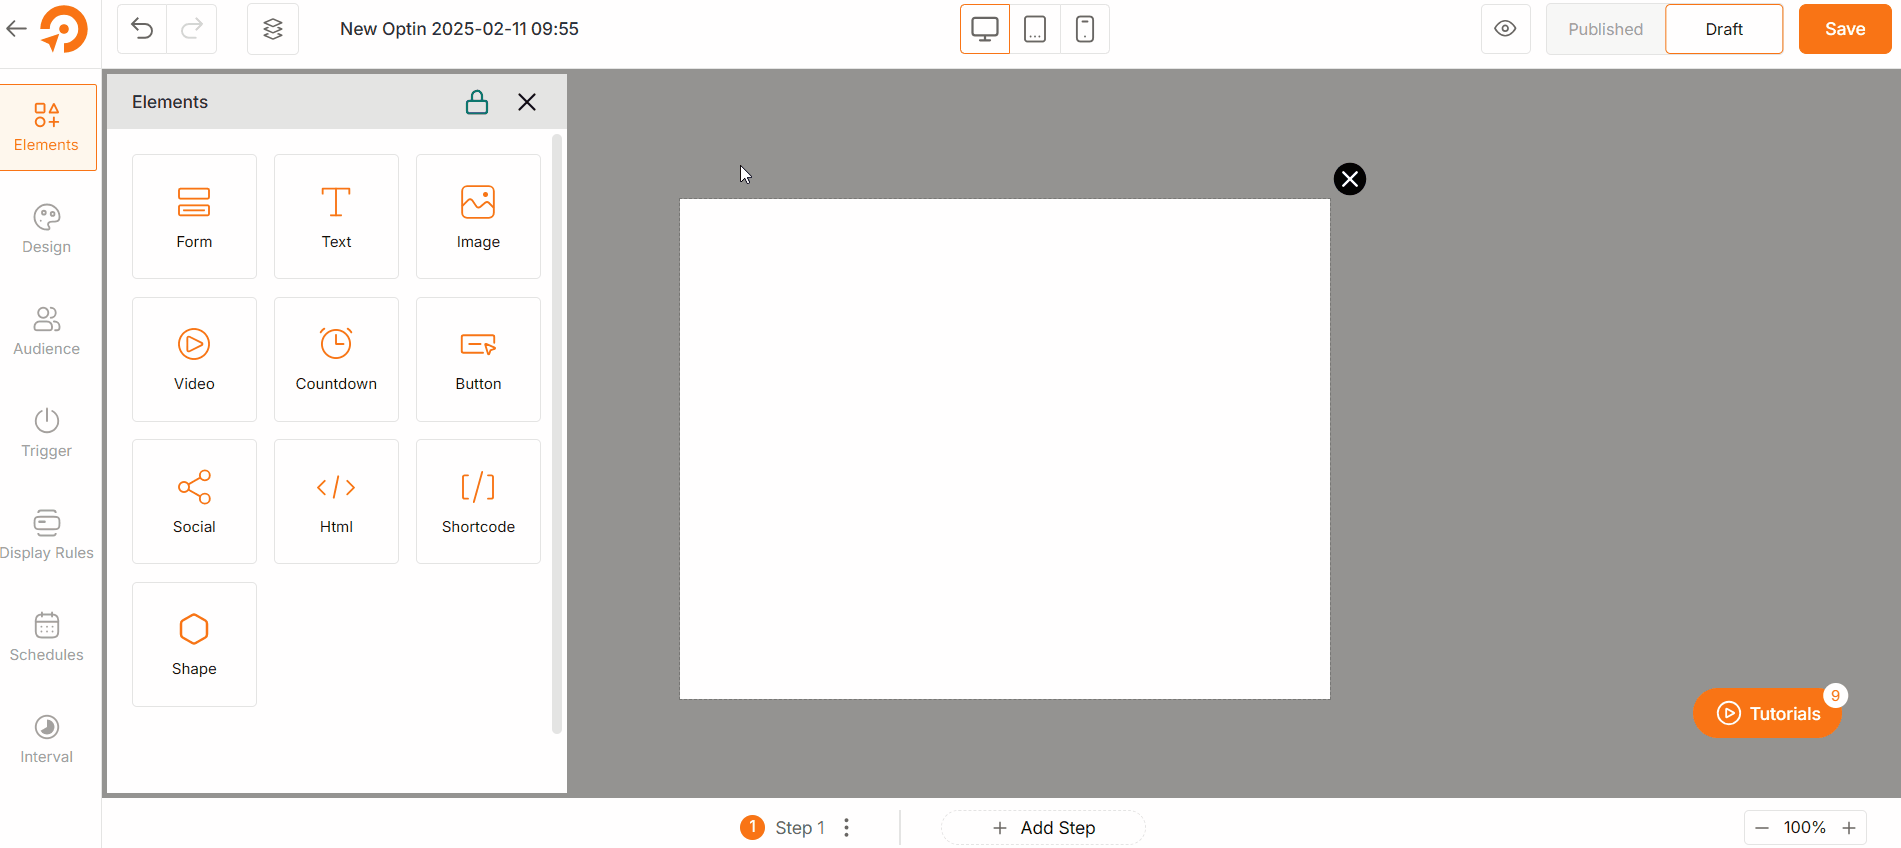
From the Elements section, add essential parts for your popup such as text, buttons, forms, images, and videos.
Step 2: Make the Design Eye-Catching
After adding the elements, you can further customize each one to suit your design goals.
For example, if you want to customize the text size and text color, you can easily do so. Also, you can add a cool background to it.
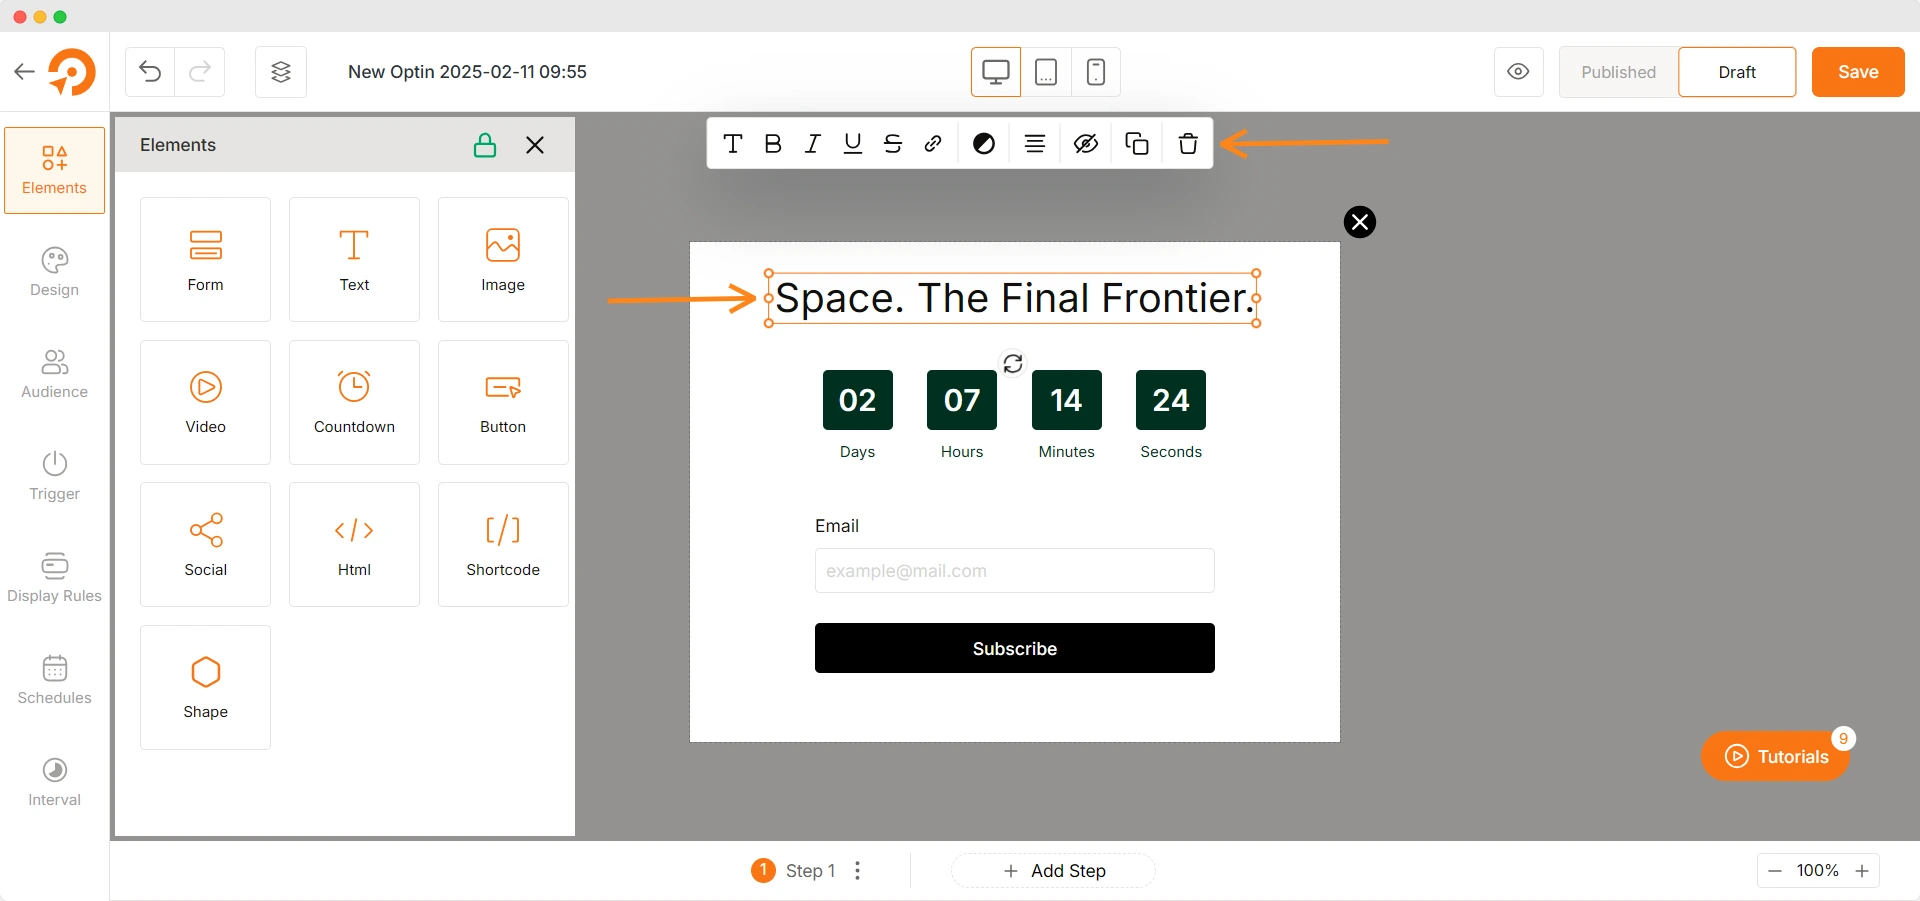
Just like this, you can modify the look and functionalities for other elements as well.
Note that each element comes with a Setting bar from where you can customize the options with ease.

Next, from the Design tab, you can set the size of the popup, and set its background, border style, and box-shadow easily. You can even add custom CSS if you want.
Step 3: Choose The Right Audience For The Popup
Next, you need to select the target audience for the popup. Are they coming from a specific country or do they use a specific type of device? Maybe you want to show the popup to users who came to your site through a specific link.
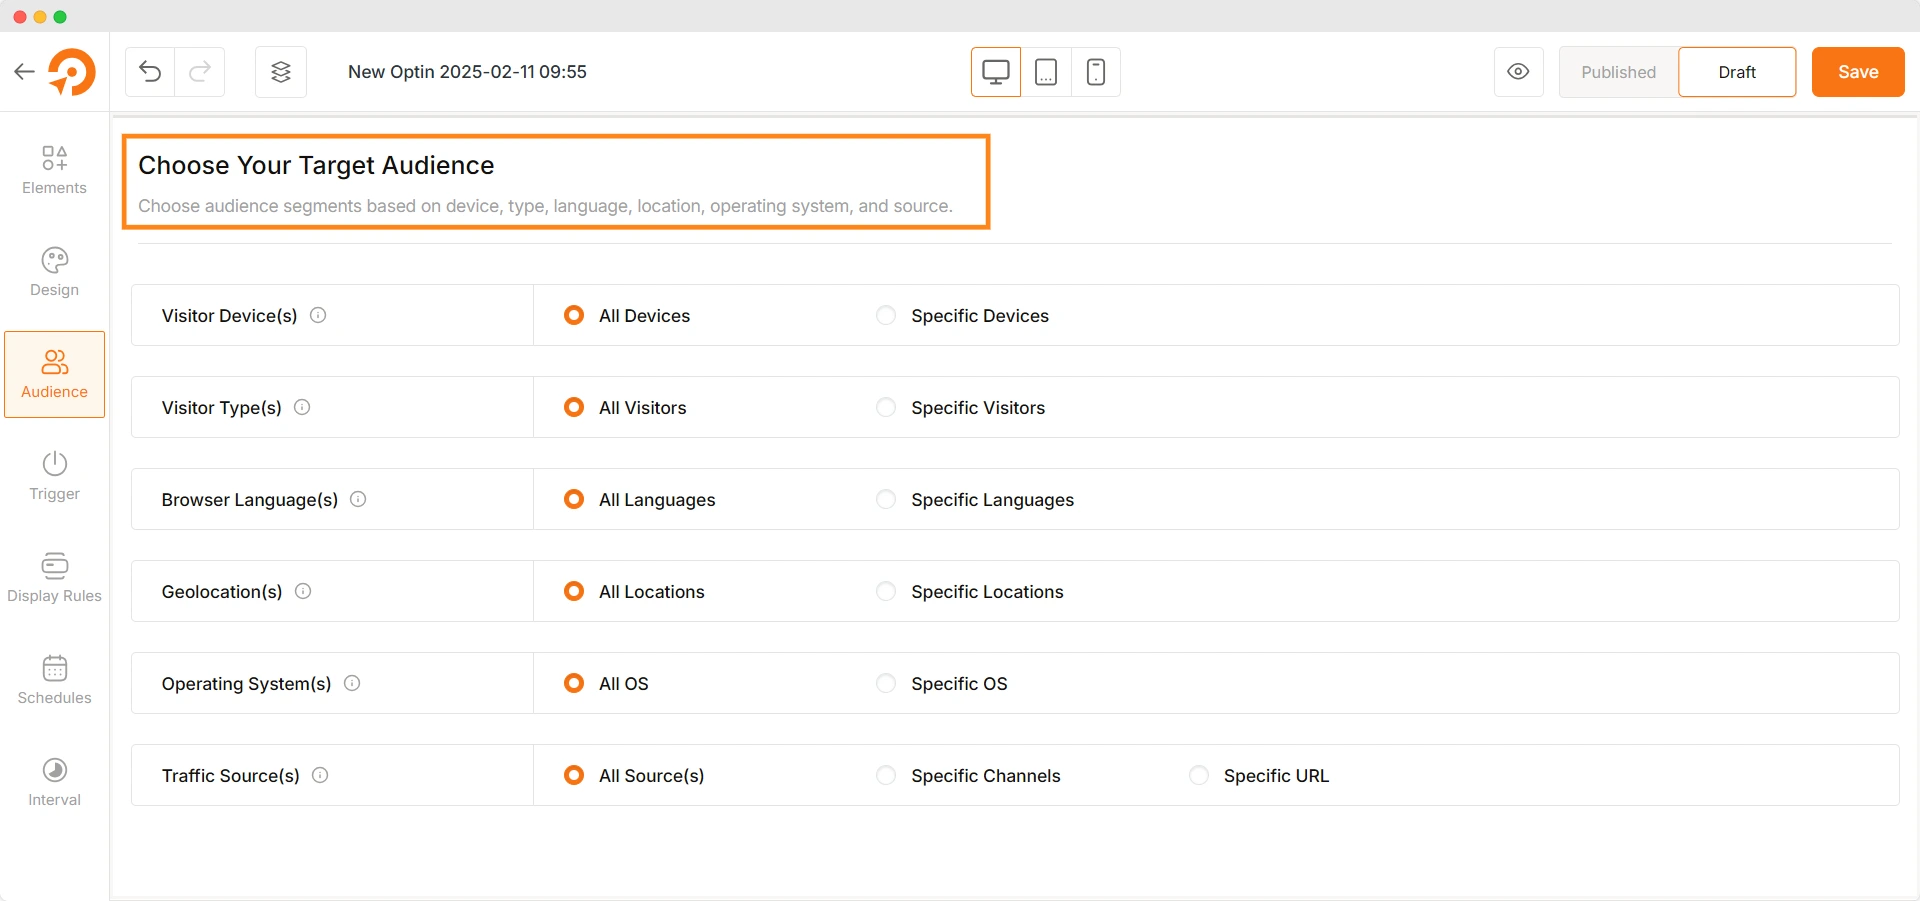
You can set all these using the Audience Targeting feature. Using WowOptin, you can set up campaigns based on different types of users:
- Visitor devices – Set popups for desktop, mobile, or tab users
- Visitor Types – show popups based on new users or returning users
- Geo-location – display popups for users from select countries
There are more targeting options to apply. Details can be found in the official documentation.
Step 4: Implement Smart Triggers to Control Popup Display
After setting up the audience targeting, you need to add specific triggers to control popups.
Triggers are specific conditions that determine when your popups are displayed. This helps showcase personalized offers without annoying the customers.
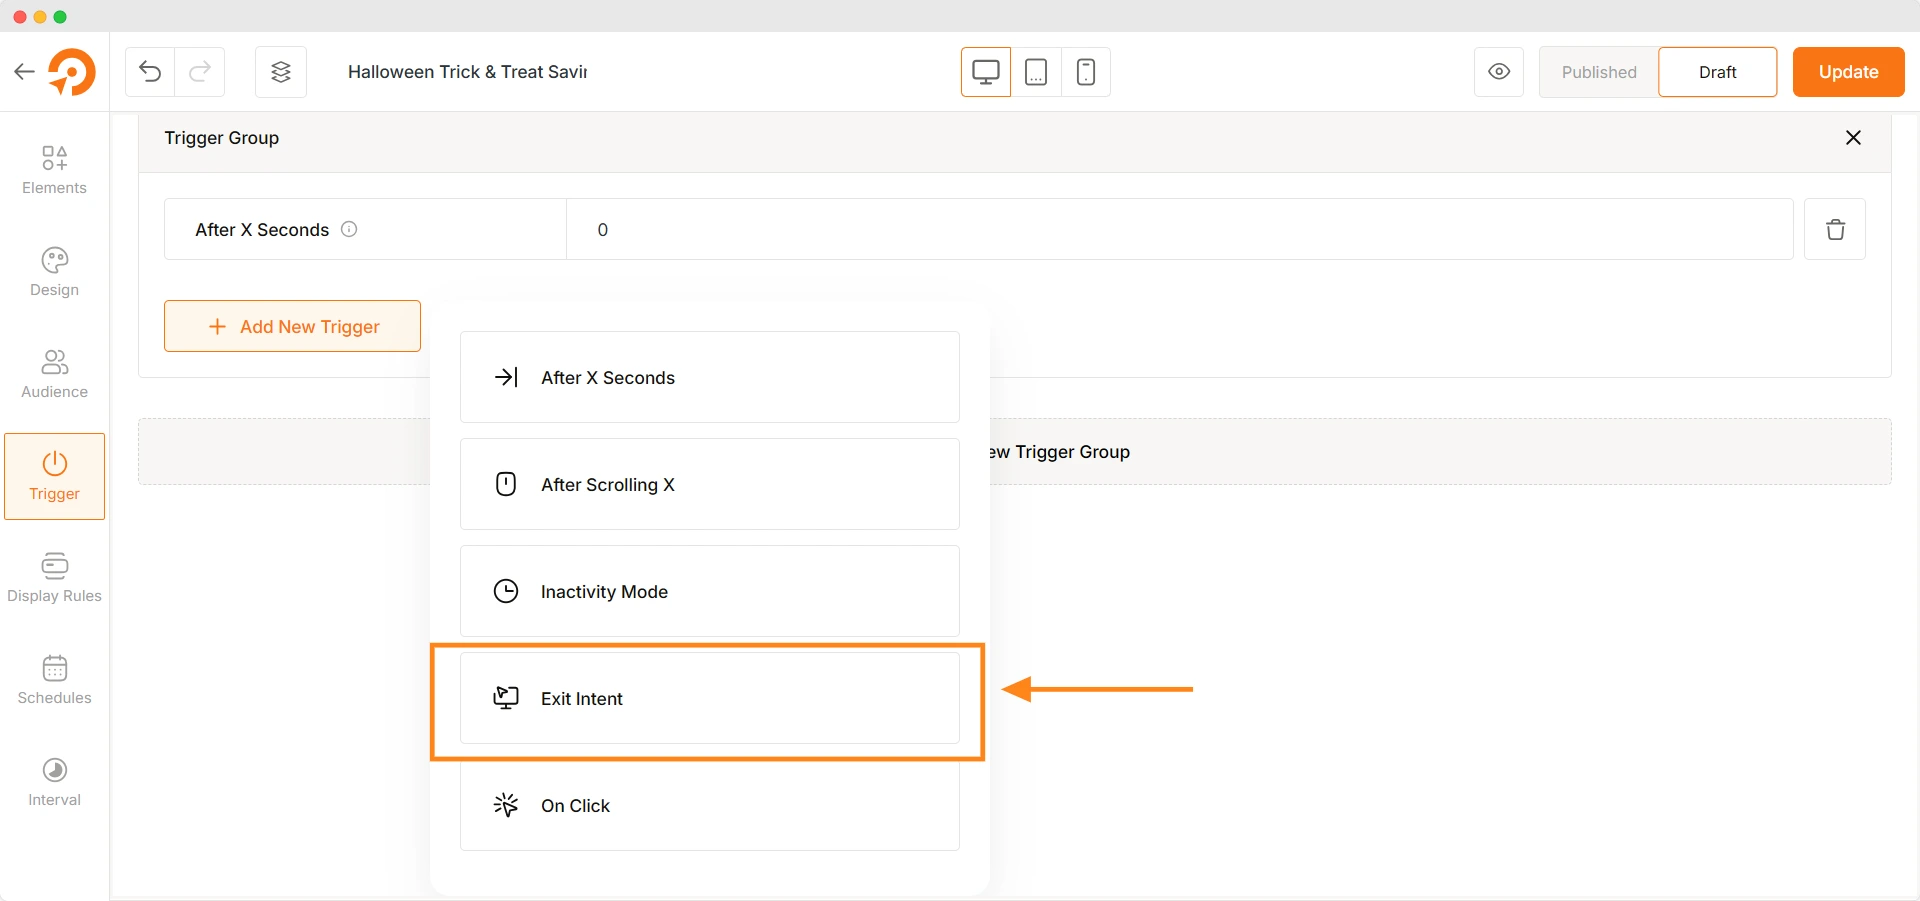
Exit Intent Popup: An exit-intent popup is triggered when visitors are about to leave your site. This is very effective in reducing cart abandonment and capturing leads from potential customers.
To set it up, simply move to the Trigger section of WowOptin and choose the exit-intent option.
Tips: Check out the best plugins to create exit-intent popup.
Scroll Popup: Only display the popup when the visitor has scrolled a certain amount on a page.
To get started with this, choose the After Scrolling X option from the trigger dropdown.
On-click Popup: Display popup when users click on a specific button.
Simply choose the On-click option and copy-paste the CSS selector of the target element.
Timed Delay: Show the popup after a specific time a user has spent on your website. To implement this, choose the After X Seconds option from the triggers.
There are other triggers you can tinker with using WowOptin. More details can be found in the Trigger Settings documentation.
Step 5: Set Target Posts or Pages For The Popup
Not all pages should display popups because you need to maintain relevance and ensure a good user experience.
Let’s say you want to show a popup to boost conversion on a specific section or specifically the cart page. You can do that using the Display Rules feature of WowOptin.
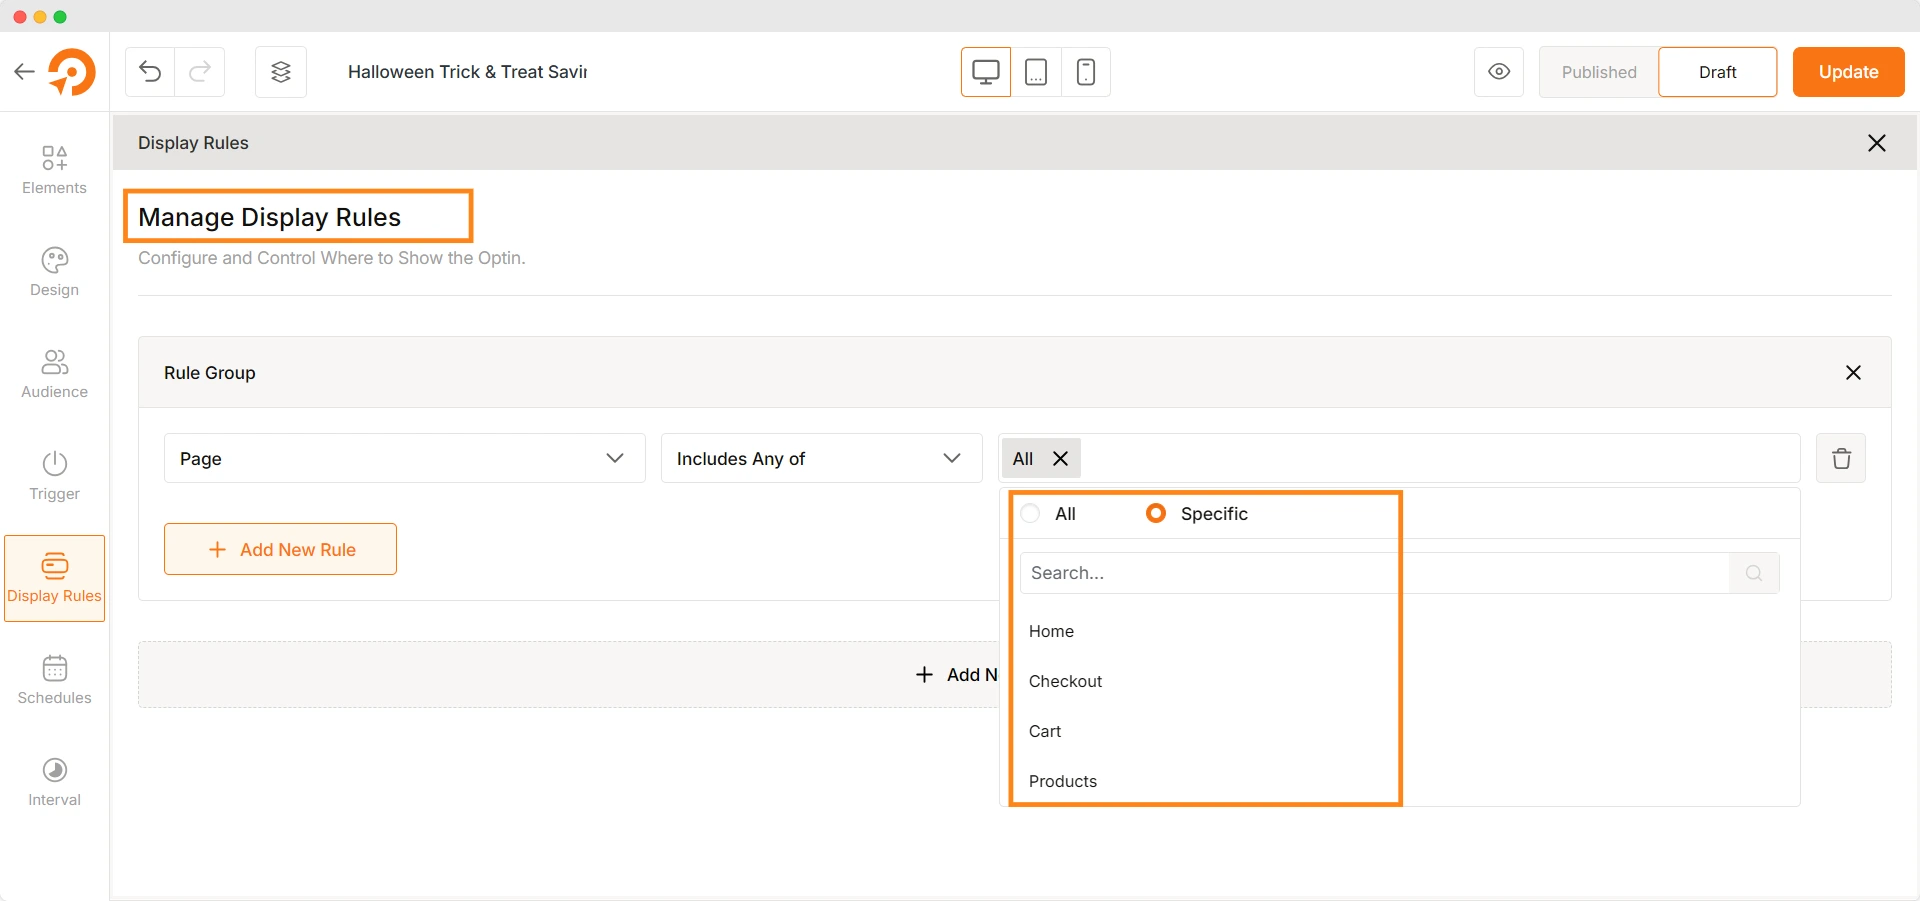
From the Display Rules settings, you will see the Rule Group section where you can choose target pages such as:
- Entire Site: Display the popup sitewide
- Page: Include or Exclude specific pages to trigger popups
- Post Type: Display popups for selected post types
- Post Category: To show popups for posts from specific categories
Also, if you have a WooCommerce or EDD store, you can show popups for specific products, cart, or checkout pages – boosting conversion and sales.
Step 6: Schedule The Popup For Maximum Engagement
Your popup is almost ready to publish, but there is one more setting you should into consideration – setting the schedule for the popup. It will let you control when the popup will be shown.
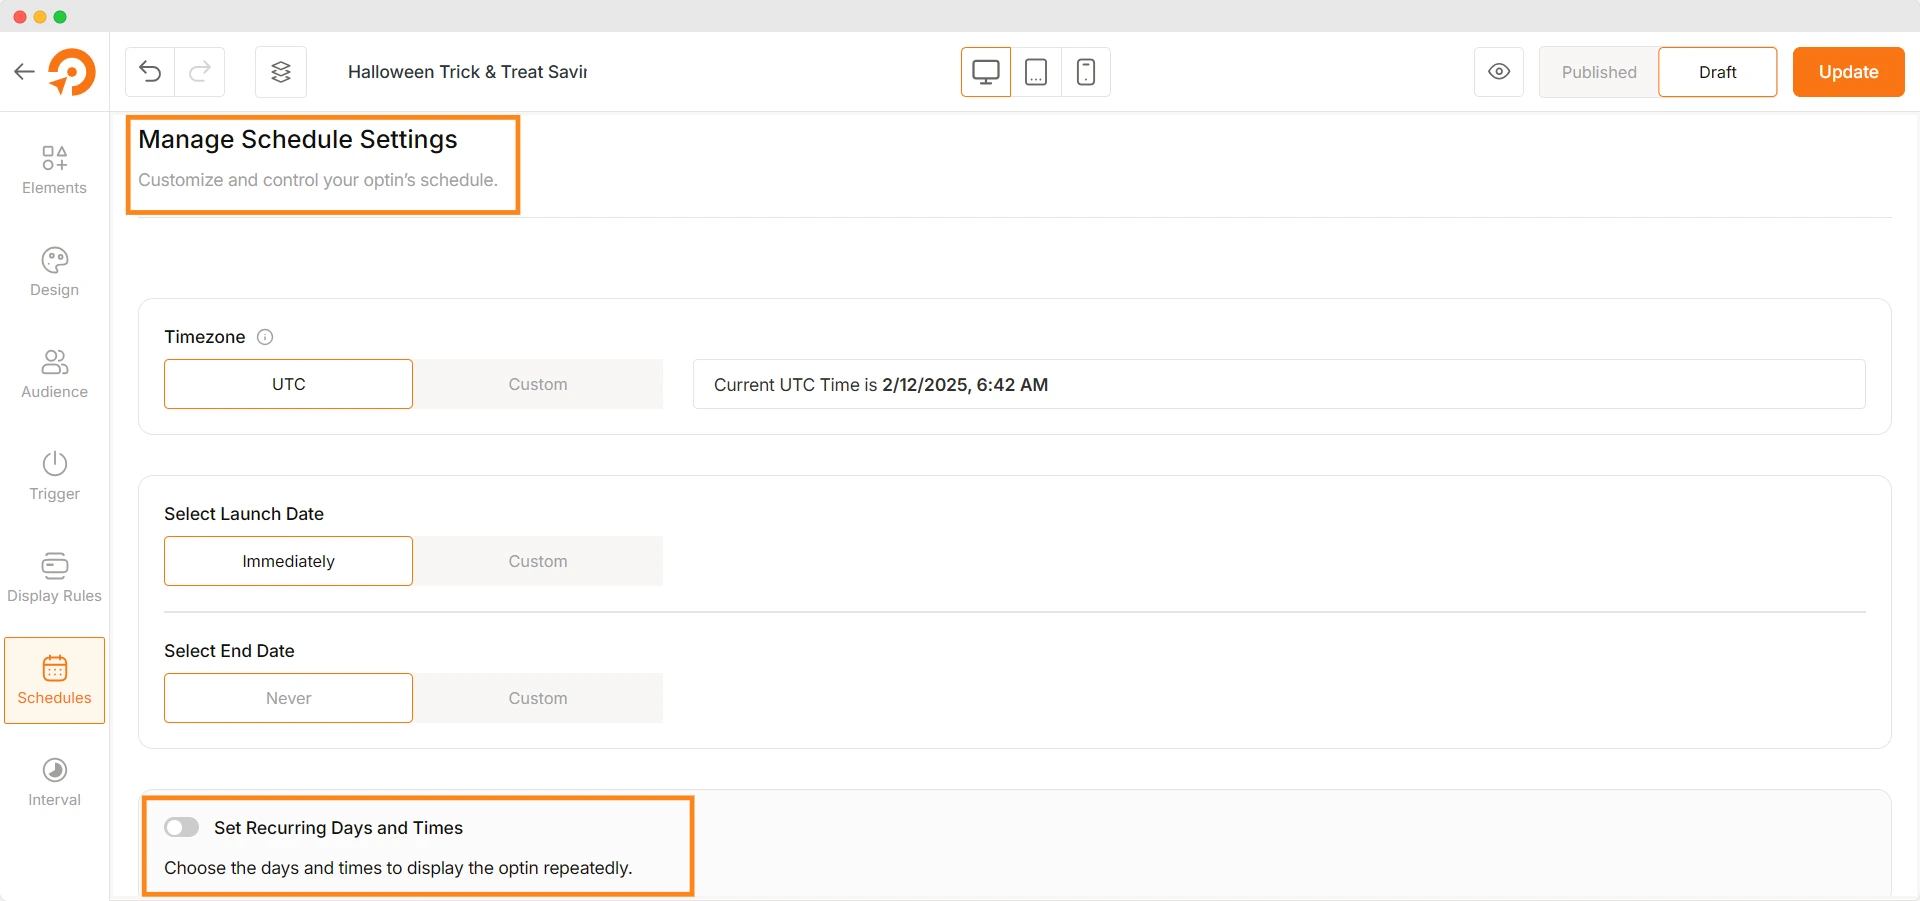
From the Schedules tab, set the start date and end date for the popup. This will allow the popup to run on specific dates.
You can also enable the option that will repeatedly show the popup on recurring days and times.
Step 7: Control Interval For The Popup
You can further control how often the popup will be displayed.
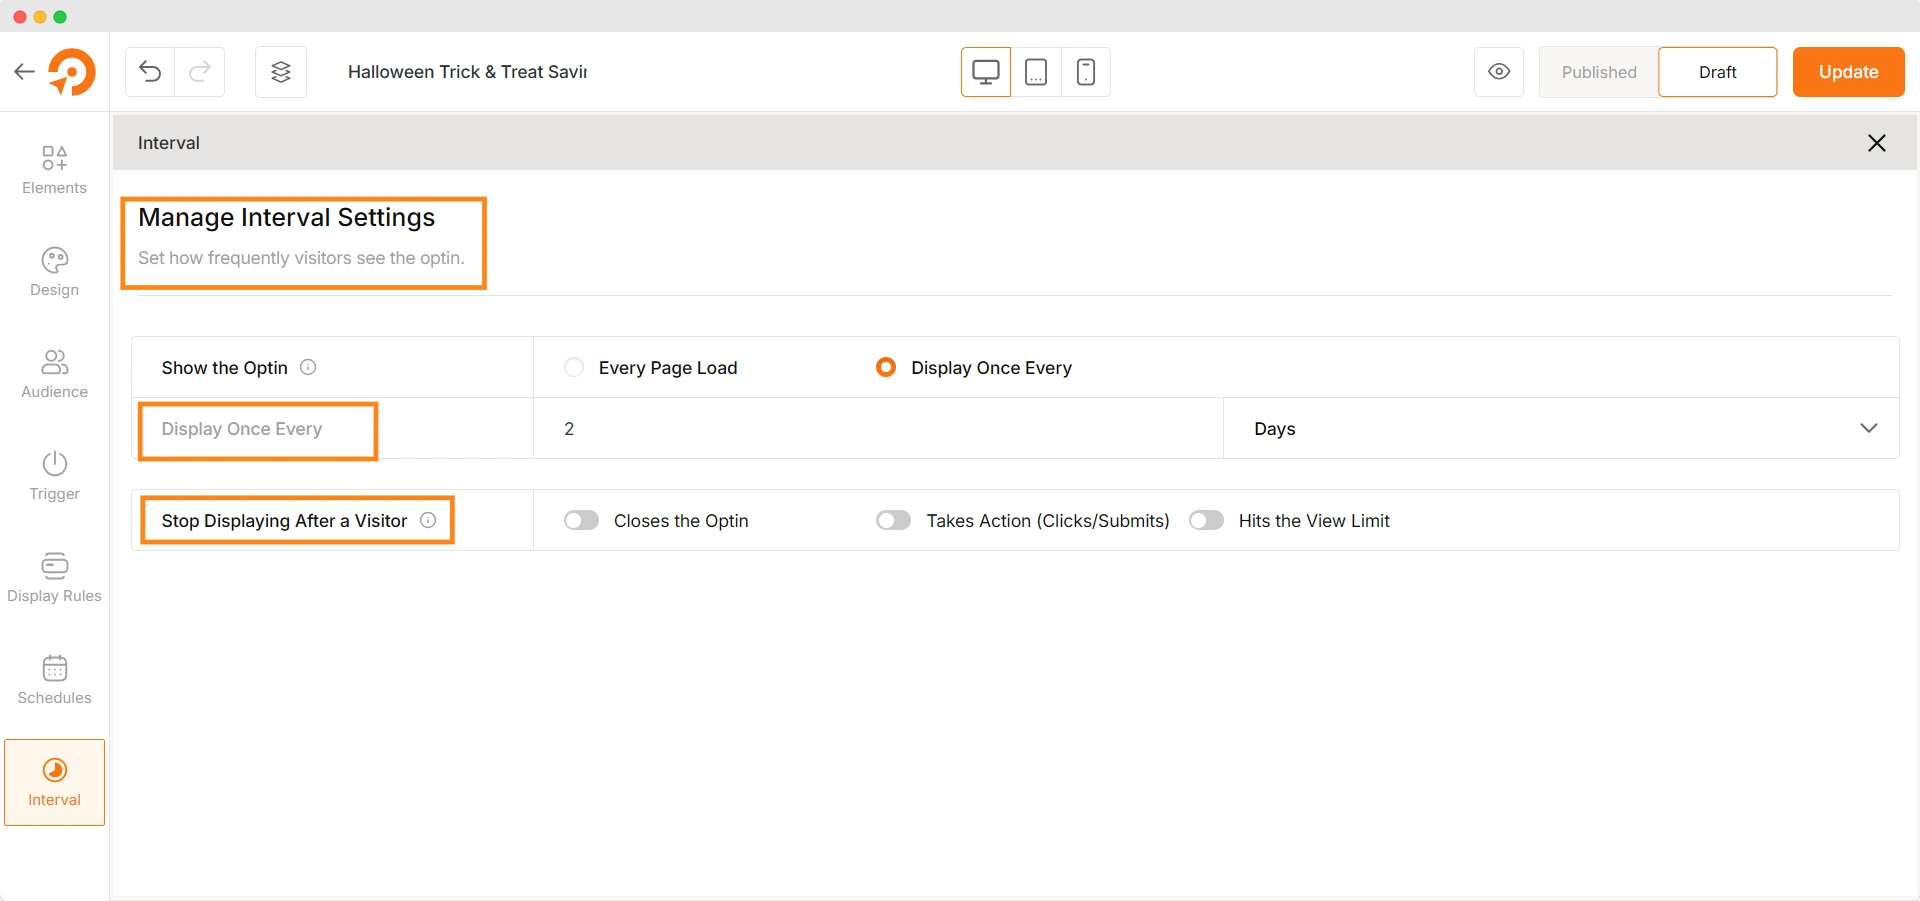
From the Interval settings, choose whether you want to show the popup on every page load or want to display it every hour, day, or the specific time you want to set.
Also, to improve the user experience, set when the popup will be stopped:
- When the user closes the popup
- Takes specific action
- Or hits the view limit.
Pro Tip: Want to make the popup compatible for all types of devices? Here is the detailed article on making popups responsive.
Benefits of Using a Popup on Your Website
Okay, now you know about how to set popups properly but are you still confused about what benefits they might bring? Well, let’s explore them in this section:
Capture Leads Without Disrupting User Experience
Popups can help you collect users’ information without frustrating them. Most notable popup builders offer advanced features with which you can:
- Show popups only when a user has spent a specific time on your page.
- Display different offers for different audiences to boost conversion.
Connect with Visitors Before They Leave
Not all visitors are ready to convert right away.
But instead of losing them forever, popups allow you to engage with them strategically.
- Display exit-intent popup before visitors are about to leave.
- Showcase coupon popups on the cart page to complete purchases.
Boost Sales & Manage Inventory
Customers love exclusive deals, but they might not always see your promotions.
Popups solve this by putting your offers in the right places at the right time:
- A discount popup can appear when a user adds specific items to their cart.
- A coupon popup can be triggered when a visitor lands on a specific product page.
Frequently Asked Questions
When Is The Best Time to Display A Popup on My Website?
The best time to display a popup is when a user has already spent some time or engaged with your site. The exact time can vary. But you can show the popup when users have scrolled a certain amount on a page or spent, let’s say more than 5 seconds. Also, using an exit-intent popup, the popup will only be triggered when users are about to leave.
Do Popups Hurt SEO or User Experience?
Well-designed and well-timed popups do not hurt SEO. However, it is not SEO-friendly to have intrusive popups on websites that negatively impact the user experience. Especially for mobile devices, popups that take up the whole screen or do not offer a closing option can harm your website’s experience.
How Do I Create A Popup In WordPress Without Coding?
You can use popup builder plugins like WowOptin, OptinMonster, or Popup Maker. These plugins provide a user-friendly interface, premade templates, and advanced features to create high-converting popups easily.
How Can I Personalize My Popups For Better Results?
To personalize popups, you should optimize them based on different target audiences such as users coming from different countries, traffic sources, devices, and so on. Also, you can showcase different popups for new and returning customers to further personalize them.