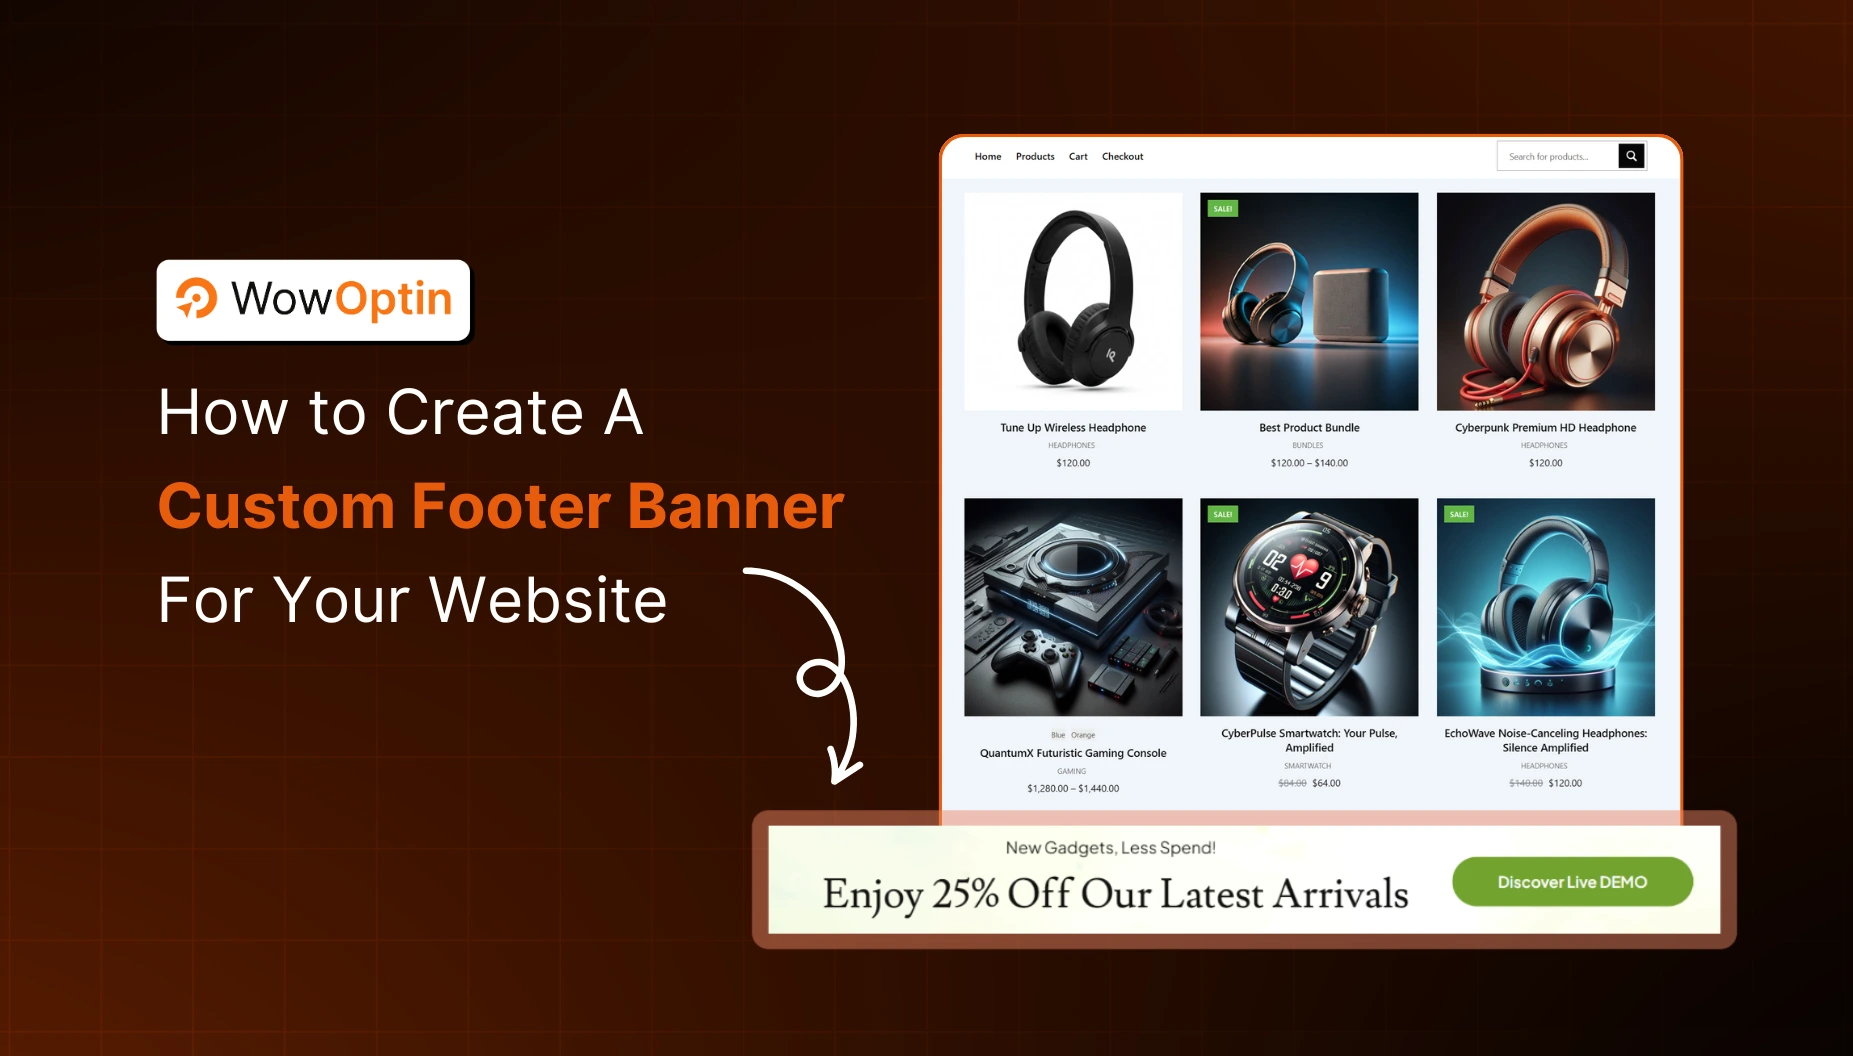
Most websites display a banner at the top of the page, and it works… sometimes. But let’s be honest, users are getting better at ignoring the top bar, especially if they’ve seen it everywhere. That’s where a footer banner can be your hidden gem.
A footer banner quietly lives at the bottom of your site – non-intrusive yet always present. It grabs attention from users who scroll with intent, making it perfect for subtle promotions, coupon codes, lead magnets, or announcements.
In this guide, I’ll show you how to create a custom footer banner for free, why it works so well, and how you can create one in just a few clicks using a free tool like WowOptin – no coding, no headaches.

✅ What Is a Footer Banner on a Website?
A footer banner is a sticky bar or popup that appears at the bottom of your website. It’s typically used to share:
- A discount or special offer
- A sitewide announcement
- Newsletter signup
- A call-to-action (like “Shop Now” or “Get Free Demo”)
- Important updates (like shipping delays or stock alerts)
And more. You can use footer banners for various other purposes – the choice is yours.
Unlike intrusive popups that appear in the middle of the screen, footer banners are less disruptive, which makes them perfect for delivering promotions or messages without annoying your visitors.
What Should a Website Footer Banner Include?
To make your footer banner effective, you should have the following elements (but you can always get creative and add elements that you think are necessary):
- Short headline: Catchy and direct (e.g. “Don’t miss this deal!”)
- Text message: One or two lines of important text.
- Email Form: To collect leads from potential customers
- CTA button: Link it to your product, survey, or demo.
- Icon/image: To visually support the message.
👀 Why Add a Footer Banner When You Already Have a Header Banner?
If you’re already using a header banner to promote offers or important messages, you might be asking:
“Do I really need a footer banner?”
The short answer? Yes, and here’s why:
Footer Banners Get a Second Look
Sure, header banners get the first visibility. But visitors often rule out header banners because they’re so common.
A footer banner is less intrusive and unexpected, giving your offers a second chance to be seen – especially by people who are already interested in your business.
Better for Mobile — Doesn’t Push Down the Page
On mobile, header banners often take up valuable screen space and push down your main content.
A footer banner, on the other hand, sits quietly at the bottom and doesn’t interfere with your layout.
Run A/B Tests Without Overcrowding the Header
You can A/B test header and footer banners and see how the messages perform in different placements.
You can display both types of banners – keep a permanent banner in the header (like free shipping), and show targeted promotional footer banners for specific pages.
Learn more about how to do A/B testing effectively.
Precise Targeting for Specific Goals
Footer banners are perfect for campaign-specific goals:
- Show a coupon banner on specific product pages
- Promote a blog newsletter on article pages
- Announce a new feature or update sitewide
How to Create a Footer Banner for Free: Step-by-Step
You can always build a footer banner using custom HTML/CSS/JS. But I will be honest with you. It takes time, technical know-how, and money (if you hire someone).
But there’s a better and free alternative you can use. Using the popup builder plugin WowOptin, you can easily create beautiful footer banners for your WordPress website in minutes. It comes with amazing free templates and offers an easy setup process to create a custom footer.
Let’s learn the detailed steps to create the footer banner using WowOptin:
Step 1: Install and Activate WowOptin
To create a custom footer using a plugin, first install the WowOptin plugin. Installation is similar to any other plugin.
Simply from your WordPress dashboard, navigate to Plugins → Add Plugin. Search for WowOptin → Install → Activate.
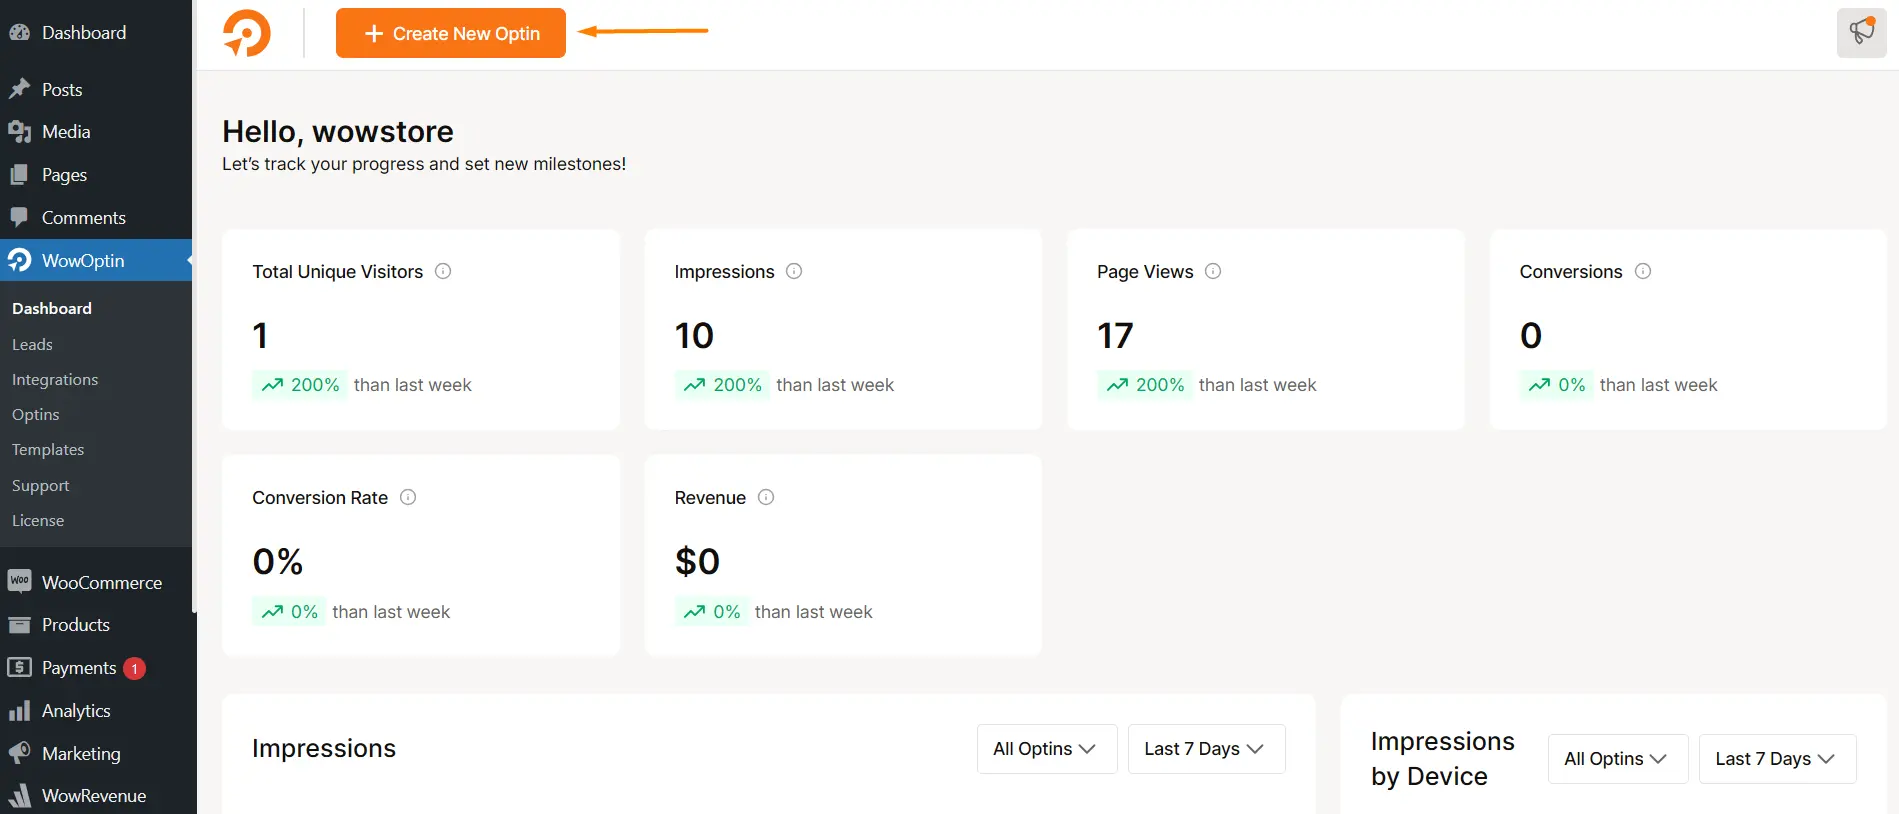
It’s as easy as that. Now, go to the dashboard of WowOptin, and you will see all the essential options.
From here, click on Create New Optin, and you will be directed to the templates library.
Step 2: Choose a Premade Template or Create From Scratch
You will see hundreds of premade pop-up and banner templates. Choose the Banner option from the list of optin types to see all the cool banner designs.
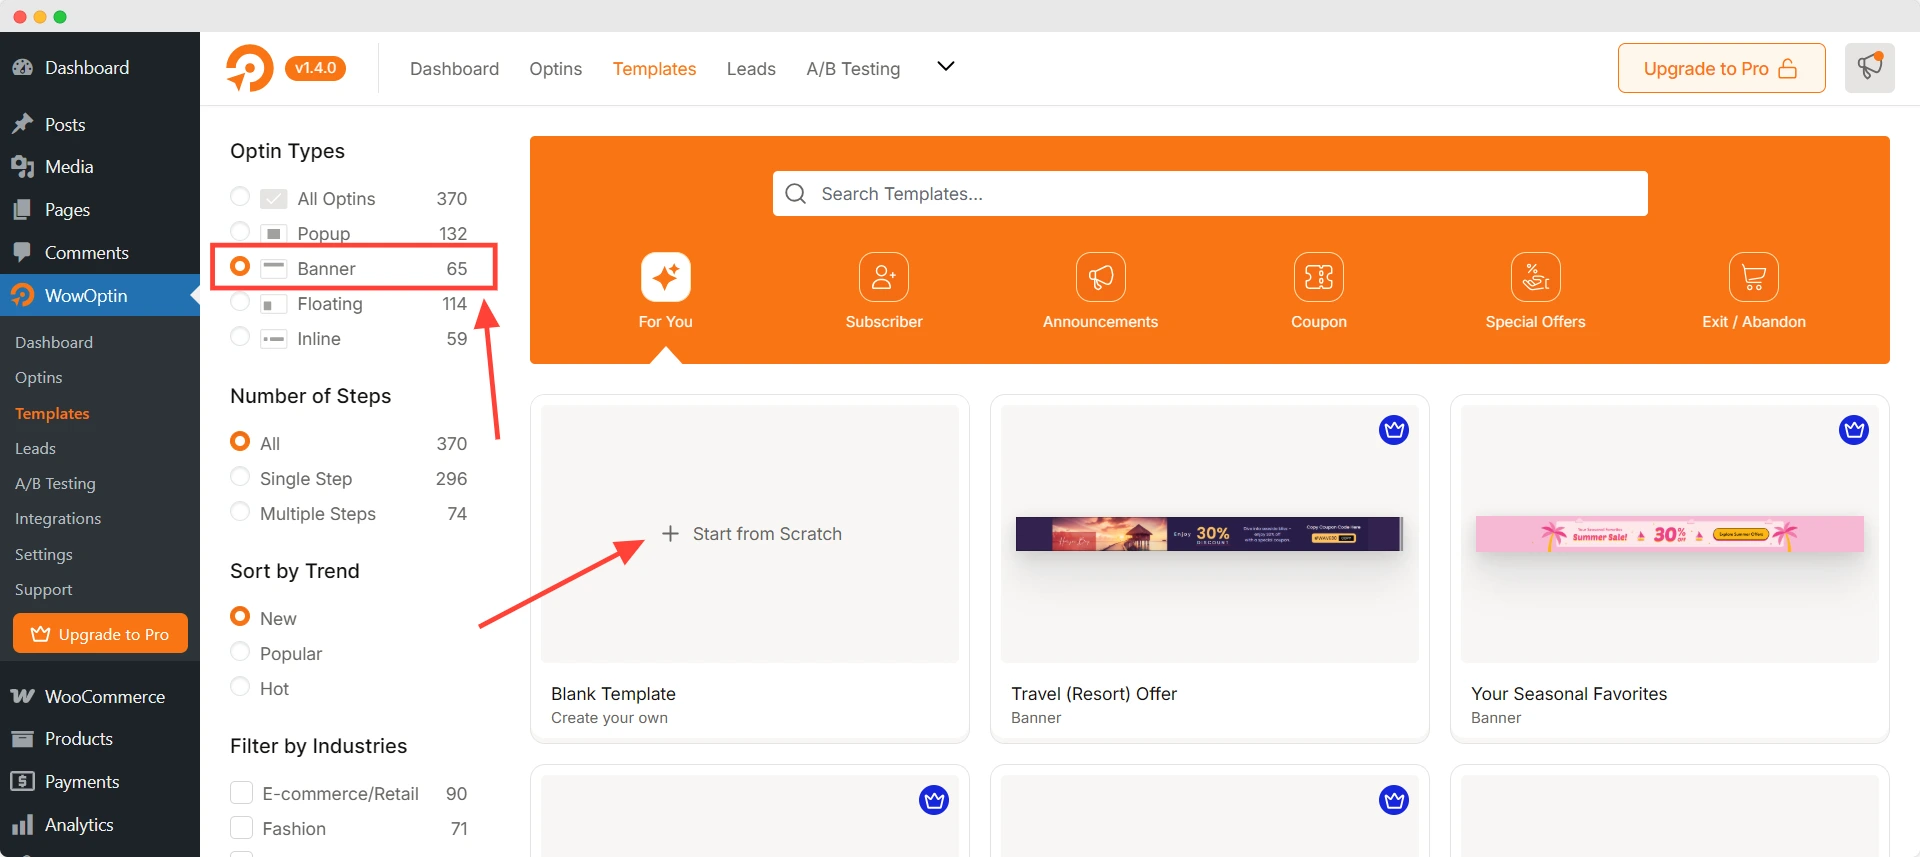
You can choose any of these pre-existing banners to get started quickly, or you can create the banner completely from scratch.
I recommend that you start with a premade banner template. And then you can further customize it to your liking.
Step 3: Set Position for the Banner
Click on the banner and you will see a floating settings bar from where you can customize the size, background, border, shadow, and a lot of other things.
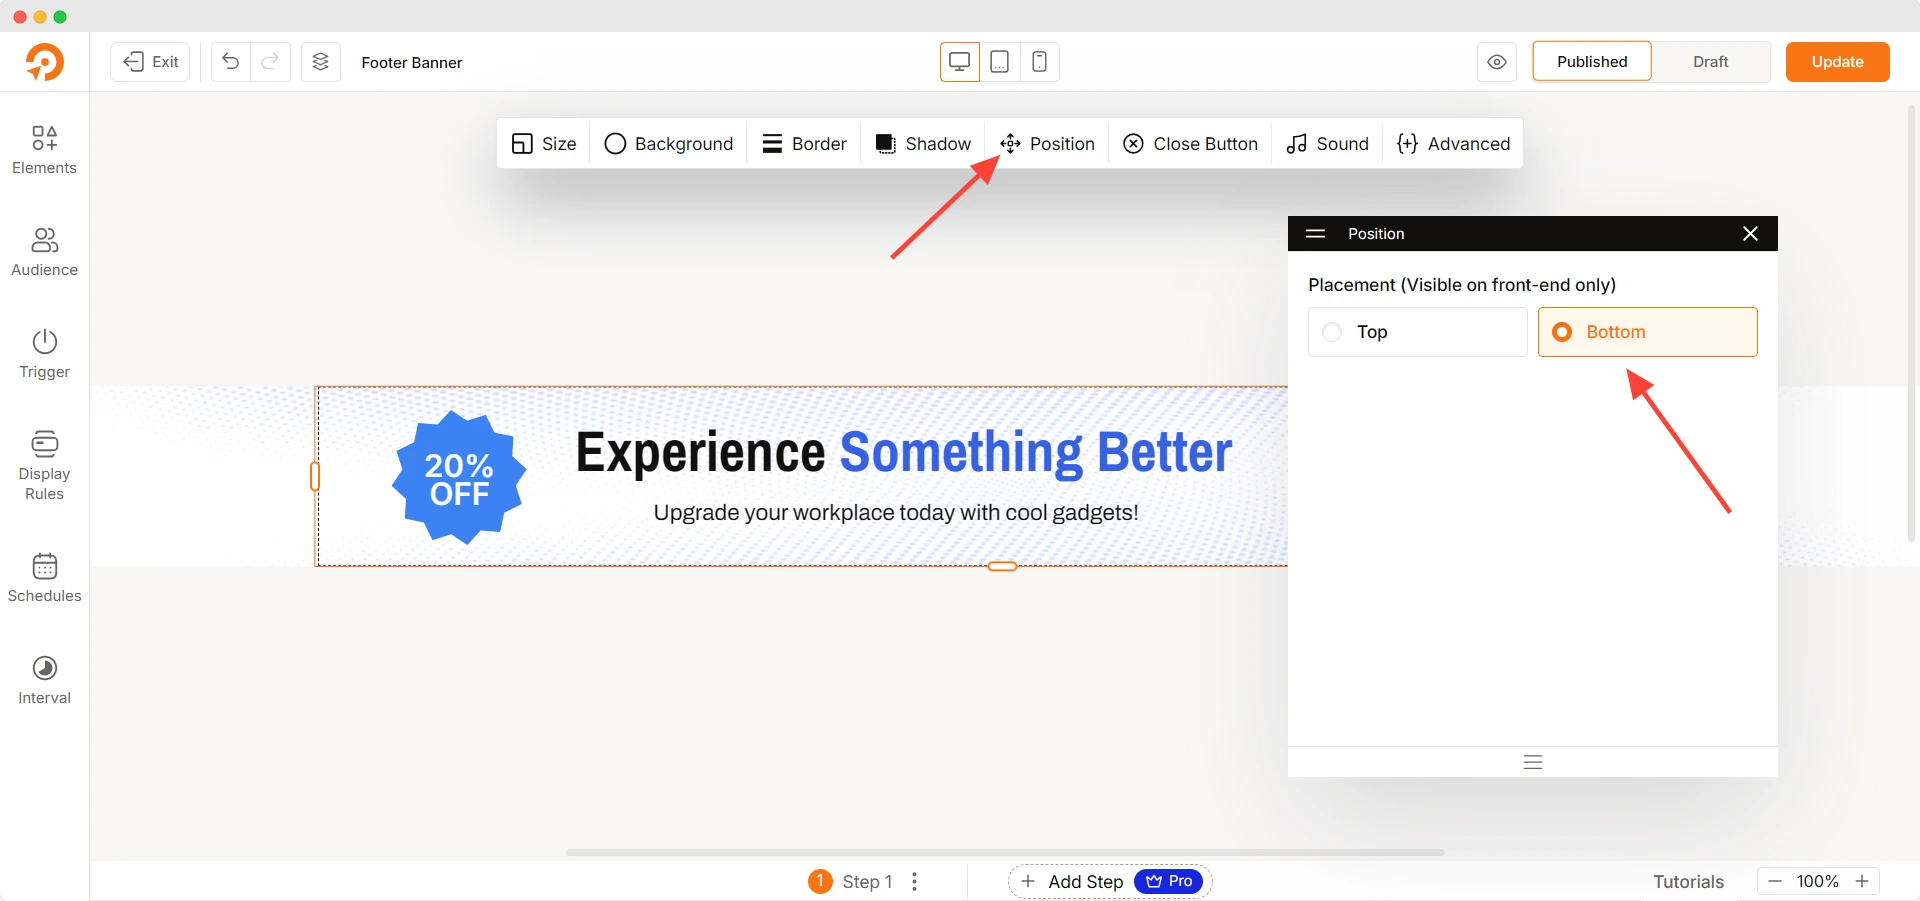
But more importantly, you can set the position of the banner. As we will place the banner at the bottom of the page as a footer, we will set the placement as Bottom.
Step 4: Add and Customize Your Preferred Elements
Choose the template you want to use, hover over it, and click on Use Template. You should land on the opt-in editor page.
Here, first, you should add your preferred elements or customize the existing ones. You can display a wide range of elements such as form, images, videos, countdown, button, coupon, and so on.
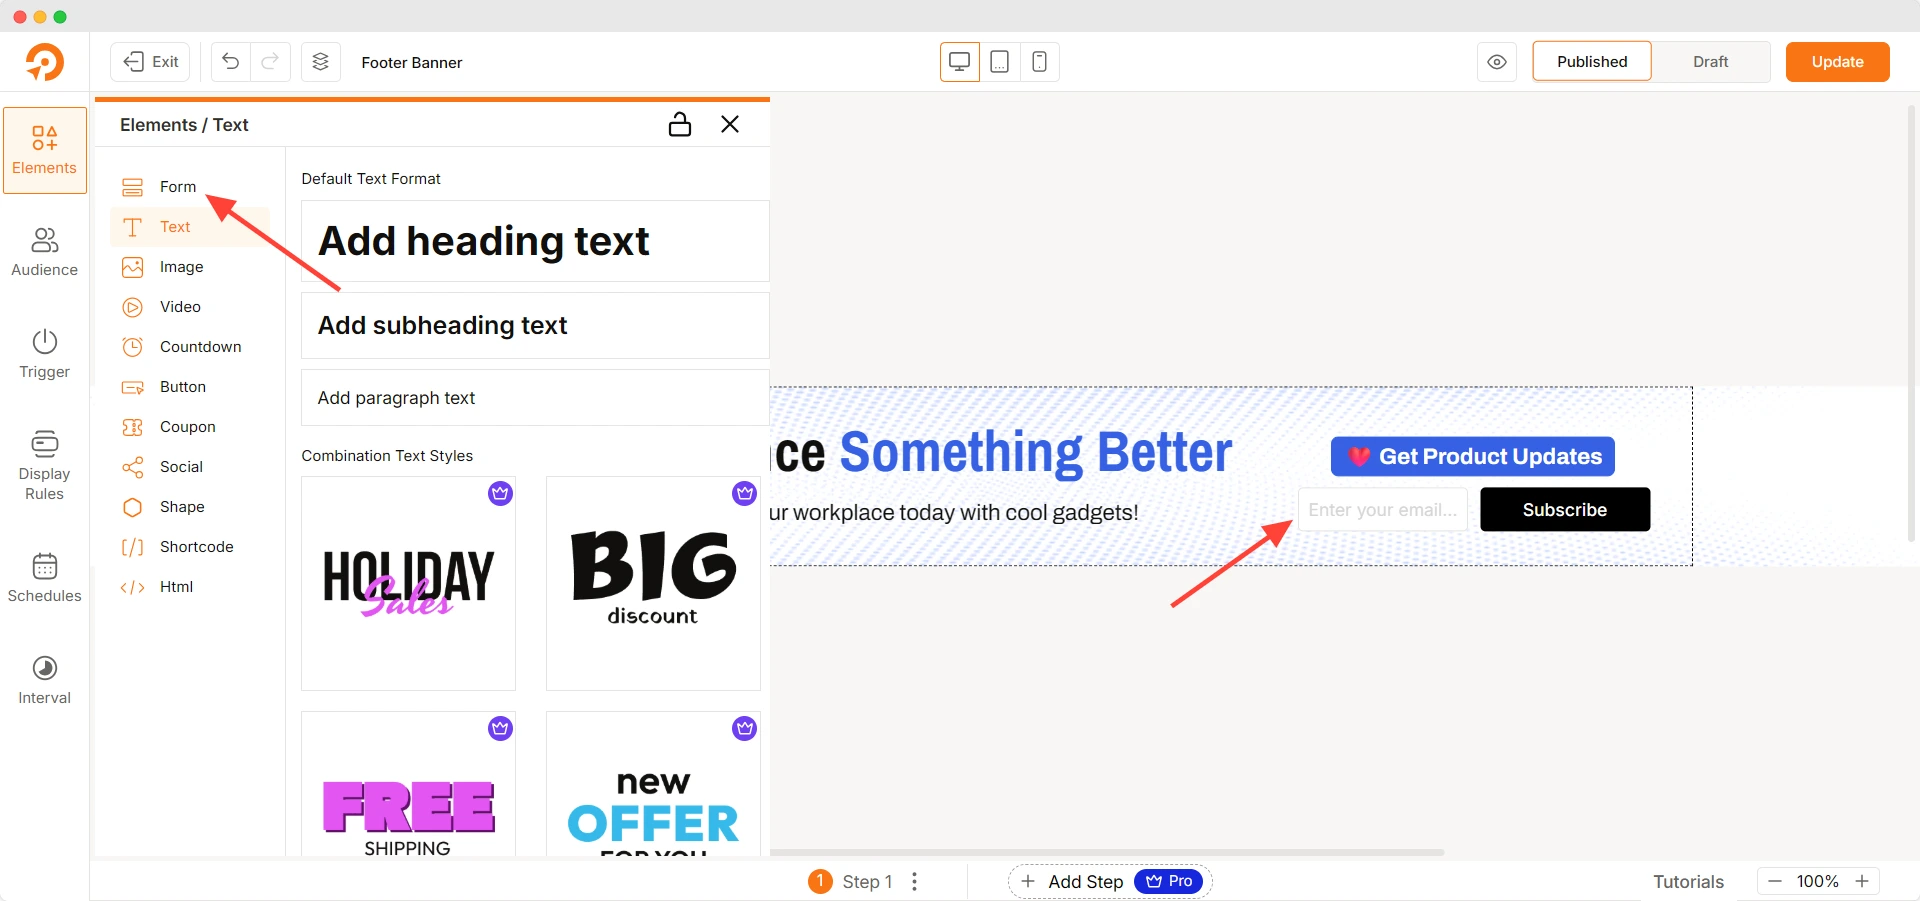
Let’s say I want to increase my newsletter subscribers. I need to add an email signup form inside my footer banner. So, I will add the Form element alongside other essential elements such as Text.
The elements you need for your banner will vary depending on your preferences. Make sure to add a catchy headline, short message, CTA button, signup forms, images, and other elements required.
In addition, you can fine-tune settings for each of these elements. Make changes to the text, color, spacing, alignment, link, and a lot more. I suggest you tinker with the settings to find all the possibilities.
Step 5: Set Audience and Custom Triggers for the Banner
Do you want to show the footer banner to specific users you have set? You have that option in WowOptin. You can target returning users, specific geolocation, mobile vs. desktop visitors, or even traffic source.
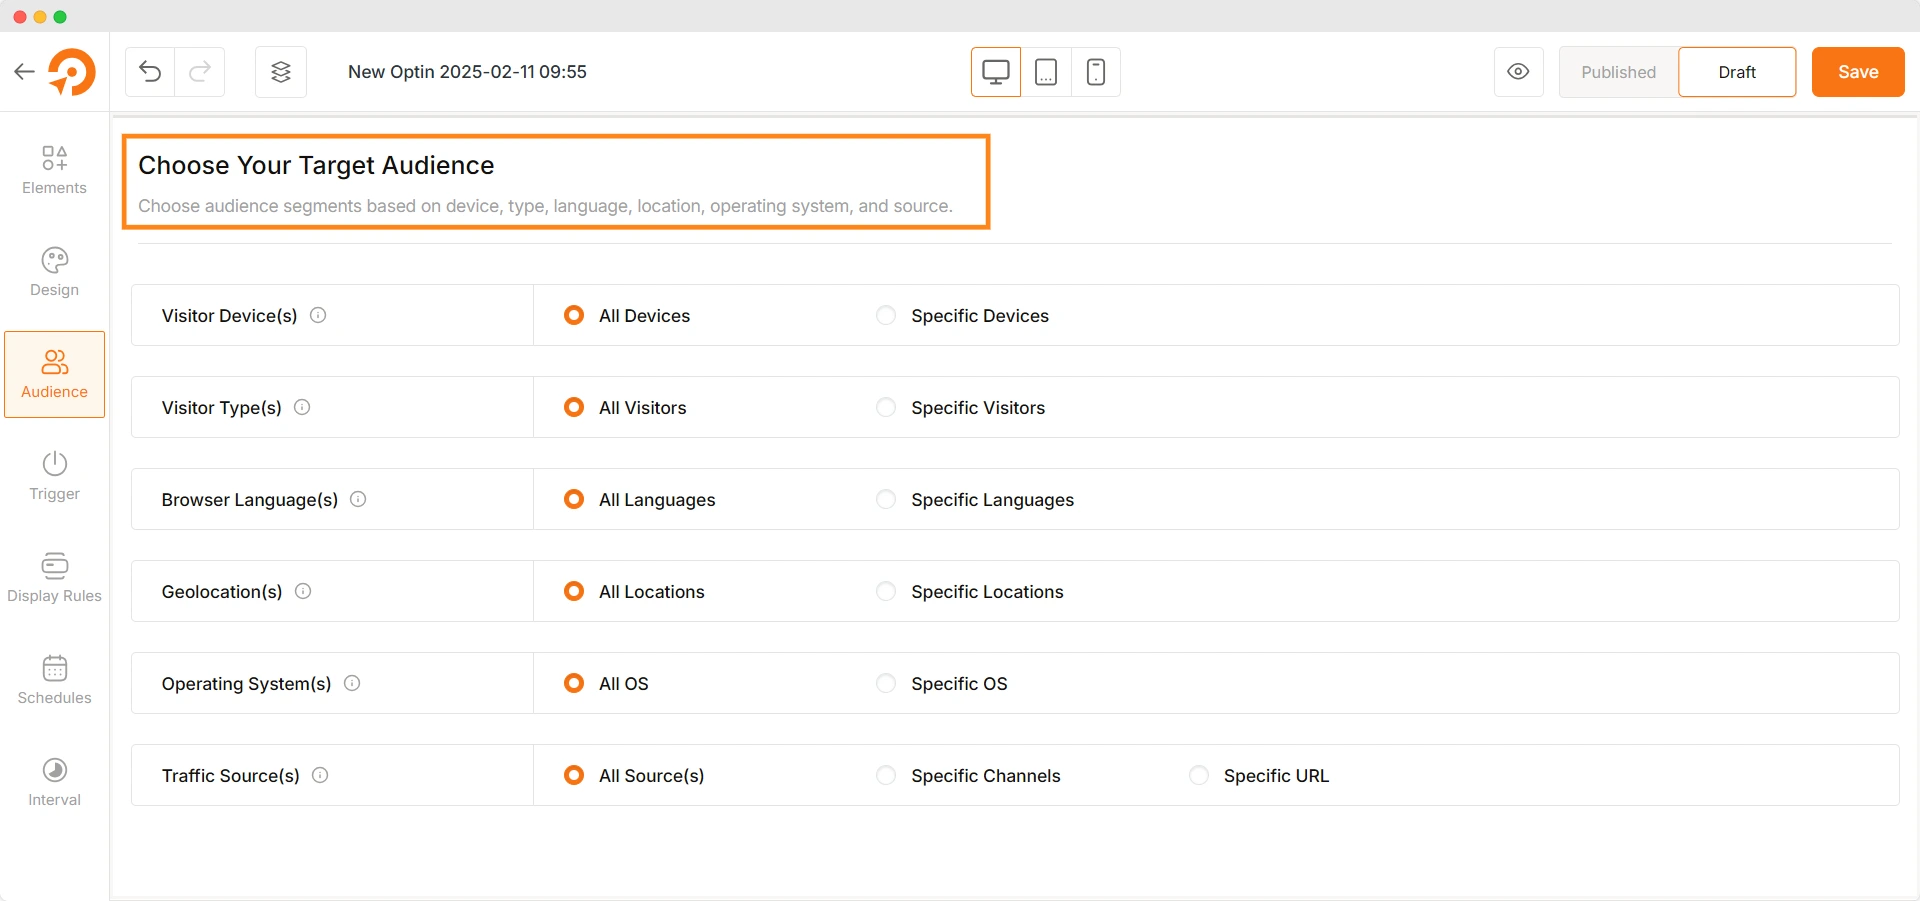
Simply navigate to the Audience tab from the opt-in builder. By default, the pop-up will be shown to everyone.
But you can exclude a specific audience group from seeing the banner. Also, if you want to disable the banner on mobile and tablet devices, you can do that too.
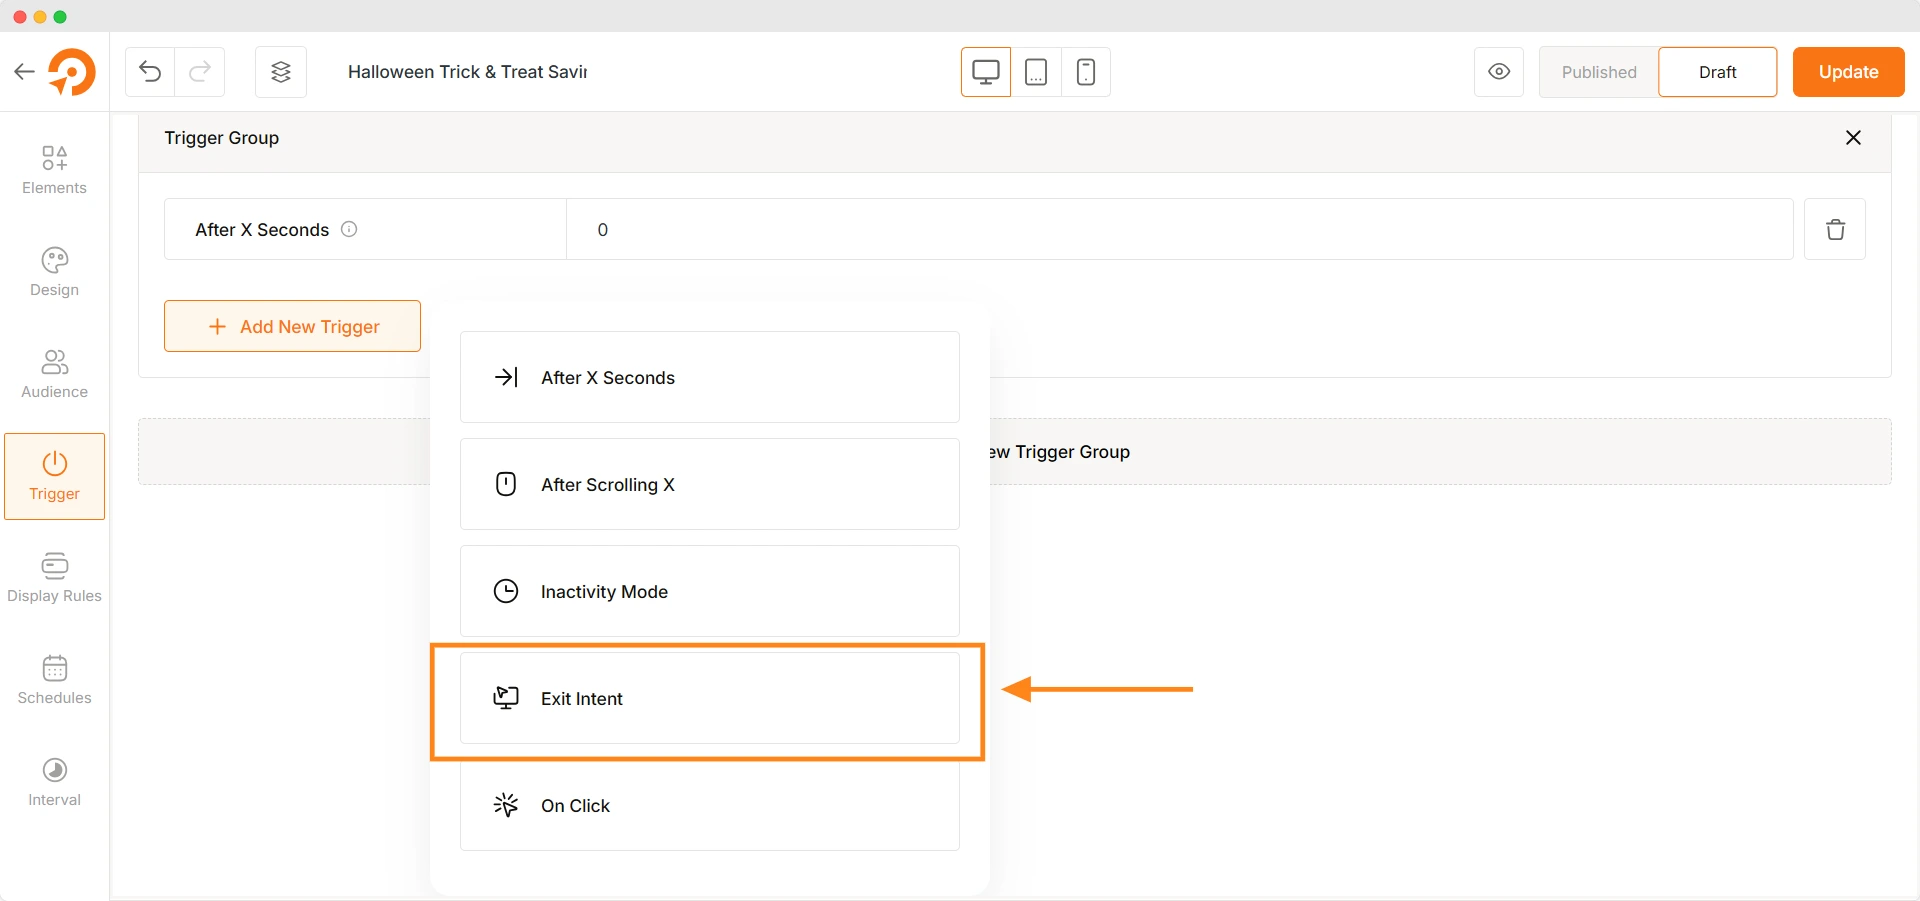
Next, you can set custom triggers for the banner. Some effective triggers can be:
On Scroll – shows the banner only when customers scroll a certain amount on a page.
Timed Delay – shows the banner after a set time
Exit-intent – shows the banner when the customer is about to leave the page.
However, as we are creating a footer banner, we want it to be visible at all times. So, I will keep the default settings here and don’t apply any specific trigger. But you can use a trigger if you want to.
Step 6: Choose Target Pages for the Banner
This one is an important one. Do you want to show the footer banner only on specific pages? The Display Rules feature of WowOptin will let you do that easily.
Navigate to the Display Rules tab, and you will see the Rule Group dropdown for different pages.
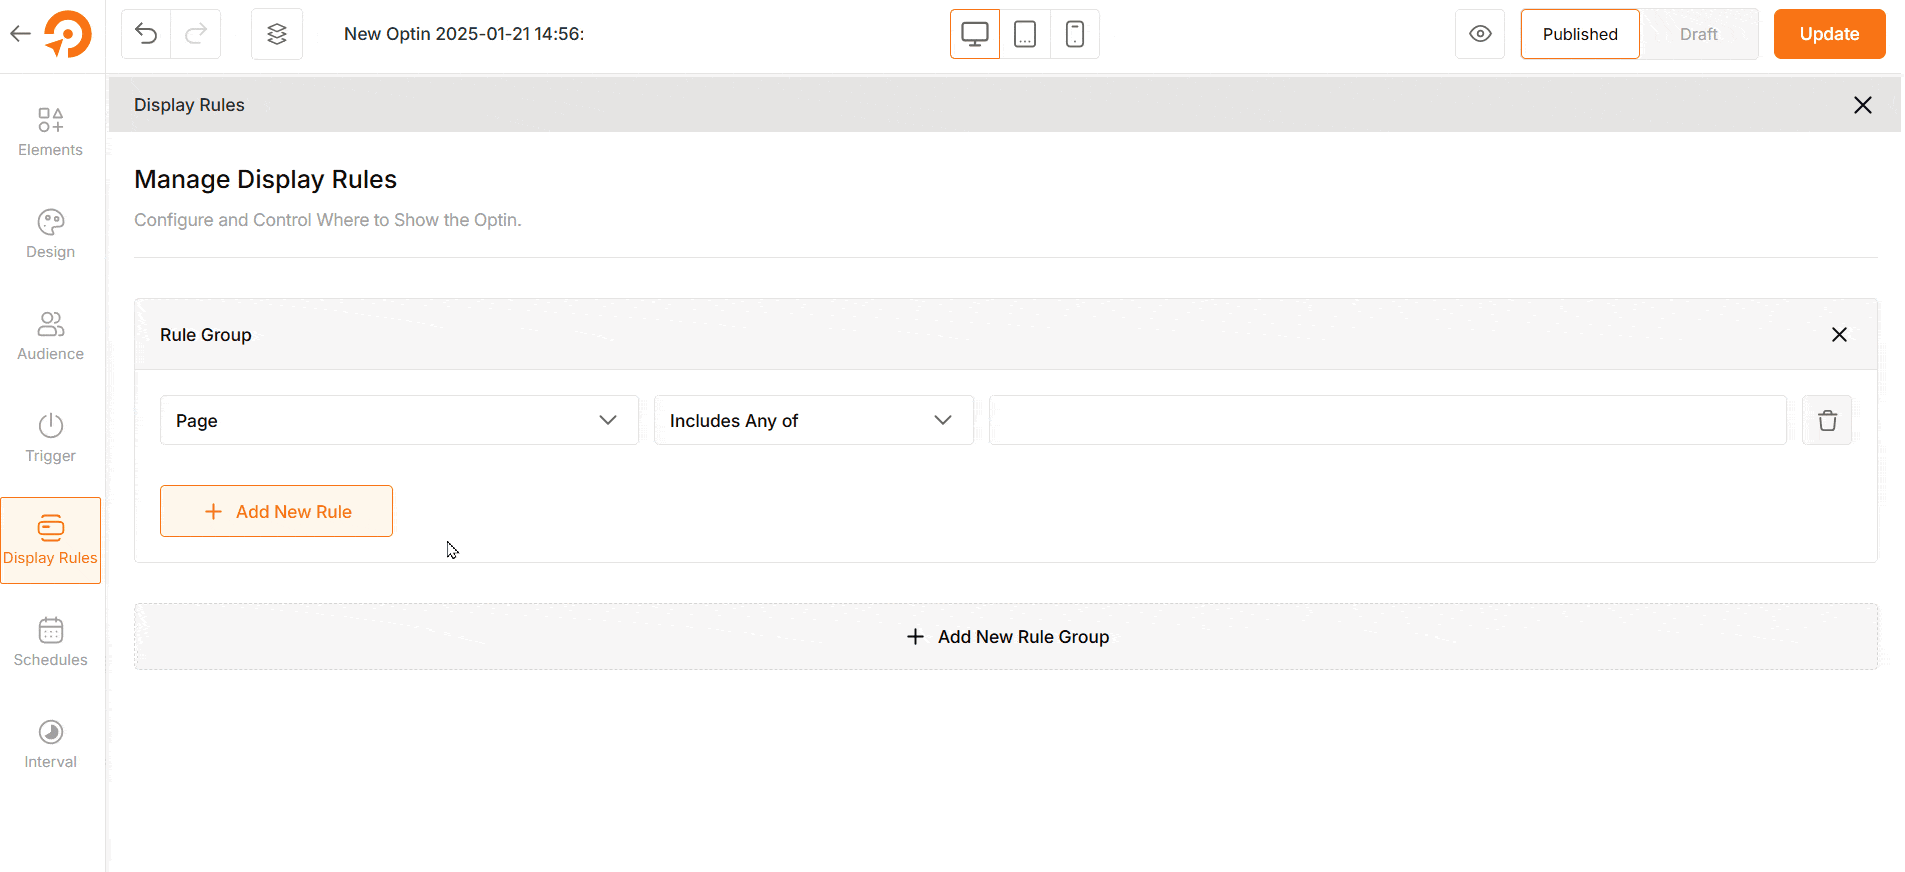
In the dropdown, you can select Entire Site, Pages, Post Types, WooCommerce & EDD pages, etc.
For instance, I want to offer extra discounts for digital products – so I want to show the banner only for posts from the category Gadget. From the dropdown, under Post, I select Category and then choose the specific category.
In the same way, you can add specific posts, specific categories, and specific pages to display the footer banner.
Step 7: Customize Additional Options Like Scheduling
You have more customization options available for the banner when you use WowOptin. For instance, you can schedule the banner to appear at a specific time.
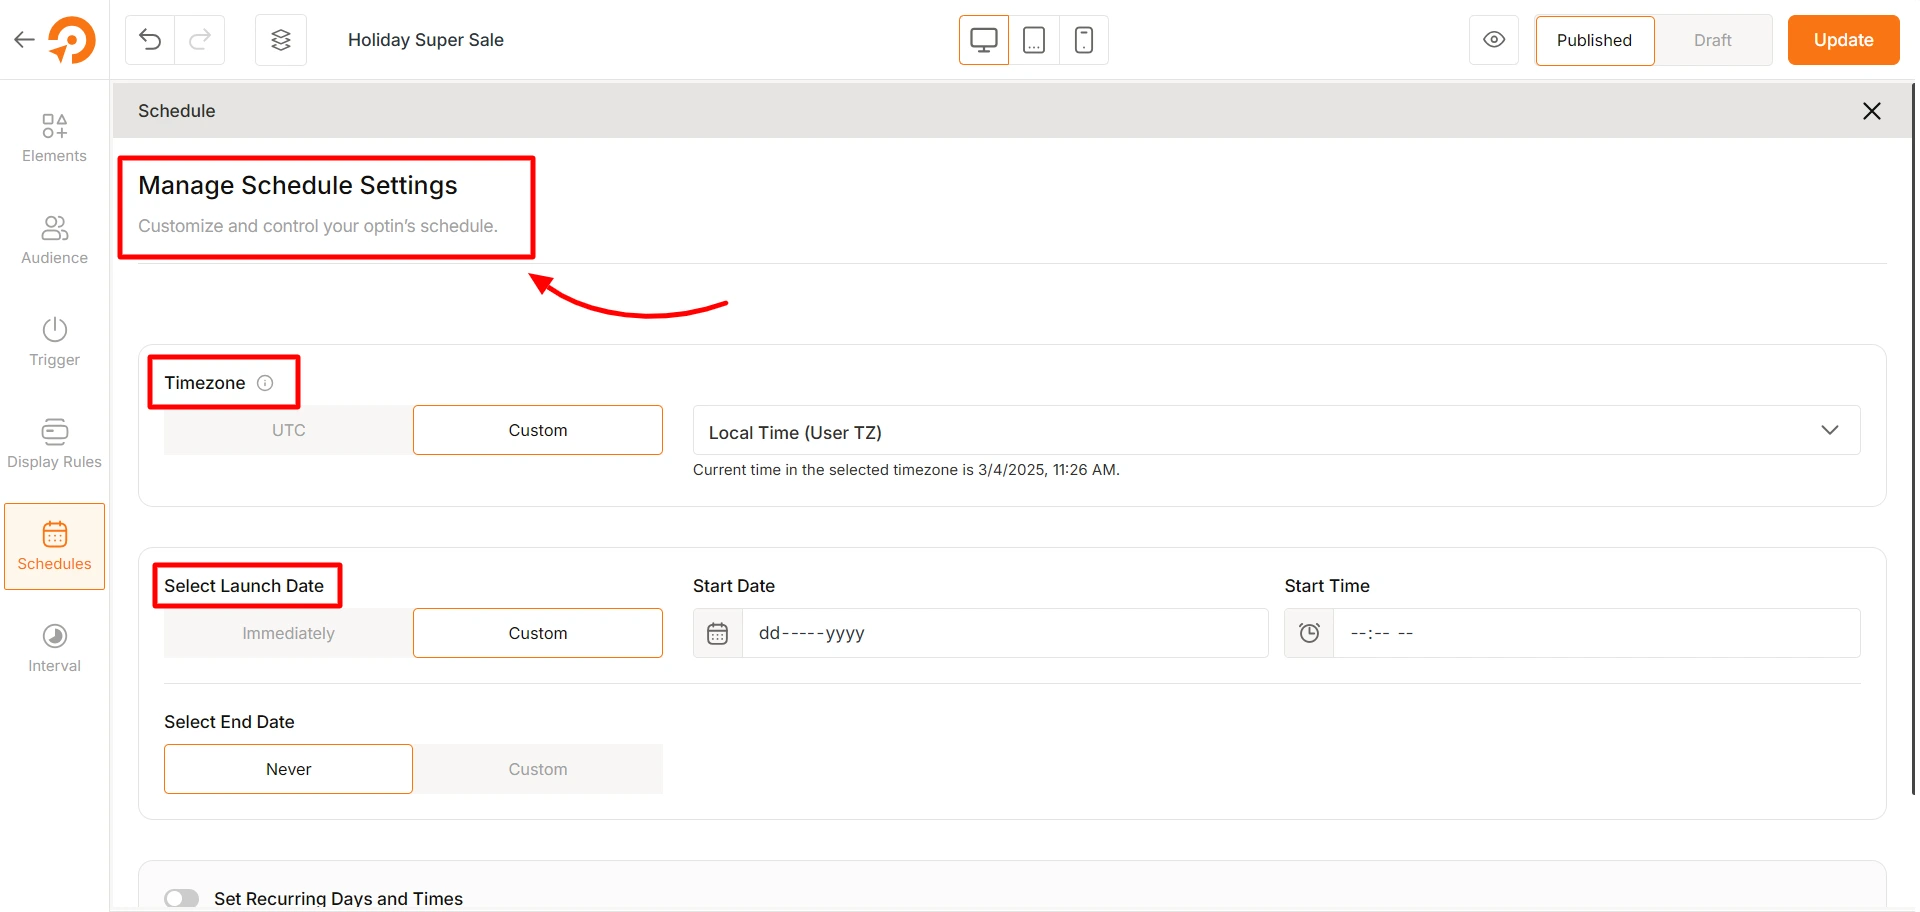
Go to the Schedules tab and select the Launch Date and End Date for the footer banner.
Learn how to add a video in a popup on your WordPress site without any code.
🎨 Popular Types of Free Footer Banner Templates You Can Use
Footer banners aren’t just for discounts – they can be used for all kinds of messaging.
Here are some of the most effective types of banners you can create using WowOptin’s free templates:
Promotional & Discount Banners
These are one of the most common banners for ecommerce stores. Whether you’re running a flash sale or highlighting a limited-time deal, these banners quickly catch users’ attention with bold text and a clear call to action.

Example: A banner that says “SUPER SUNDAY SALE – Up to 50% Off” or “Enjoy 25% Off Our Latest Arrivals” is perfect for hyping up limited-time deals.
Membership or Loyalty Program Banners
Want users to sign up for a subscription, club, or rewards program? These banners help communicate the perks of joining – increasing the user membership rate.

Example: A banner like “Mega Offer! 26% Off Your Gym Membership – Join Now” instantly shows value and encourages sign-ups.
Educational or Engagement-Focused Banners
These banners are perfect when your goal is to educate or take specific actions rather than sell. They can lead users to blog posts, resources, or campaigns that reflect your brand’s values.

Example: A banner like “Make This School Year Extra Special – Learn Through Play!” promotes content or a purpose-driven message rather than a product.
Newsletter Sign-Up Banners
Email is still one of the highest-converting marketing channels, and footer banners are a great way to grow your list without annoying popups.

Example: A simple, clear message like “Subscribe for Updates, Offers, and News – Enter Your Email Below” can work wonders.
New Arrivals or Collection Banners
Highlighting fresh arrivals or seasonal collections? These banners keep your site feeling fresh and encourage exploration.

Example: Something like “Check Out Our New Spring Collection” or “Just Arrived: Our Latest Styles” lets users know there’s something new to discover.
Each of these banner types can be fully customized inside WowOptin with your colors, fonts, and calls to action. Whether you want to promote, inform, collect leads, or inspire, there’s a template ready for you.
Frequently Asked Questions
How is a footer banner different from a traditional popup?
Traditional popups typically appear in the center of the screen and often interrupt the user’s experience, which can lead to higher bounce rates. A footer banner, on the other hand, remains fixed at the bottom, allowing users to engage with your offer at their own pace.
Can I show a footer banner only on specific pages?
Yes, WowOptin gives you full control to target specific pages, posts, or product categories. For example, you can show a discount offer only on the cart page or display a newsletter signup only on your blog.
Can I schedule a footer banner for a limited-time offer?
Yes, WowOptin lets you schedule your banner to appear and disappear automatically based on your selected start and end dates. This is great for running flash sales, weekend promos, or seasonal messages without the need to manually enable or disable them.
Will it work on mobile devices too?
Yes, footer banners created with WowOptin are fully mobile responsive. You can even design mobile-specific banners with different layouts, messaging, and triggers. This ensures your call-to-action remains effective no matter what device your visitor is using.
Can I display different banners to different visitors?
Yes, WowOptin allows you to set audience rules such as logged-in vs. guest users, mobile vs. desktop visitors, geolocation, traffic source, and more. This means you can create personalized experiences by showing the right message to the right user.
Summing Up
Your website footer doesn’t have to be less tempting. With a well-placed footer banner, you can turn casual visitors into loyal subscribers, buyers, or repeat readers without disrupting their journey.
So, whether you’re promoting a limited-time deal, collecting emails, or just sharing helpful info, give your footer the power to convert.
Try creating your first custom banner with WowOptin – it’s free, fast, and can go live in minutes!


