Every business faces the fundamental challenge of attracting, engaging, and converting customers.
In a world overflowing with information, opt-in forms provide a simple yet powerful way to capture genuine interest, connect with potential customers, and grow your business.
This guide will show you how to create opt-in forms in WordPress that look compelling and deliver outstanding results.
Here’s a quick overview of the steps:
☑️ Install and Activate the WowOptin Plugin
☑️ Choose a Form Type and Create
☑️ Add Elements and Design Your Opt-in Form
☑️ Pinpoint Your Ideal Audience
☑️ Decide When to Show the Opt-in Form
☑️ Place the Opt-in Form in the Best Spot
☑️ Schedule with Additional Settings
Let’s dive in!
What Are Opt-in Forms in WordPress?
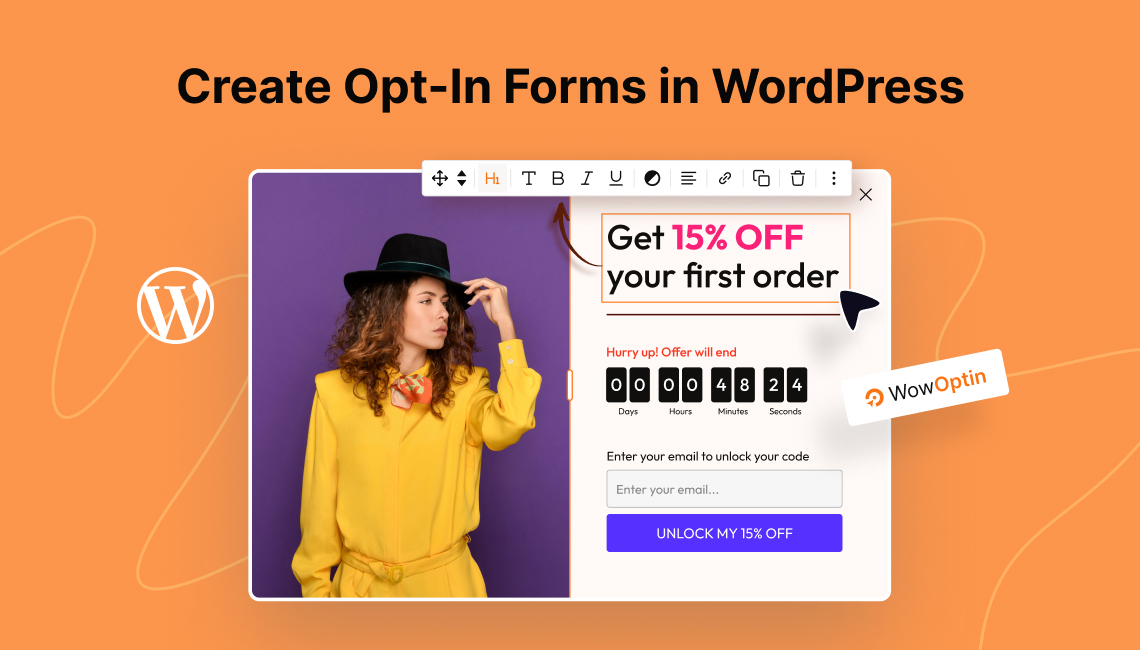
An opt-in form in WordPress is a tool you can add to your website to gather information from visitors, such as their names and email addresses.
Think of it as a small form or box where visitor’s “opt-in” (give consent) to receive updates, offers, or other communication from you.
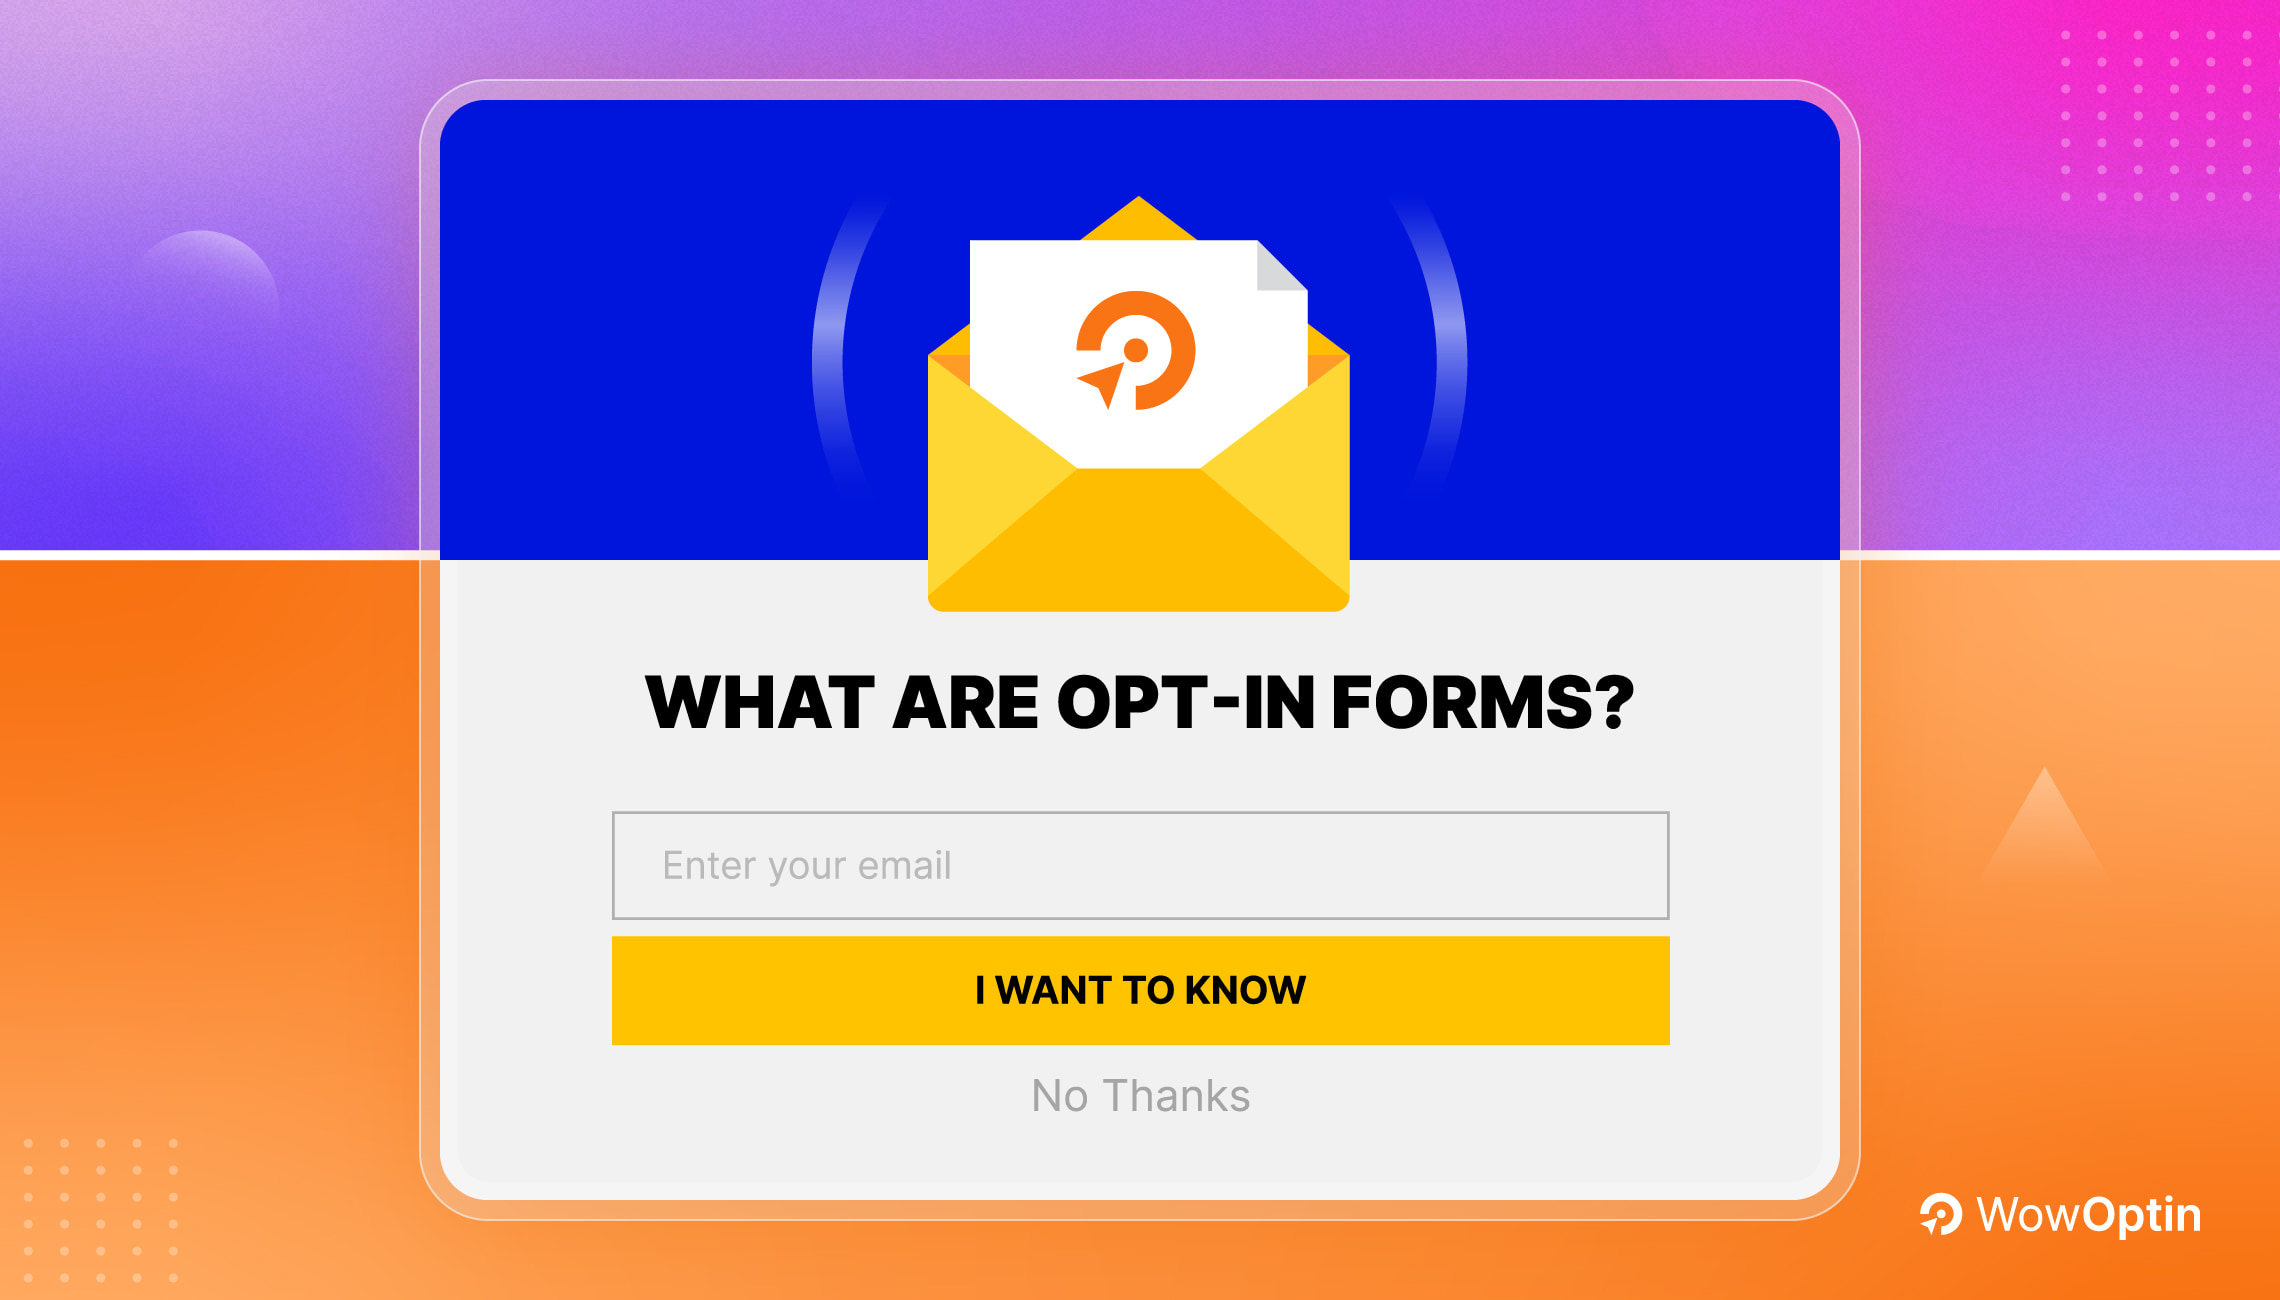
These forms create a win-win scenario: users get value in exchange for their information, while you gain their contacts.
Use Cases of Opt-in Forms
Opt-in forms are commonly used to grow email lists, sign people up for newsletters, or provide incentives like free eBooks or discounts in exchange for their details. Here are a few common examples:
- Newsletter Subscription: Provide updates, tips, and insights.
- Free Resources: Offer values in exchange for information.
- Product Launches: Collect emails to notify about new products.
- Exclusive Content: Offer premium content in return for contact details.
- Discount Offers: Offer discounts or coupons for signing up.
- Event Registration: Collect info for webinars or events.
- Online Community Access: Invite users to join a forum or social group.
What Are the Types of Opt-in Forms?
Opt-in forms can appear in different ways on your website. It depends on two factors:
- Where do you want the form to appear and
- How do you want to engage users
Here are the most common opt-in types:
- Popup Forms: These appear as pop-ups when a user interacts with the page, such as after a set time delay or upon exit intent.
- Inline Forms: Embedded directly into your pages or posts, usually within the content or at the end.
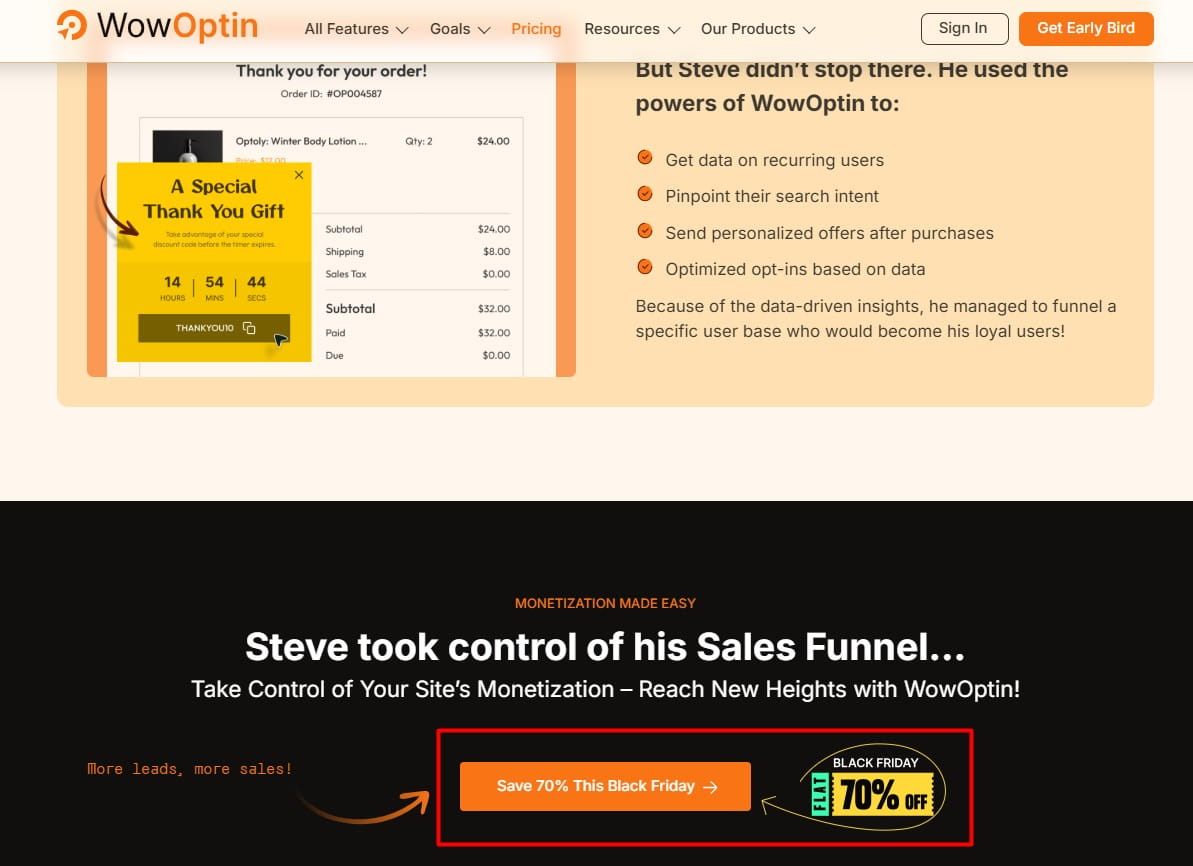
- Floating Forms: Display as a sticky bar at the top or bottom of the screen.
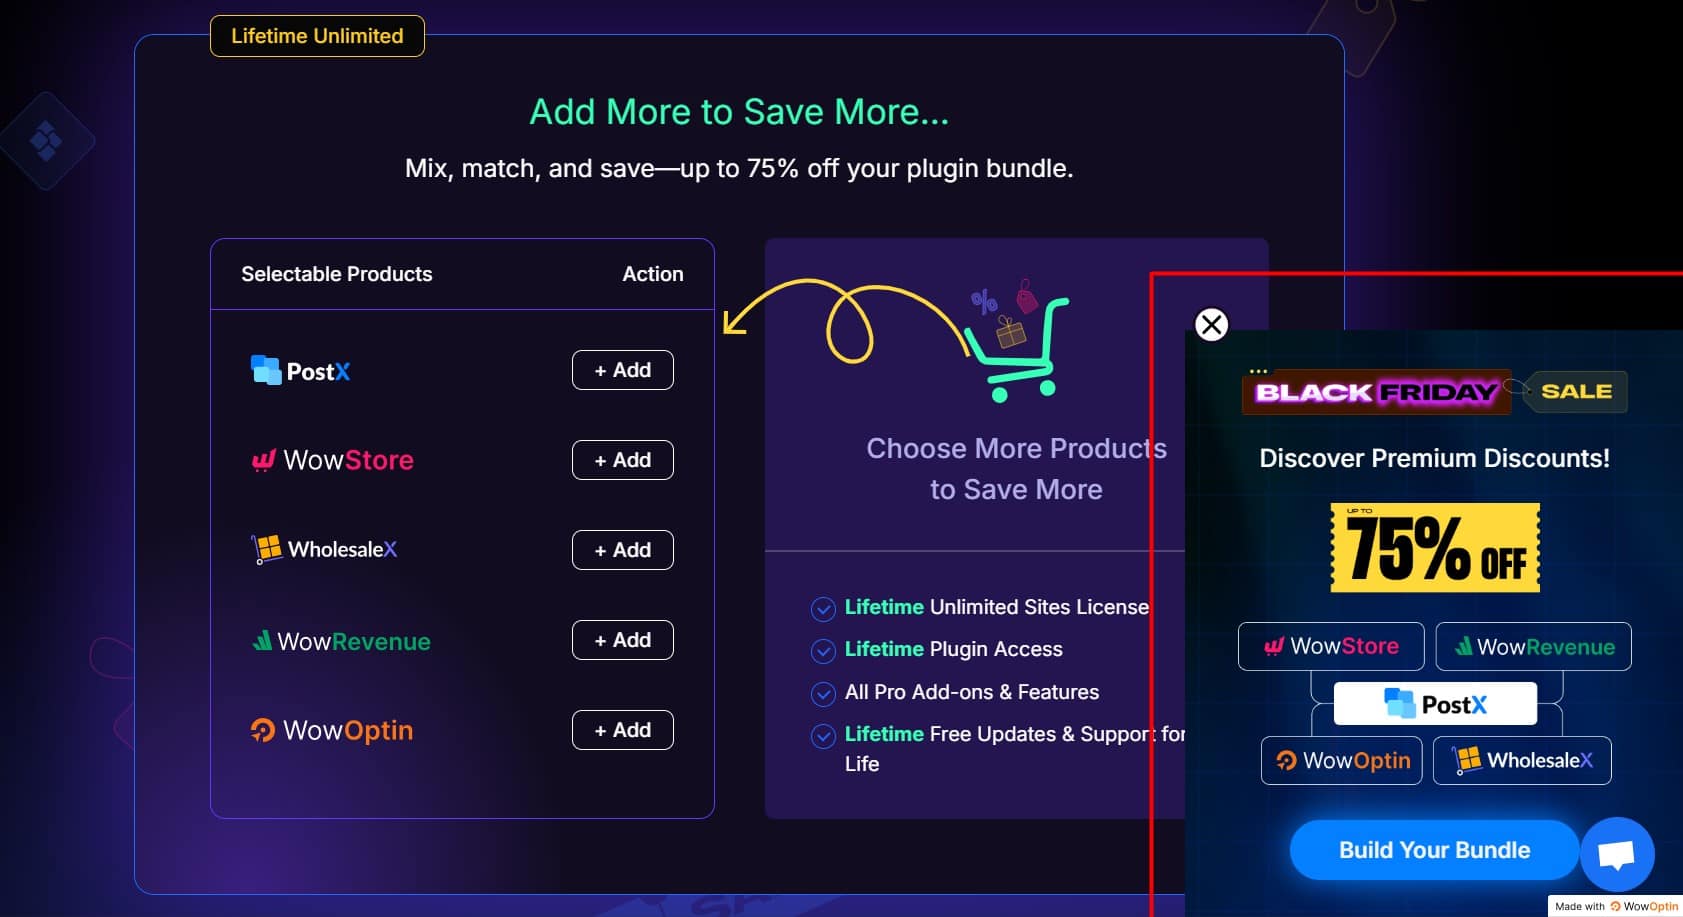
Additional Sub-Types:
- Full-Screen Opt-In: A form of popup that takes over the entire screen, often used to promote lead magnets.
- Exit-Intent Popup: A popup that appears when the user shows intent to leave the page.
- Slide-In Forms: Floating forms that appear from the side of the page, usually after the user has scrolled a certain distance.
How to Create Opt-In Forms in WordPress? (7 Steps to Follow)
Now that you understand what opt-in forms are, their use cases, types, and benefits let’s begin creating an opt-in form step by step.
Step 01: Get Started with a Powerful Opt-In Form Builder Like WowOptin
The first step in creating high-converting opt-in forms is selecting a reliable opt-in form builder.
While there are many options available, I recommend WowOptin for several key reasons:
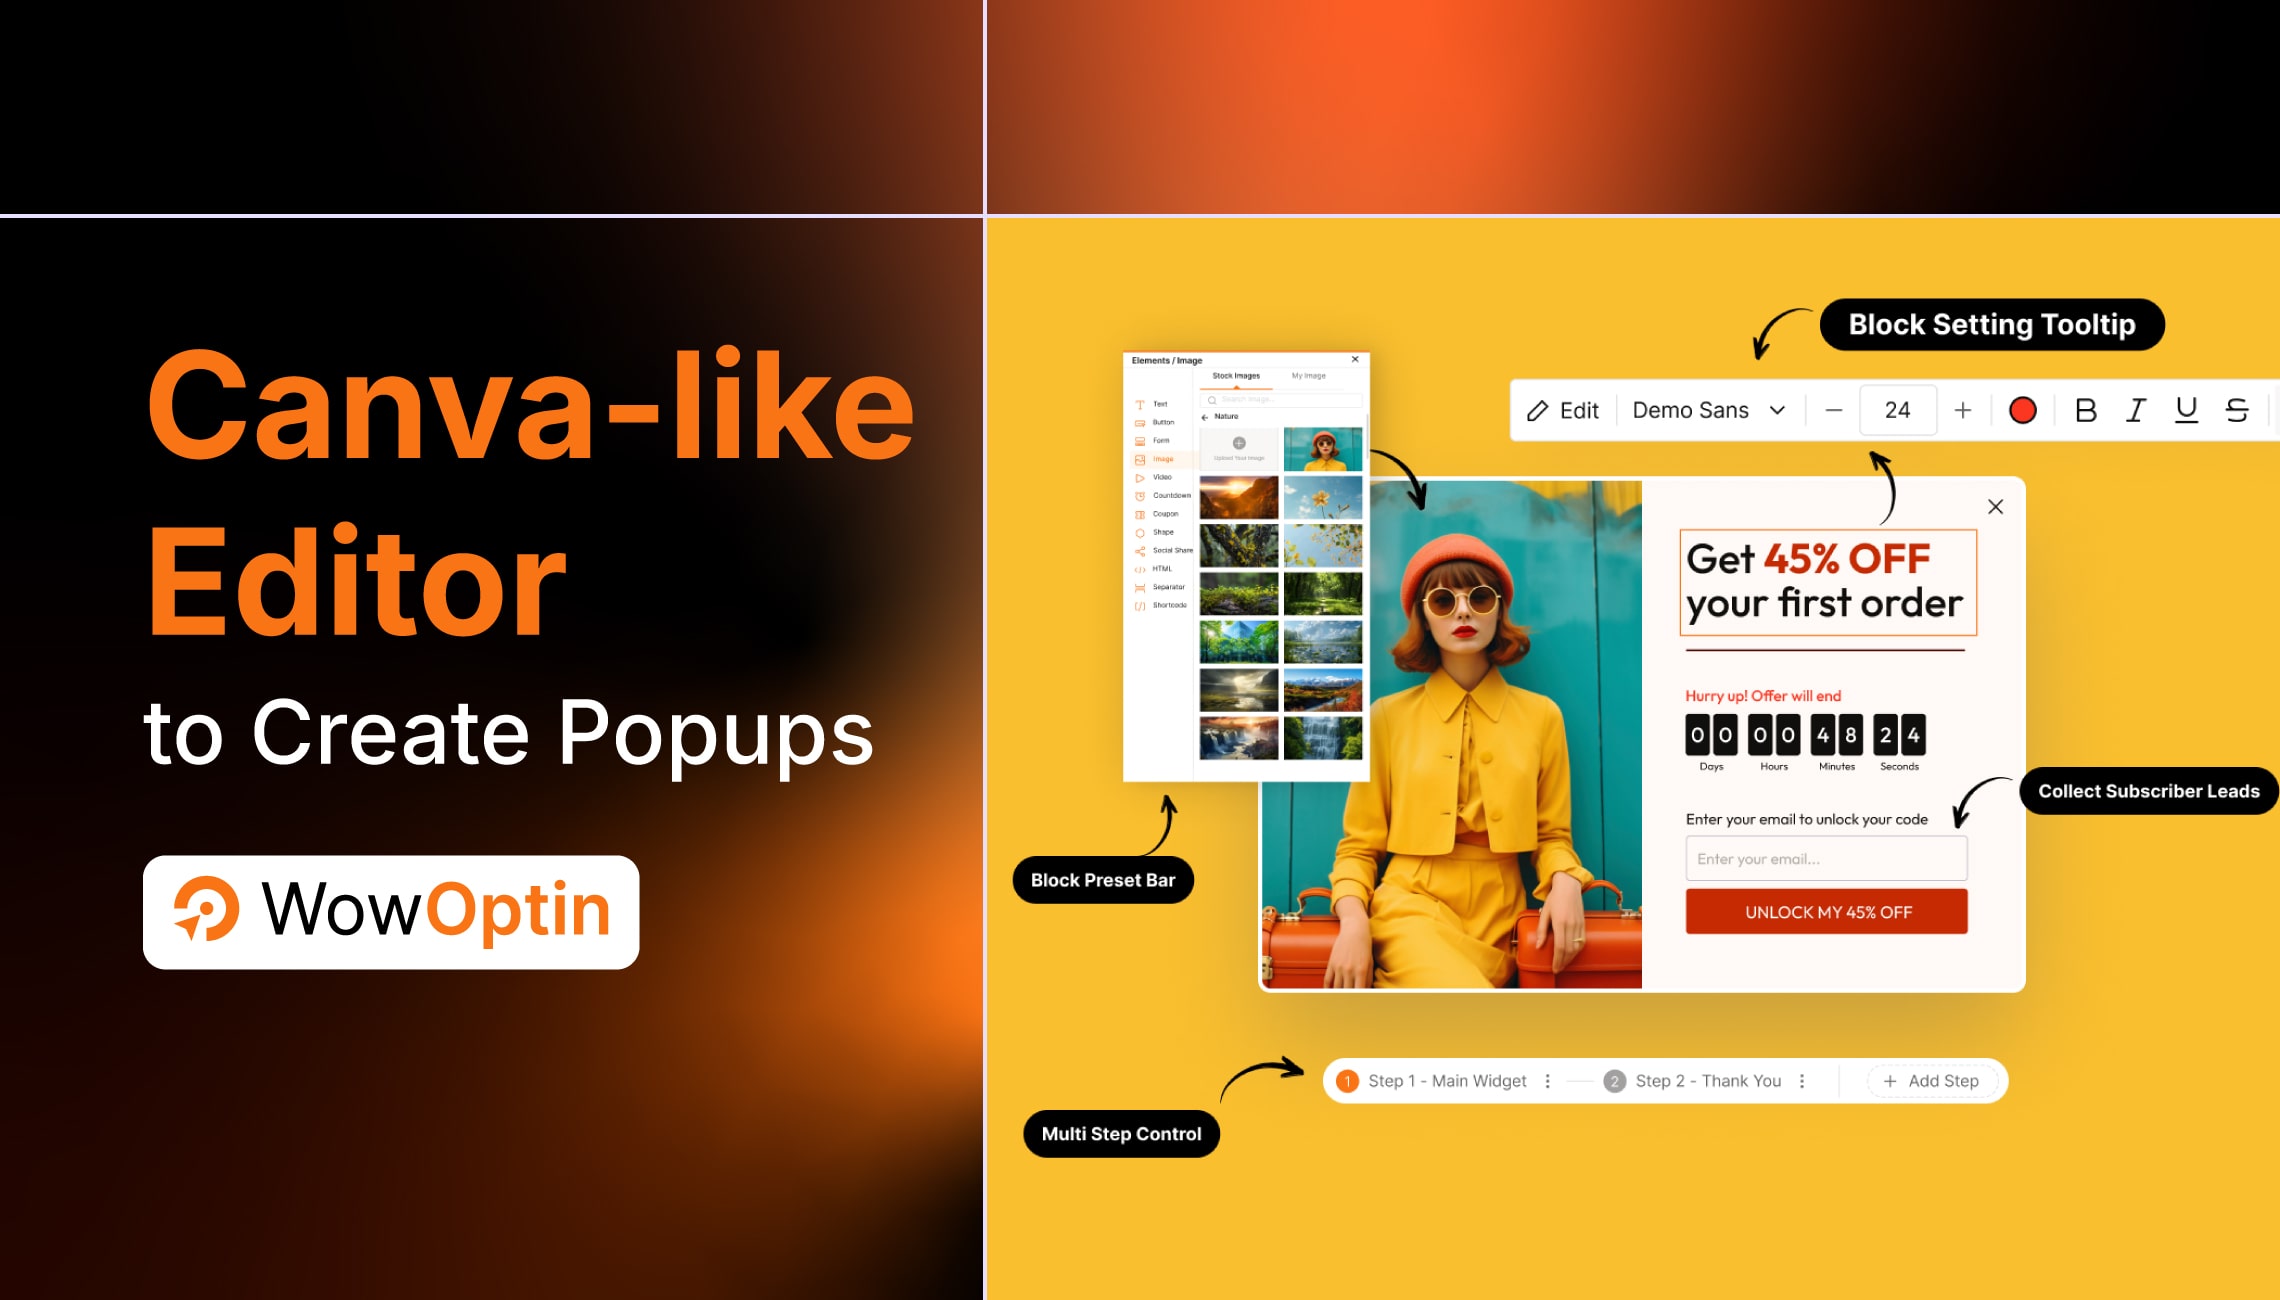
- Canva-like drag-and-drop
- Unlimited pageviews
- Unlimited Sites
- Lifetime updates
- Pre-built templates for every element
- And more.

To get and activate the plugin, check out the installation process.
Step 02: Choose a Form Type and Create
Once you’ve installed and activated the plugin, the next step is to choose the best opt-in form type for your goals. Here’s a quick guide on when to use each type:
- Popups: Perfect for grabbing immediate attention from visitors.
- Floating Bars: Great for subtle reminders that won’t disrupt the user experience.
- Inline Forms: Ideal for blog posts or pages where you want the form to blend seamlessly with the content.
To choose a form type:
- Go to the WowOptin section in your WordPress dashboard.
- Click the “Create New Optin” button at the top.
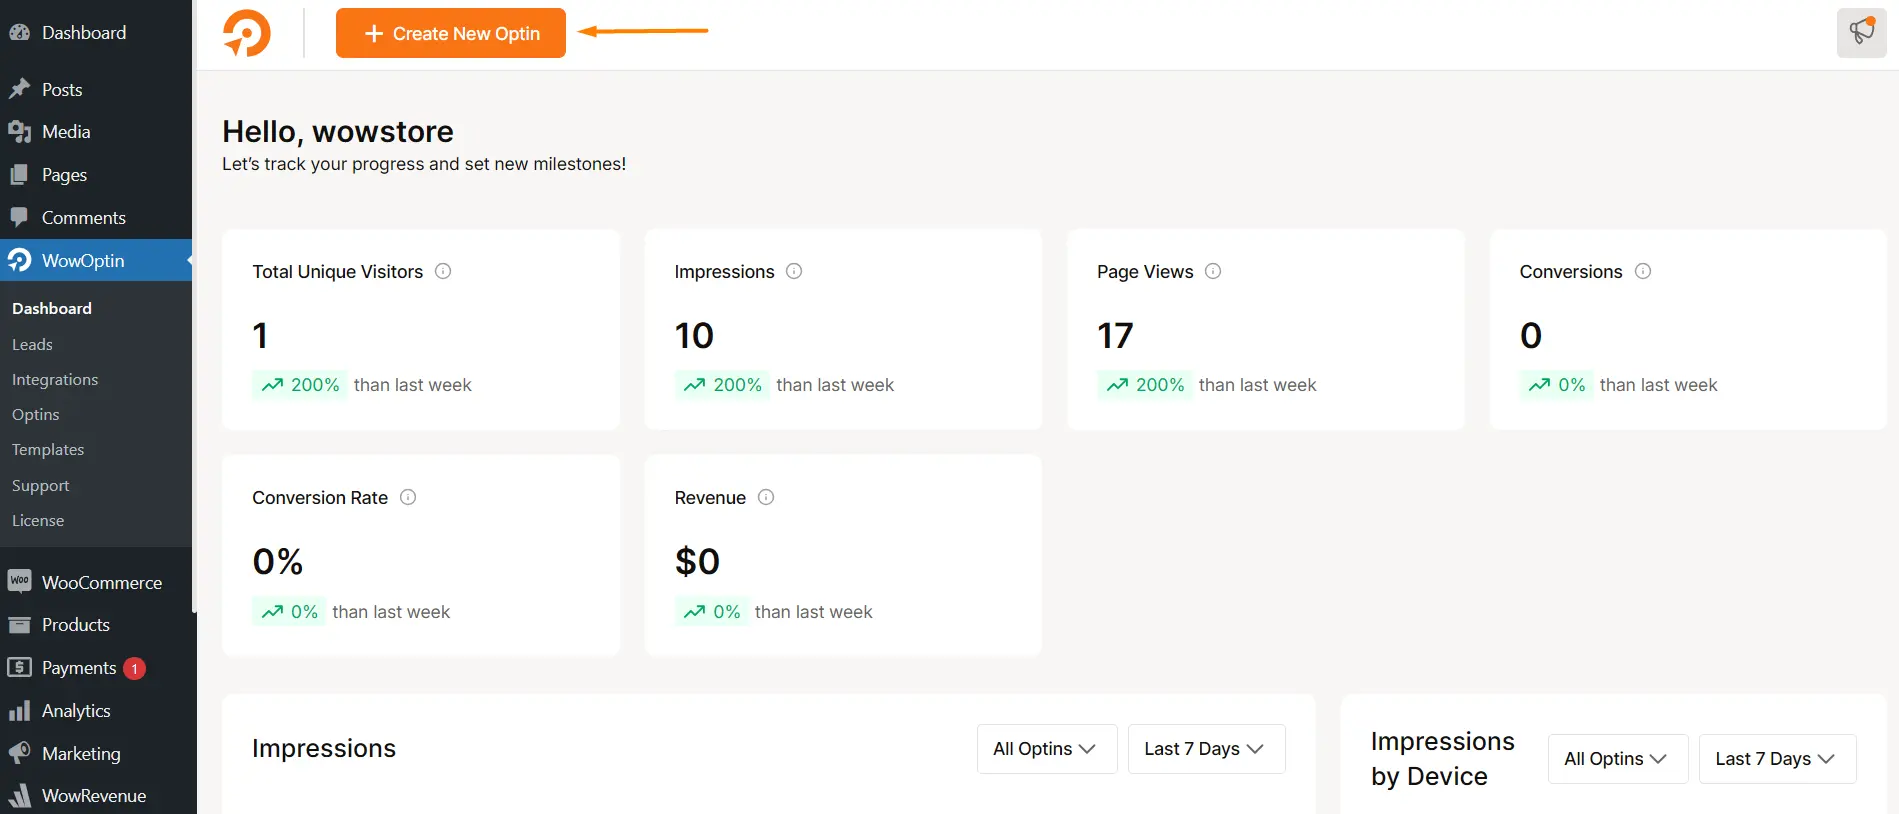
- Select a template or start from scratch using the builder.
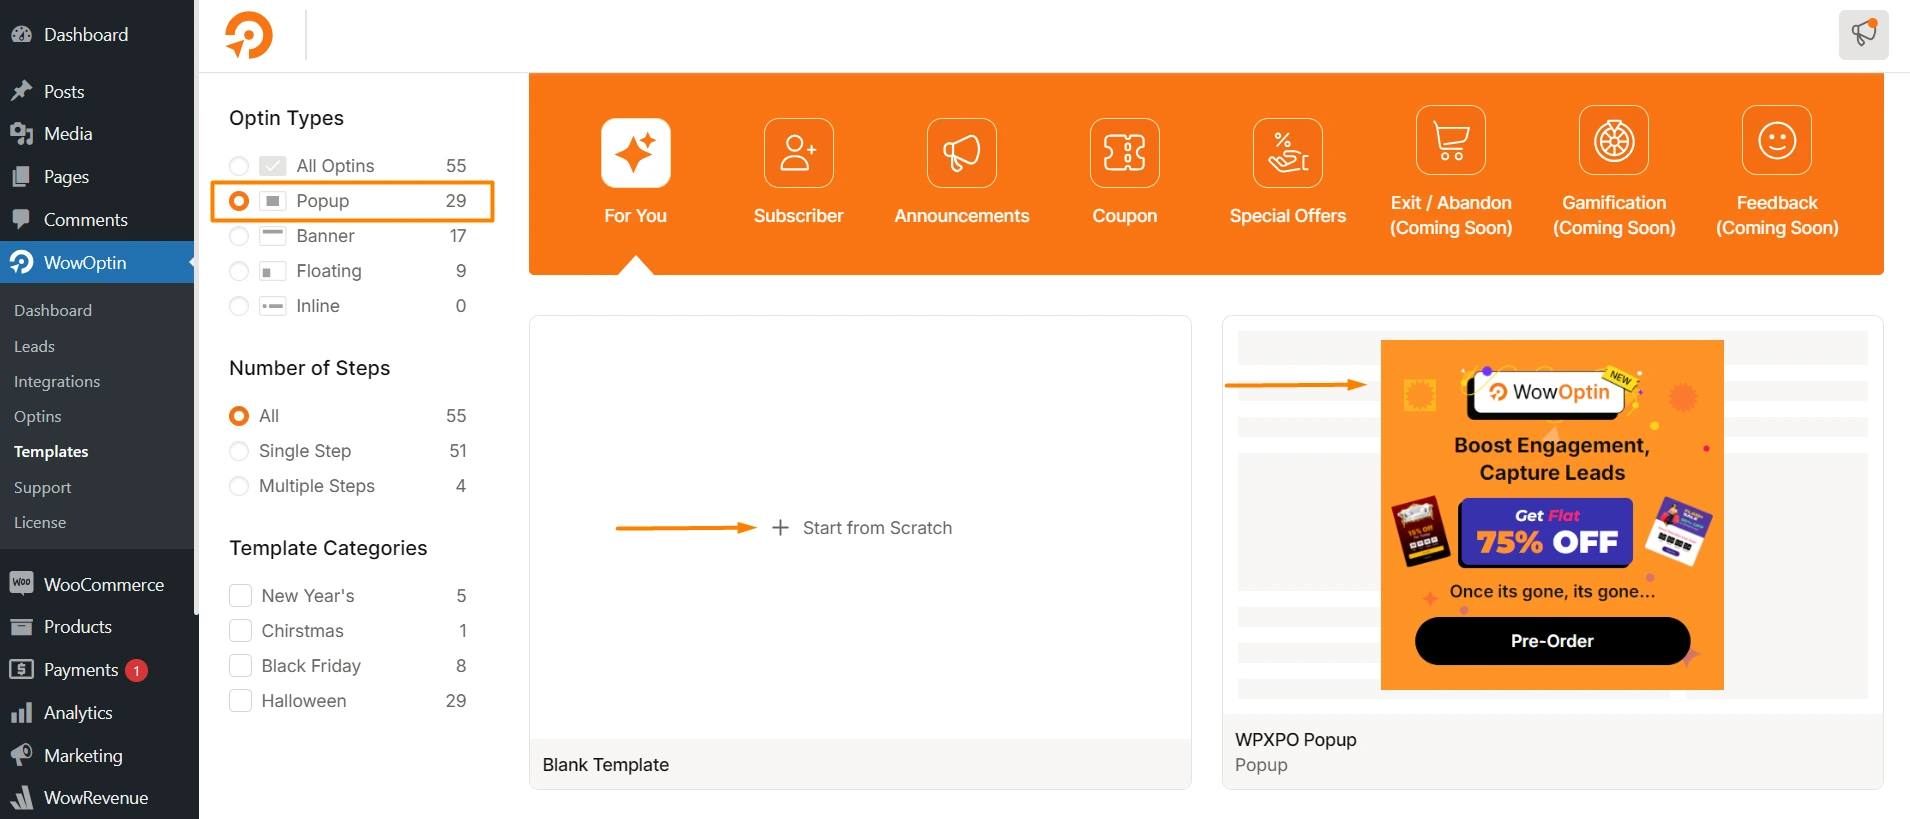
- If you’re starting from scratch, select the opt-in type first.
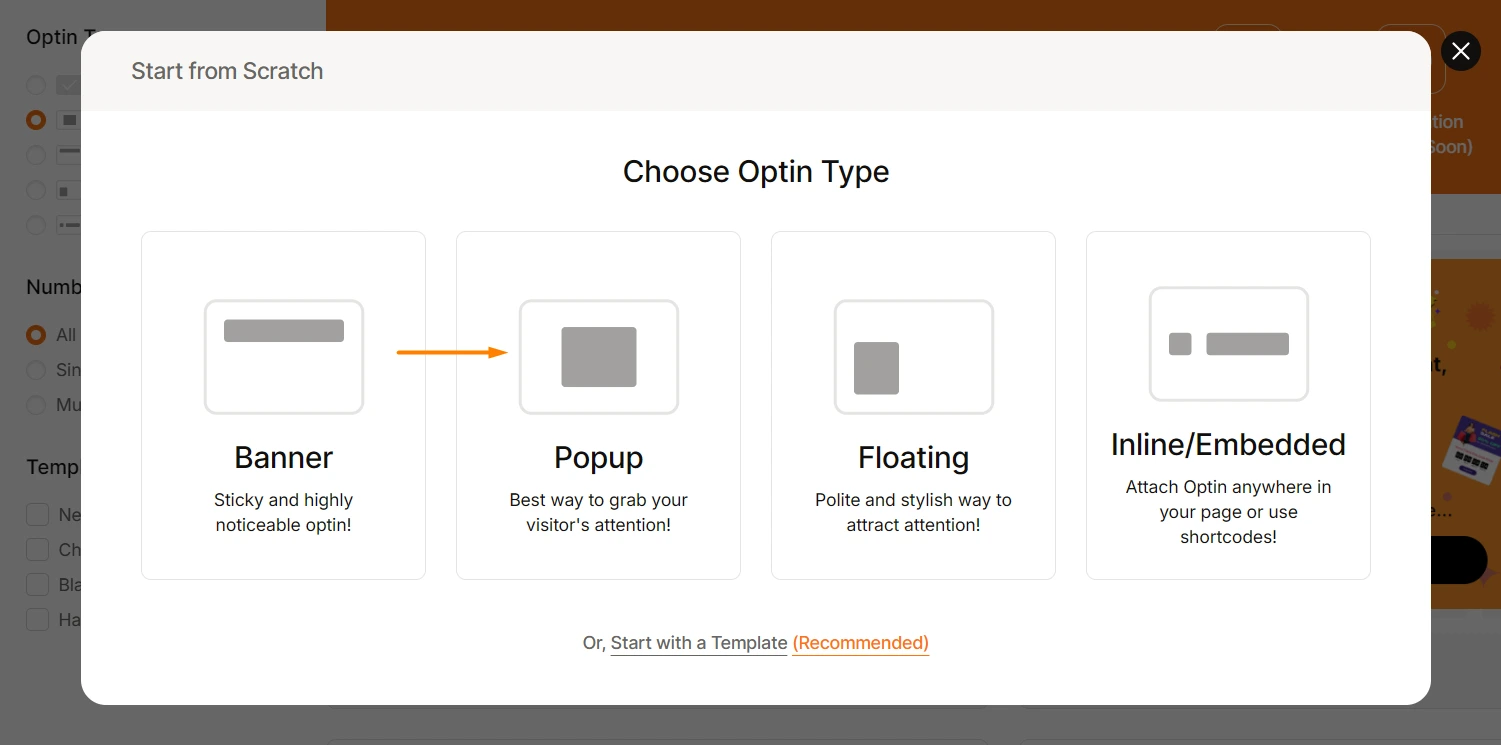
You’ll then be redirected to the builder page, where you can add elements and design your opt-in form.
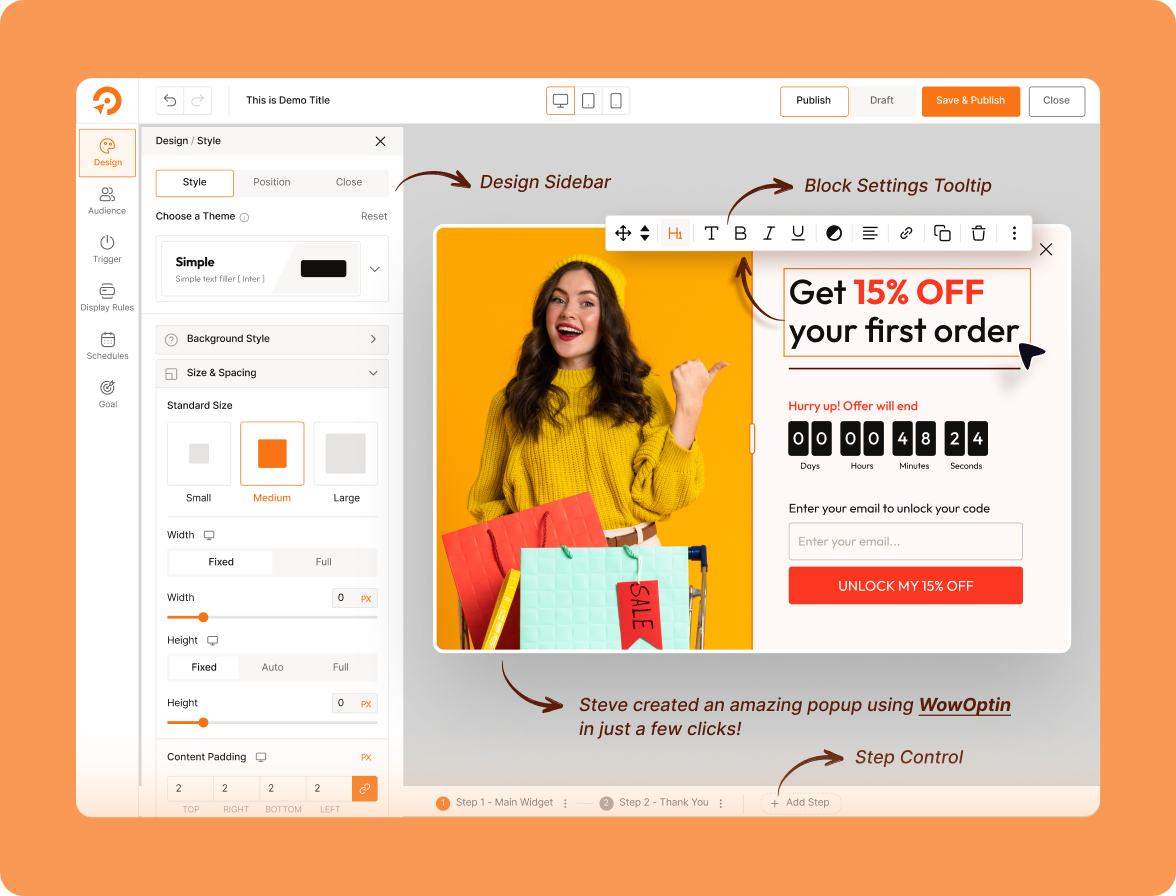
Step 03: Add Elements and Design Your Opt-in Form
You’ve selected your opt-in type; now use the Elements and Design section to add and customize the elements to build your opt-in form.
- Form: Add forms for user input and data collection.
- Heading: Organize content or highlight key text.
- Image/Video: Add visuals to engage users.
- Countdown: Add timers for limited-time offers.
- Button: Add buttons for actions like “Submit Now.”
- Shape: Include decorative shapes for design.
- Social: Add social media icons or links.

After adding the necessary elements, customize the design to your preference. You have all the tools to tweak and adjust your opt-in form to fit your needs perfectly.
The Design tab provides three key options for customizing your design:
Style – Adjust the appearance, such as colors, fonts, and visual details.
Position – Set where the opt-in form will appear on the screen.
Close – Configure the close behavior or settings for the opt-in.
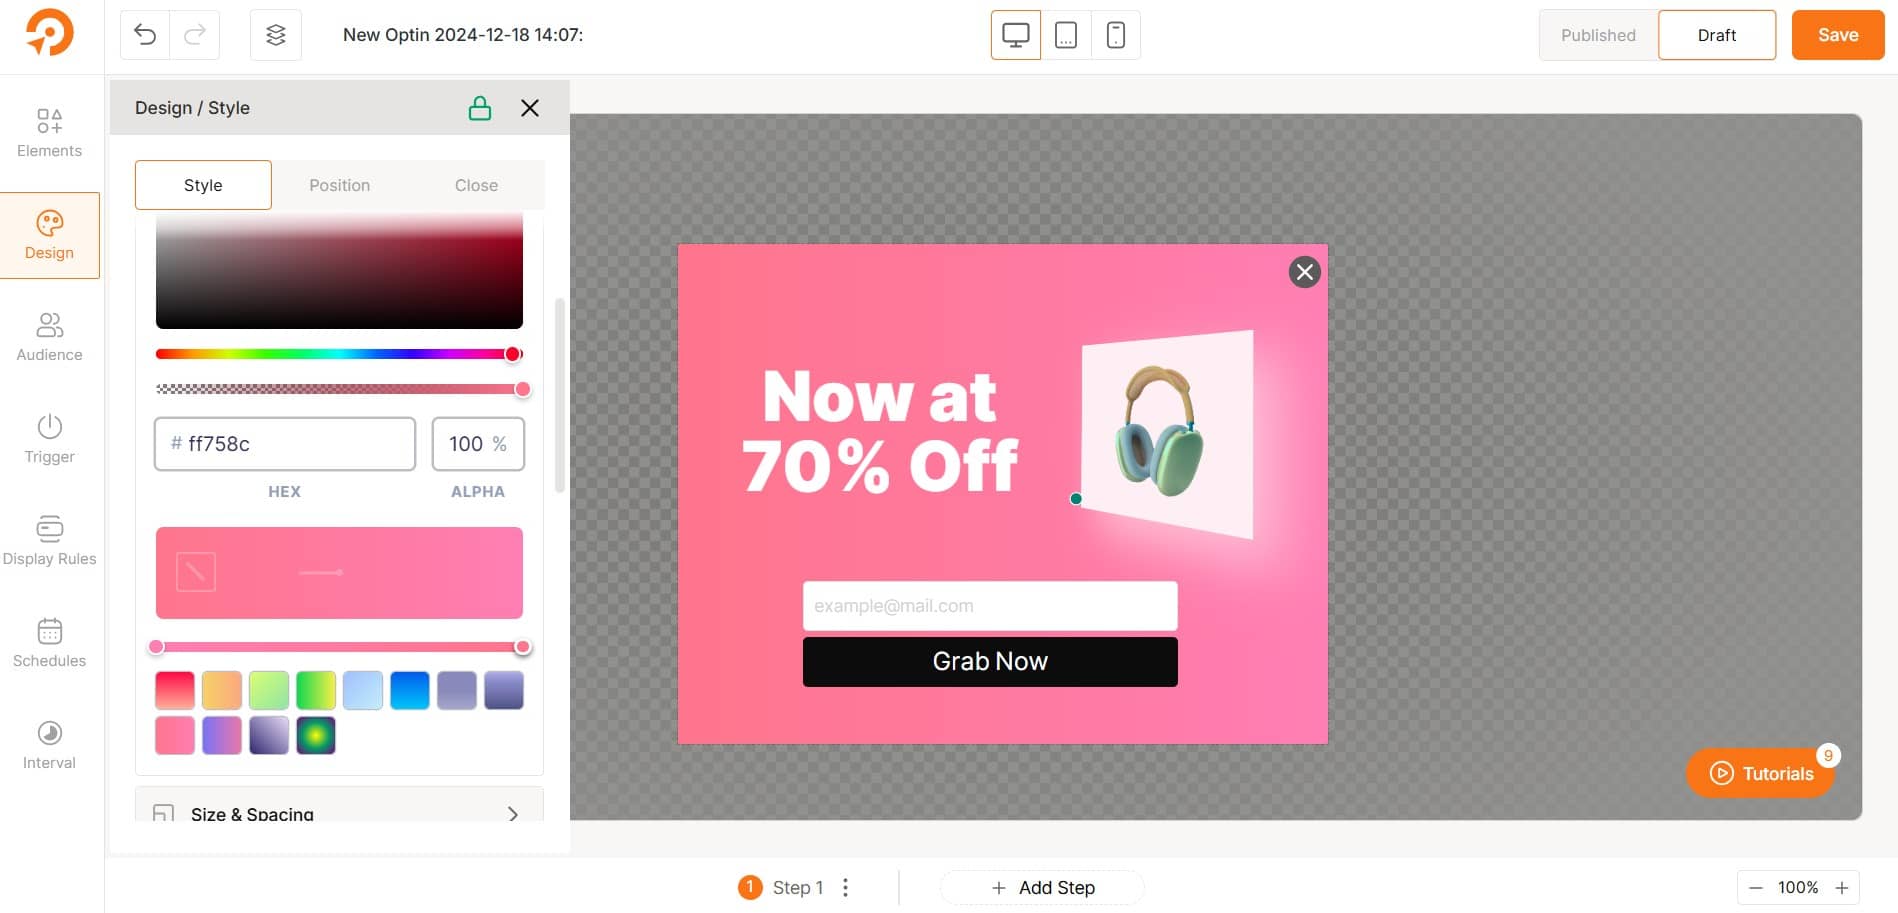
These options allow you to precisely customize the design, positioning, and functionality of your opt-in form for a polished and effective result.
Step 04: Pinpoint Your Ideal Audience
This step is crucial to ensure that your opt-in delivers real results. Targeting the right audience is key, as a single opt-in won’t resonate with everyone.
To maximize conversions, you must personalize and carefully select your audience. You have plenty of options to narrow down your target audience effectively. Let’s explore!
Visitor Device(s)
Target users based on the device they are using (e.g., mobile, desktop, tablet).
Visitor Type(s)
Choose between all visitors or target specific user types (e.g., new vs returning visitors).
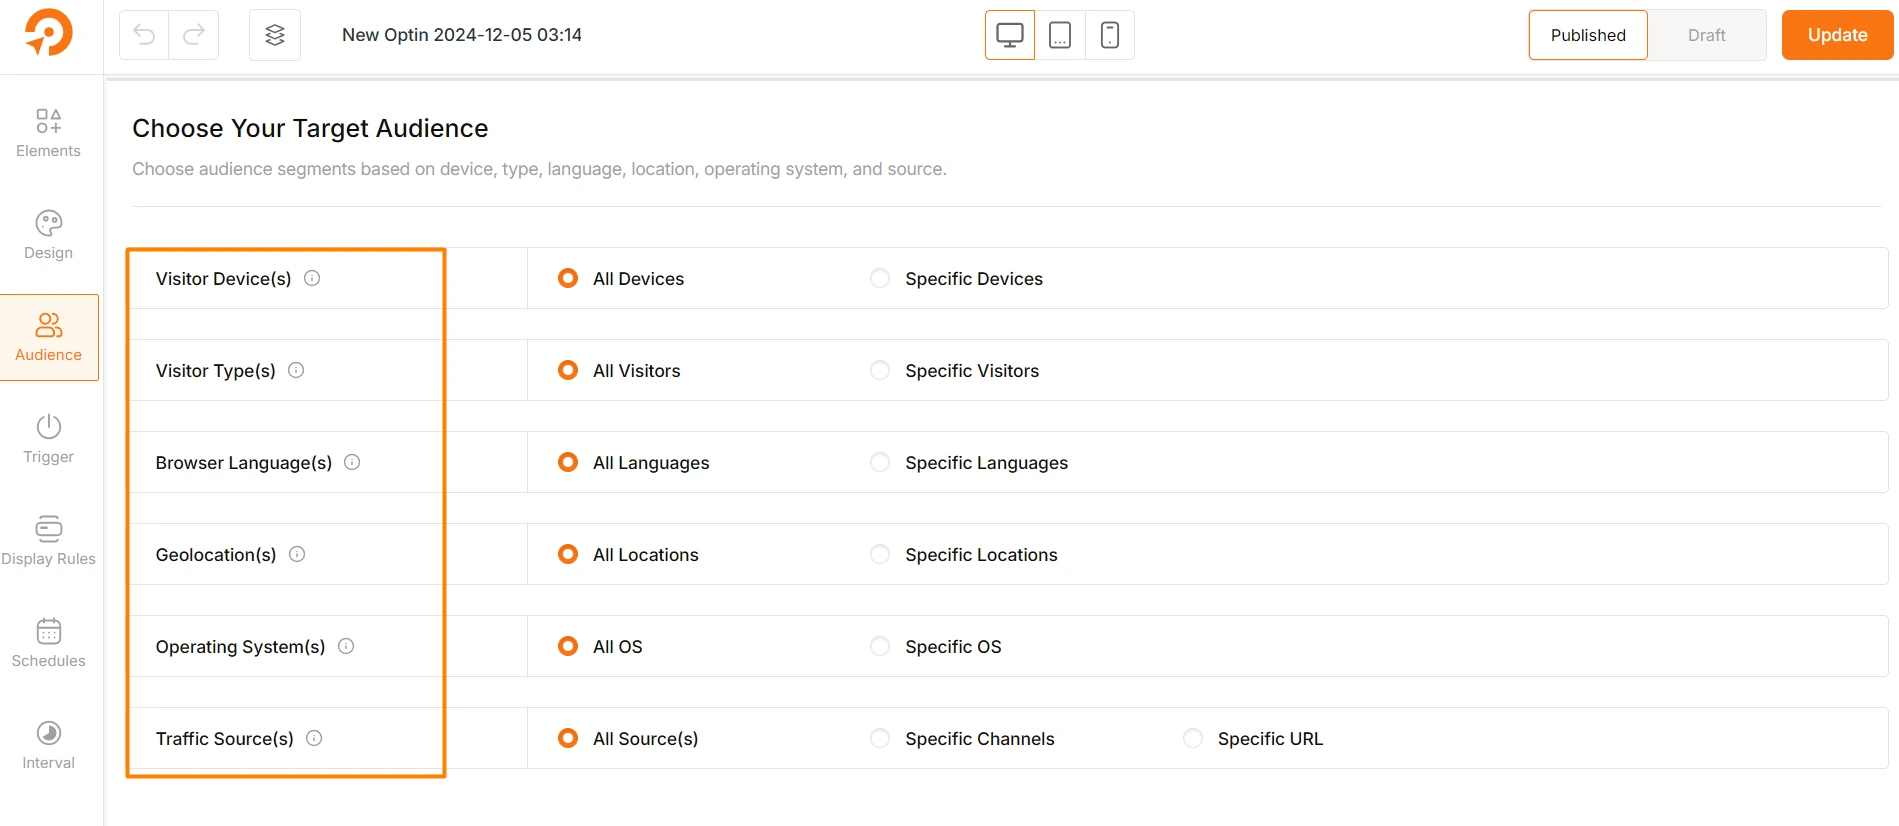
Browser Language(s)
Target users based on their browser language (e.g., English, Spanish).
Geolocation(s)
Target visitors based on their location (e.g., countries, regions, cities).
Operating System(s)
Target users based on their device’s operating system (e.g., Windows, iOS, Android).
Traffic Source(s)
Target users based on how they reached your site (e.g., specific channels like social media, search engines, or direct URLs).
Step 05: Decide When to Show the Opt-in Form
Now that we’ve defined the target audience, it’s time to determine when to display the opt-in form.
Timing is essential to ensure you don’t interrupt the visitor experience. In the “Trigger Section” you’ll find the following options:
After a specific time delay: Show the form after the user has been on your site for a set amount of time.
Upon page scroll: Trigger the form after the user has scrolled through a certain percentage of the page.
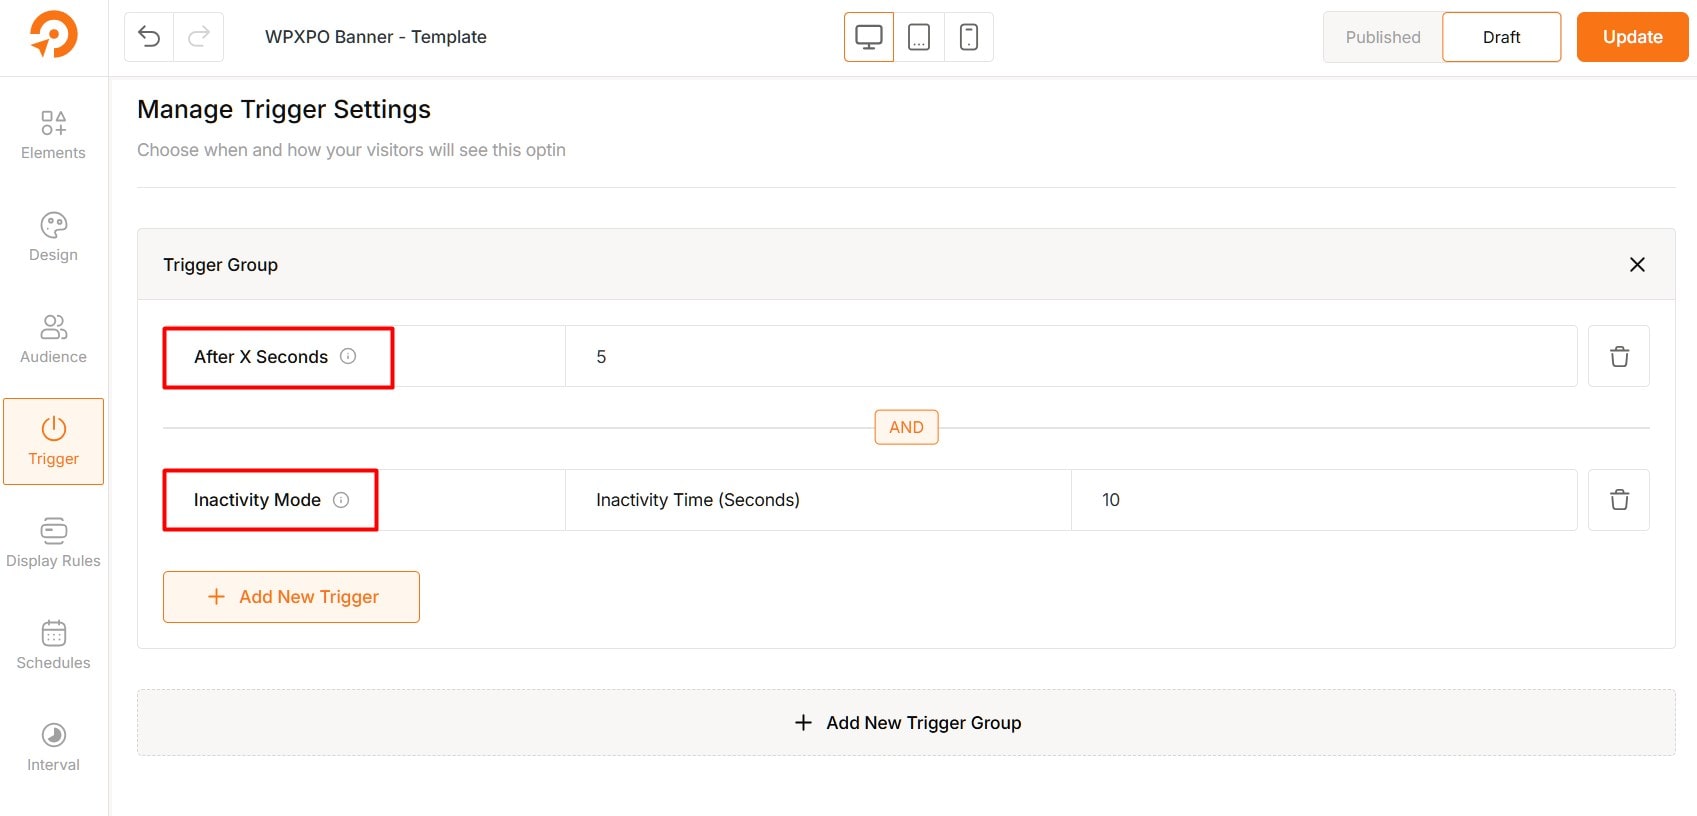
After inactivity: Bring up the opt-in form after the user has been idle for a specified duration.
On exit intent: Show the form when the visitor is about to leave the page (by moving the mouse towards the browser’s exit button).
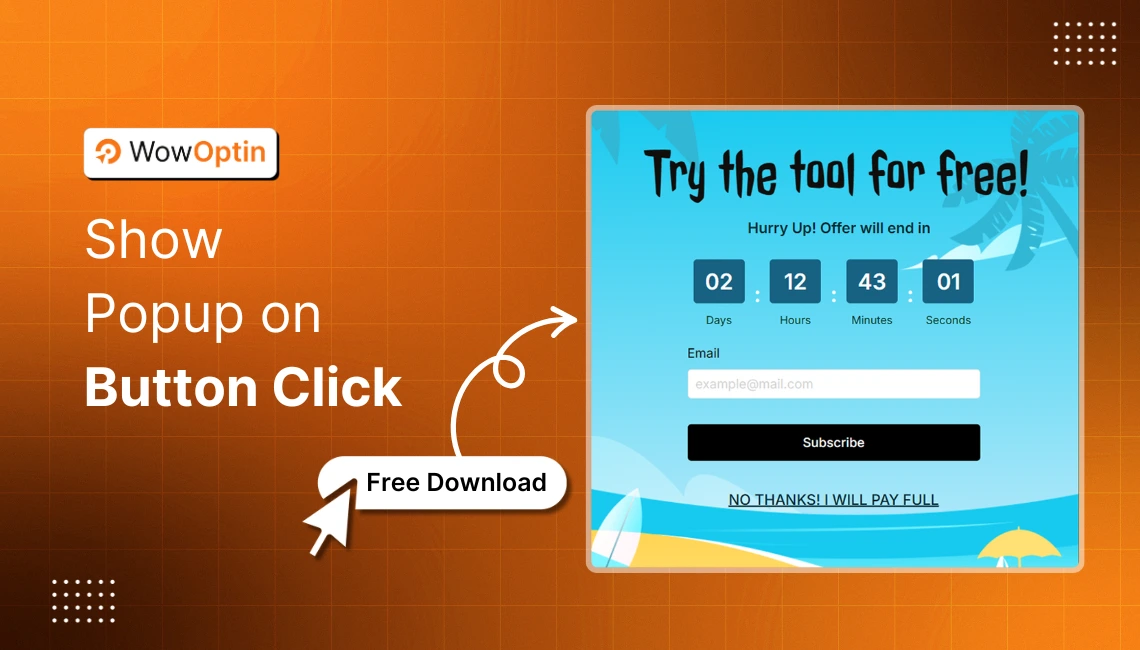
On click: Trigger the opt-in form when the user interacts with a designated element, like a button or link.
Step 06: Place the Opt-in Form in the Best Spot
Now that you’re at the final stage of creating your opt-in, it’s time to place the form in the best position on your website.
The “Display Rule Section” allows you to manage when and where your opt-in form will appear. You can configure display rules based on the following options:
- Entire Site: Display the form across all pages.
- Front Page: Show it only on the home page.
- Posts: Display on individual posts, categories, or tags.
- Page: Select specific pages for the form to appear.
- Author: Show forms based on the post author.
- And More.
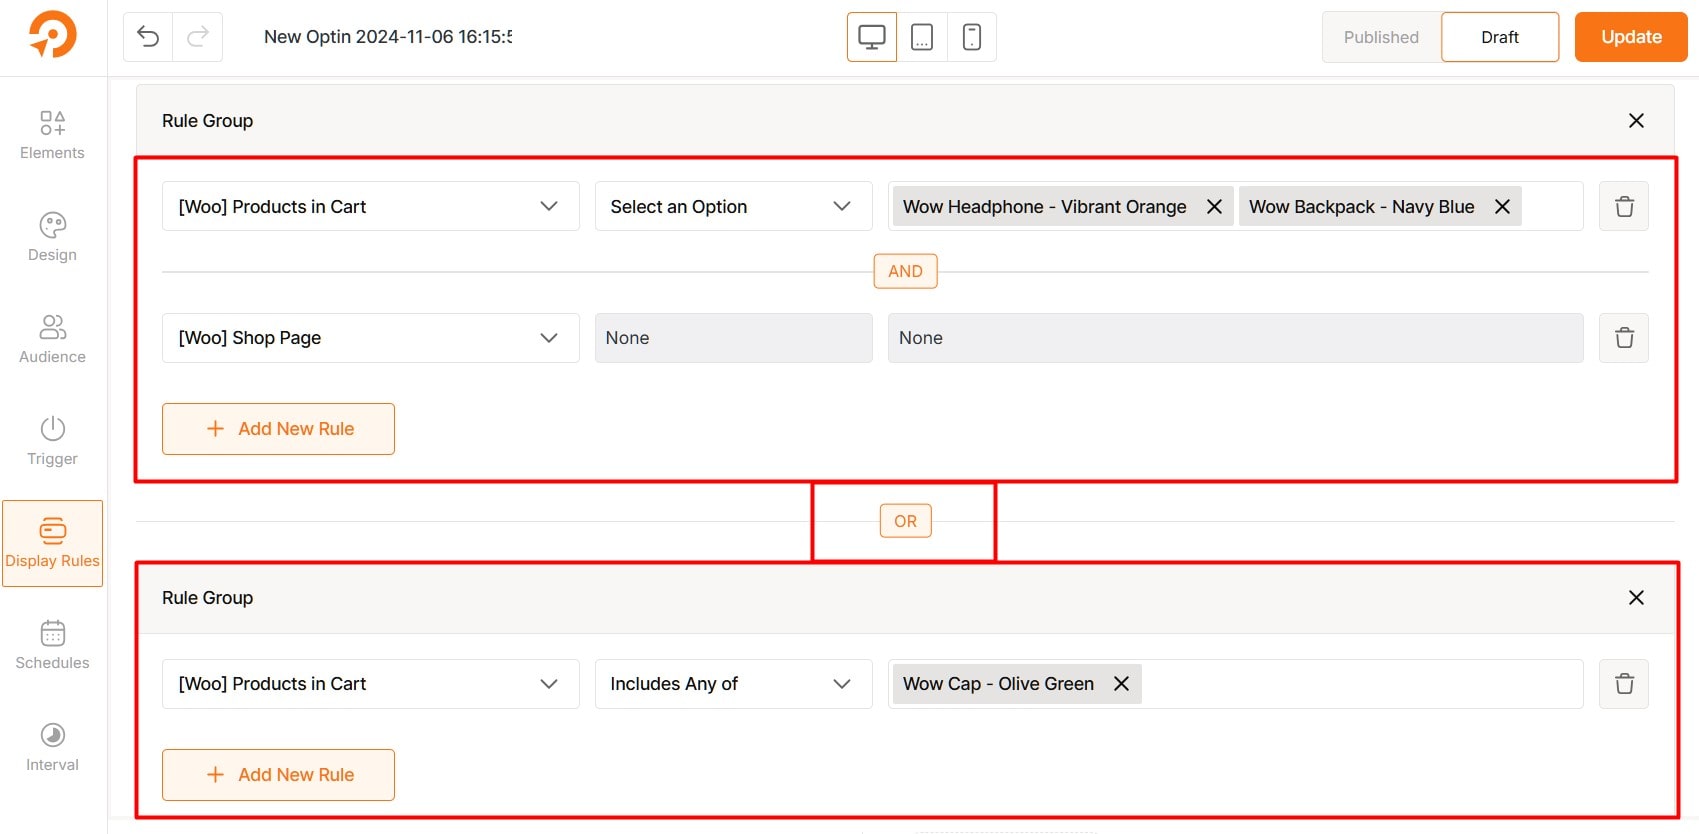
WowOptin also integrates with WooCommerce and Easy Digital Downloads (EDD) seamlessly. It lets you display opt-ins on product pages, cart pages, and more.
For more details, see:
You can also add multiple or grouped rules for more targeted placement. Experiment with different locations to determine which placement yields the best results for your audience.
Step 07: Schedule with Additional Settings
We’re almost done creating our perfect opt-in form! In this final section, we’ll cover two key tasks:
- Manage Schedule Settings
- Manage Interval Settings
The Schedule Section helps you easily schedule your opt-in form.
Select Timezone
- UTC (Default): Standard time for consistency across locations.
- Custom: Choose a timezone that matches your audience location
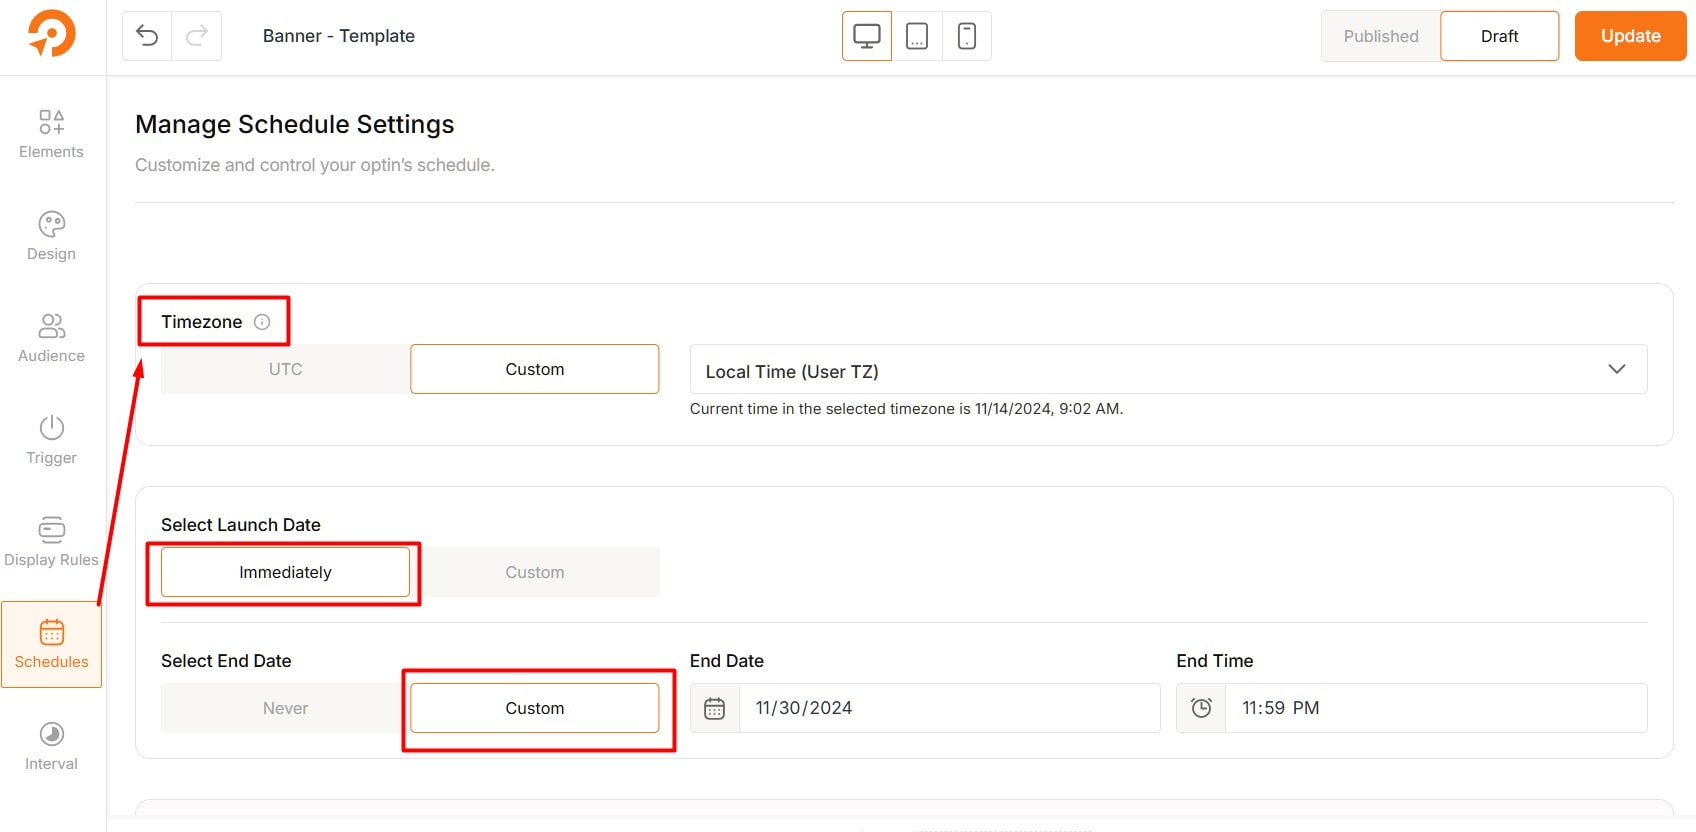
Select a Time Frame
- Start Time:
- Immediately: Start as soon as you set it.
- Custom: Pick a specific start date and time
- End Time:
- Never: Runs indefinitely until stopped.
- Custom: Set an end date and time for limited-time campaigns.
Set Recurring Days and Time
- Everyday: The opt-in will appear every day.
- Weekdays: Select specific days and times for the opt-in to appear.
The Interval Section allows you to control the frequency of your opt-in displays.
Show On
Control how often the opt-in reappears for visitors:
- Every Page Load: The opt-in shows each time a page is loaded.
- Display Once Every: Choose how often it shows (e.g., every few hours or days).
Why it’s useful: Prevents overwhelming visitors while keeping the opt-in visible.
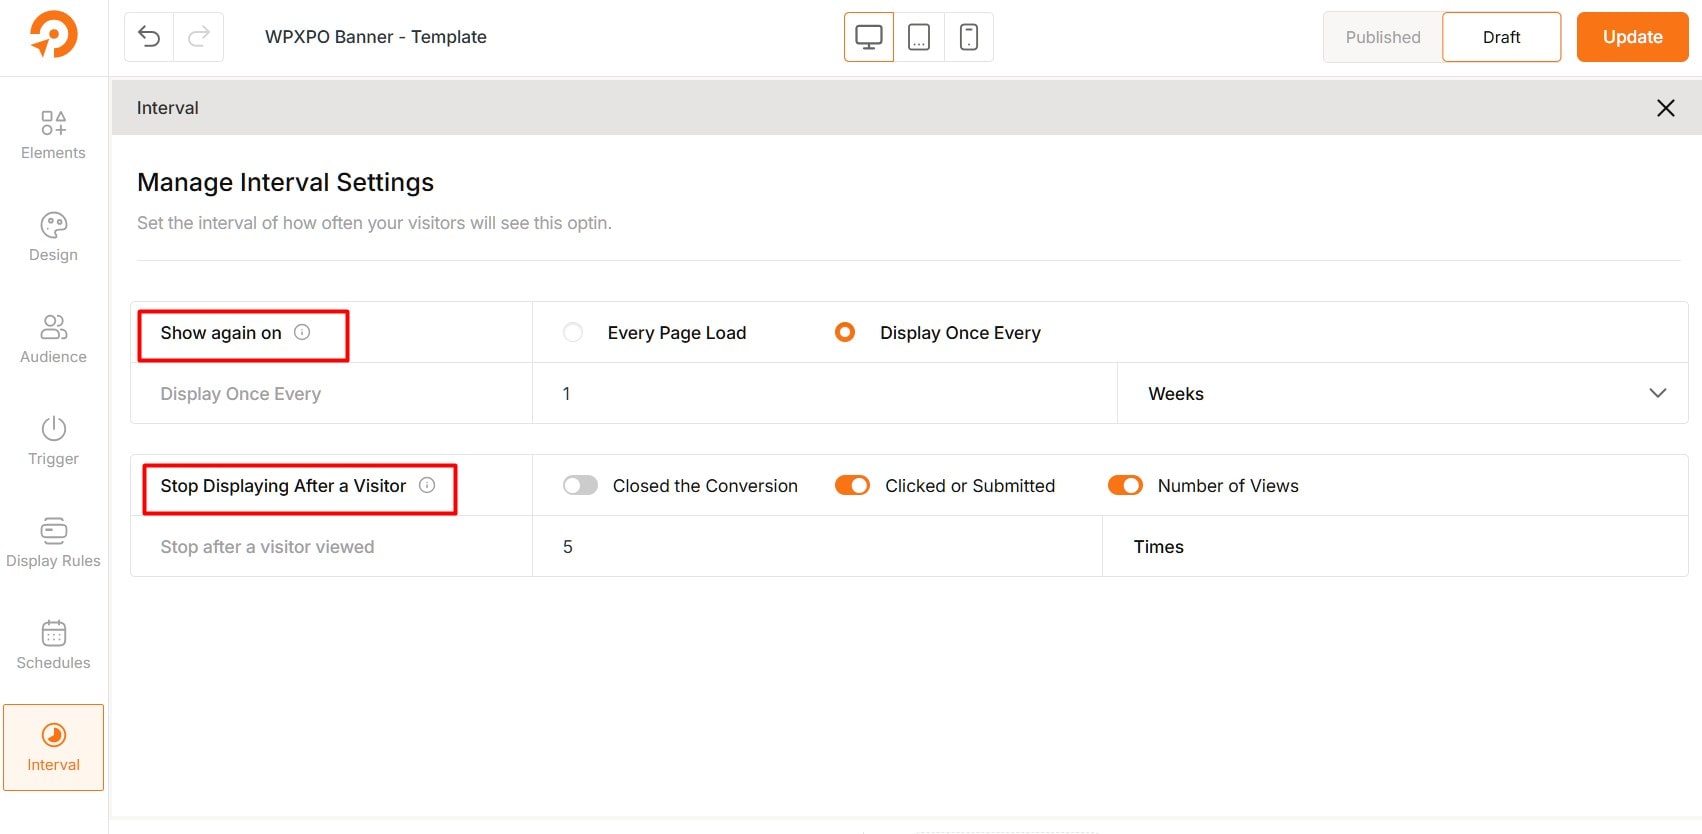
Stop Displaying After a Visitor
Set actions that stop the opt-in from showing:
- Closed the Opt-in: Stops after the visitor closes it.
- Clicked or Submitted: Stops after the visitor interacts with it.
- Number of Views: Limit how many times a visitor sees the opt-in.
Tip: Use the Number of Views option to prevent showing the opt-in too often. You’re all set with your personalized opt-in form! Keep testing and optimizing it to maximize lead generation.
What Are the Benefits of Creating Opt-in Forms?
Opt-in forms are a powerful way to grow email subscribers, lower bounce rates, and deliver personalized experiences. Here are the key benefits that make them a must-have for businesses:
Generate Qualified Leads
Opt-in forms are one of the most effective tools for gathering high-quality leads. By capturing contact details from interested users, you ensure your marketing efforts target a genuinely engaged audience.
Engage Your Audience
Keep your audience informed and connected with content they care about. Opt-in forms enable you to share updates, offers, or insights directly to foster stronger engagement.
Build Trust and Credibility
Offering valuable resources, such as ebooks, discounts, or exclusive content, through opt-in forms shows your audience you care about their needs. This helps you establish credibility and build trust in your brand.
Create a Targeted Email List
An email list is a critical asset for any business. Opt-in forms allow you to build a focused audience of users who are genuinely interested in your products or services. This helps lead to more effective marketing campaigns.
Enable Retargeting and Remarketing
The data collected via opt-in forms can power targeted remarketing efforts. For example, you can remind users about abandoned carts, share personalized offers, or re-engage them with content they’ve shown interest in.
Personalize Your Marketing
Use opt-in forms to gather insights about your audience, such as their preferences, location, or interests. With this data, you can deliver tailored messages that resonate, improving engagement and boosting conversions.
Reduce Marketing Costs
Opt-in forms help you grow your audience organically and eliminate the need for costly ads. By building a direct line of communication with your leads, you gain a long-term and cost-effective marketing channel.
Tips to Follow for Maximum Form Submissions
You need to optimize your opt-in form to maximize submissions. Here are some expert tips to help you achieve this:
✅ Offer a Clear Value: Clearly explain what users will gain by signing up.
✅ Keep it Simple: Request only essential information to reduce friction.
✅ Make It Attractive: Use an attractive design to catch attention.
✅ Use Compelling CTA: Your CTA should be clear and action-driven.
✅ Mobile-Friendly: Ensure the form works well on mobile devices.
✅ Add Social Proof: Show how many people have subscribed or highlight testimonials to build trust.
✅ Test and Improve: Experiment with design, wording, and placement to maximize sign-ups.
Wrapping Up!
Creating opt-in forms in WordPress is not just a technical task—it’s an opportunity to connect with your audience and build lasting relationships.
By following the steps outlined and leveraging tools like WowOptin, you can streamline the process of designing high-converting forms.
The goal is to lay the foundation for higher conversions, stronger customer loyalty, and a more effective email marketing strategy.
Start crafting opt-in forms that truly make a difference for your business!
FAQs about Creating Opt-In Forms in WordPress
Here are some common FAQs people have about creating opt-in forms in WordPress:
1. What is an example of opt-out wording?
“If you no longer wish to receive communications from us, please click the ‘unsubscribe’ link at the bottom of this email.”
2. What is an example of an opt-in consent statement?
“By checking this box, you agree to receive email updates, newsletters, and special offers from WPXPO. You can unsubscribe at any time via the link in our emails.”
3. What are the rules for opt-in?
– Users must give explicit consent before receiving communications.
– Consent must be freely given, specific, informed, and unambiguous.
– nclude clear opt-in checkboxes (unchecked by default).
– Provide transparency about data usage and privacy.
– Comply with regulations like GDPR, CAN-SPAM, or CASL.
– Allow users to opt-out easily at any time.
4. What is the difference between opt-in and opt-out?
Opt-in: Users actively consent to receive communications, usually by checking a box or signing up.
Opt-out: Users are automatically included unless they choose to unsubscribe or decline participation.
Opt-in is generally preferred for compliance and ethical marketing practices.
