This guide will walk you through the steps to integrate WowOptin with Mailchimp and allow you to effortlessly connect your opt-in forms and store contacts for powerful email marketing campaigns.
Follow these four (04) simple steps to Integrate WowOptin with Mailchimp:
#1. Generate Your Mailchimp API Key
To start the set up, you’ll need the API key first. Here’s how to get it:
Note: Only users with Manager permissions can generate an API key.
- Log in to your Mailchimp account.
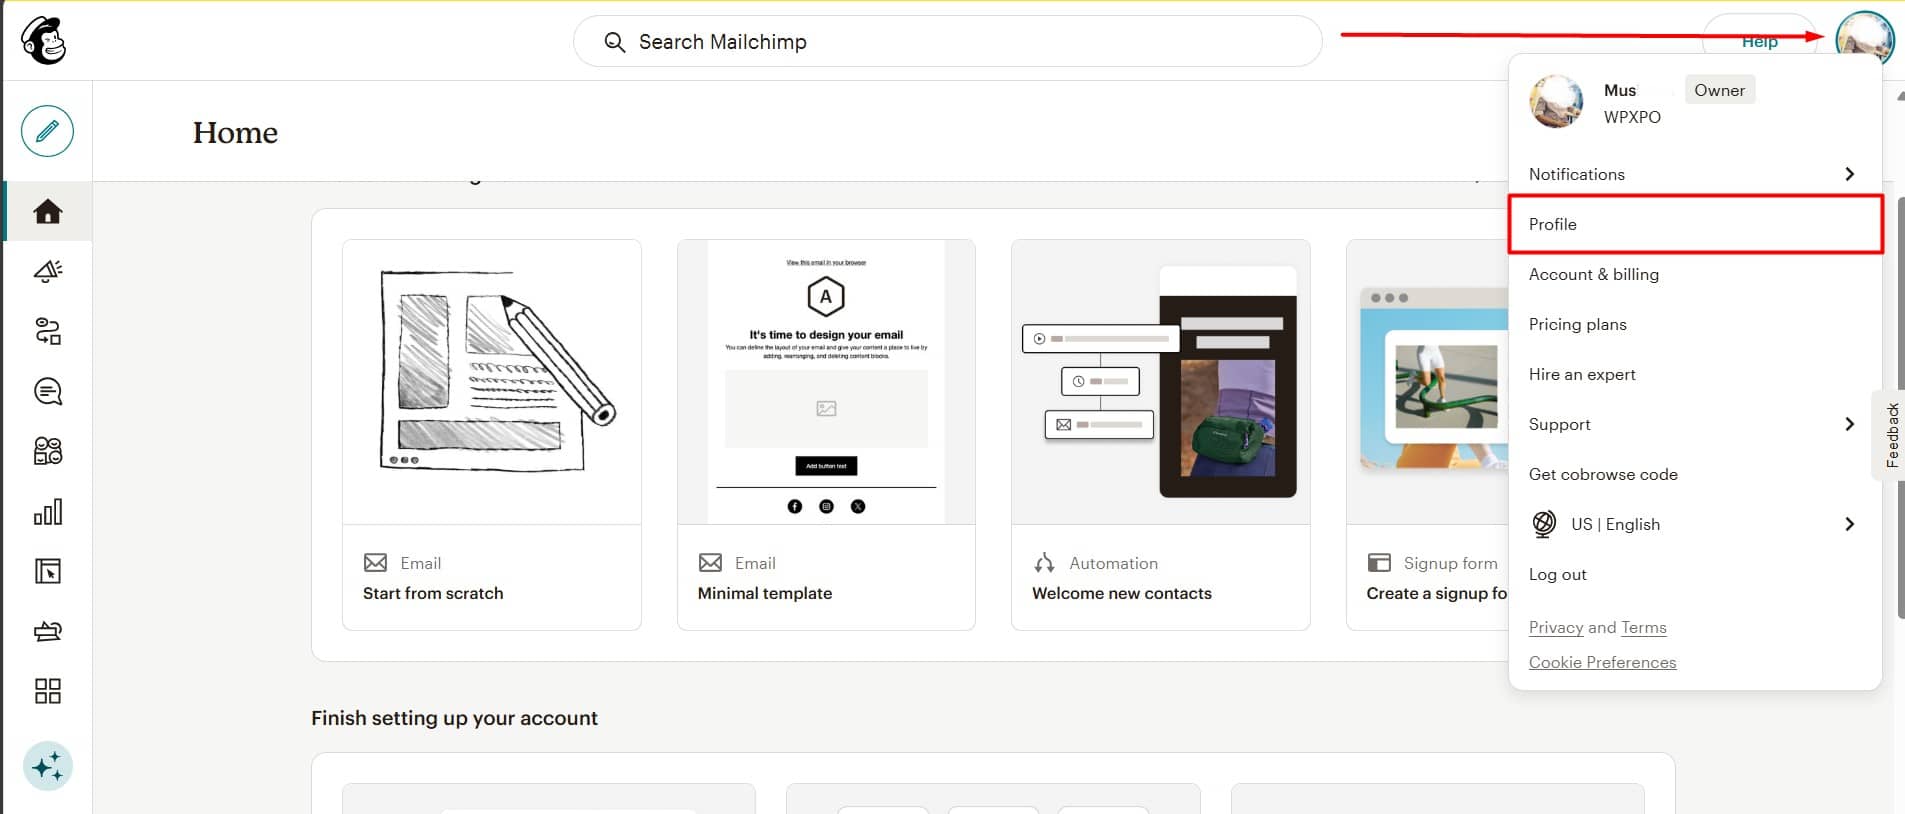
- Click on your profile icon and select Profile.
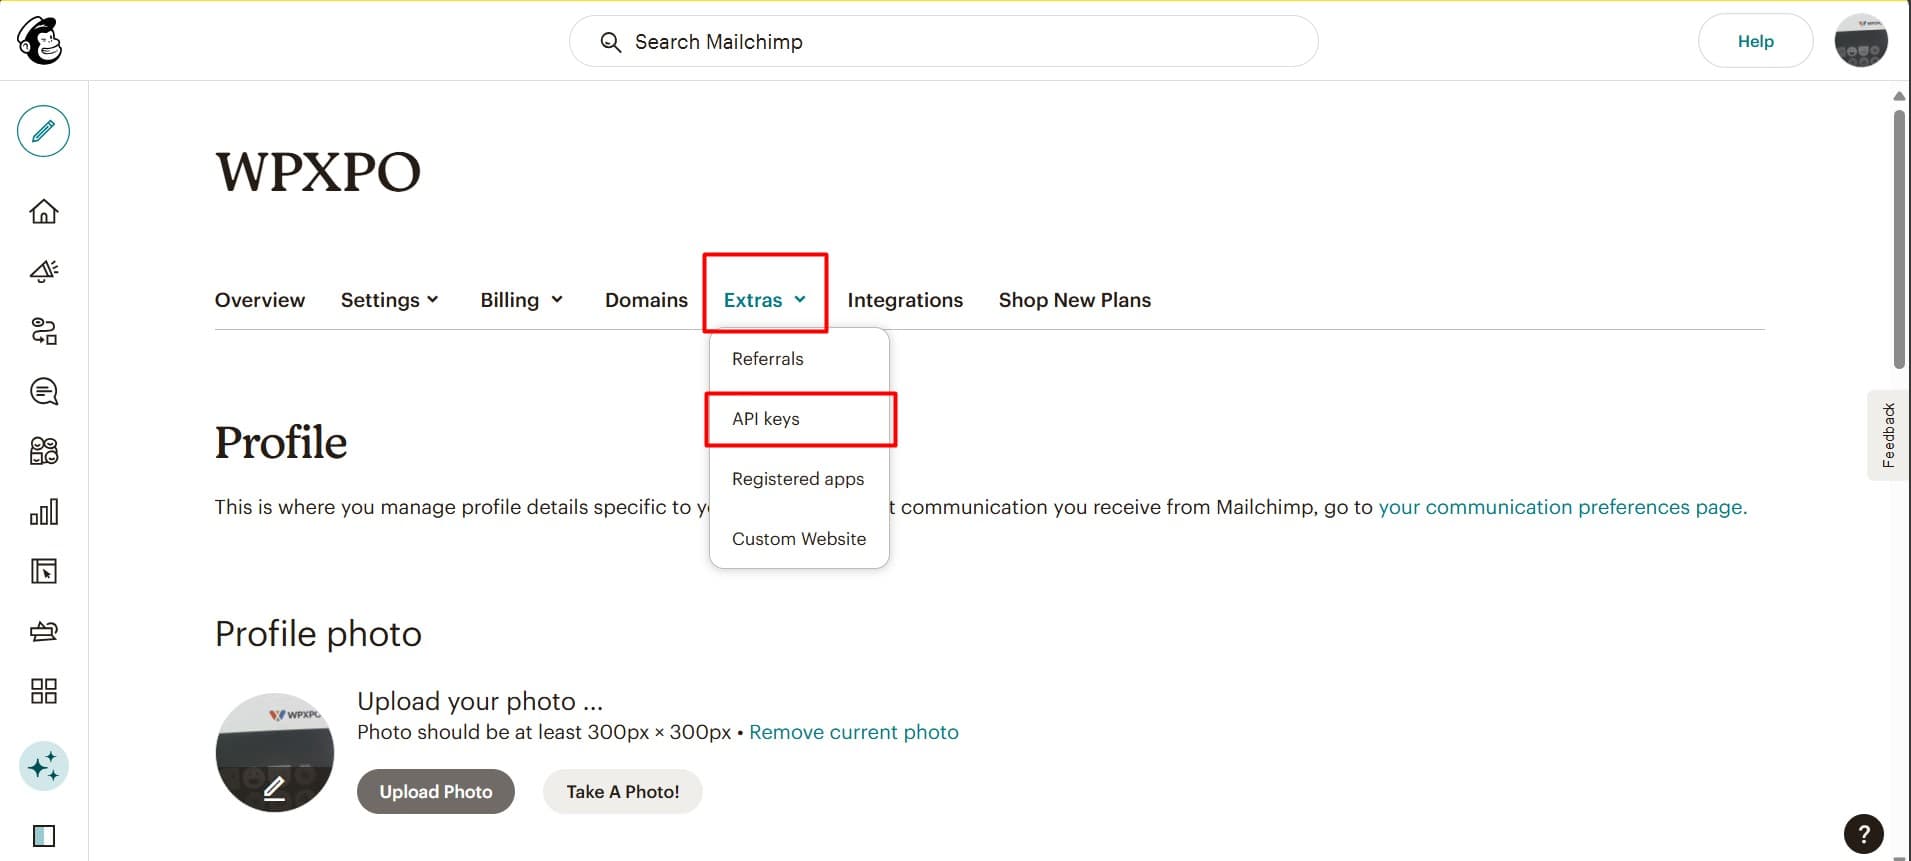
- Go to the Extras menu and choose API Keys.
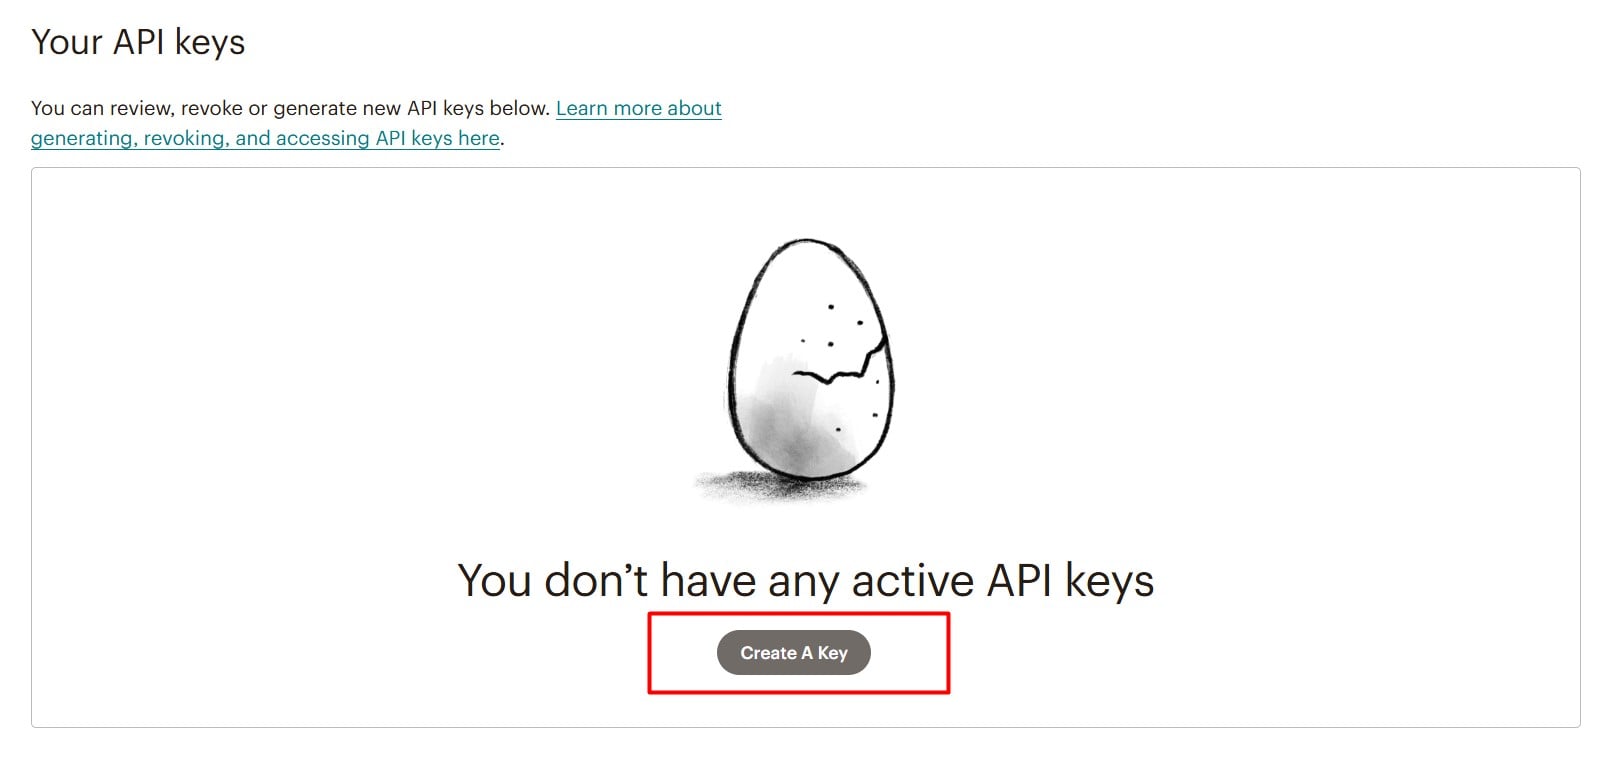
- Scroll down and click the Create A Key button.
- Assign a name to your API key.
- Read and follow the instructions provided.
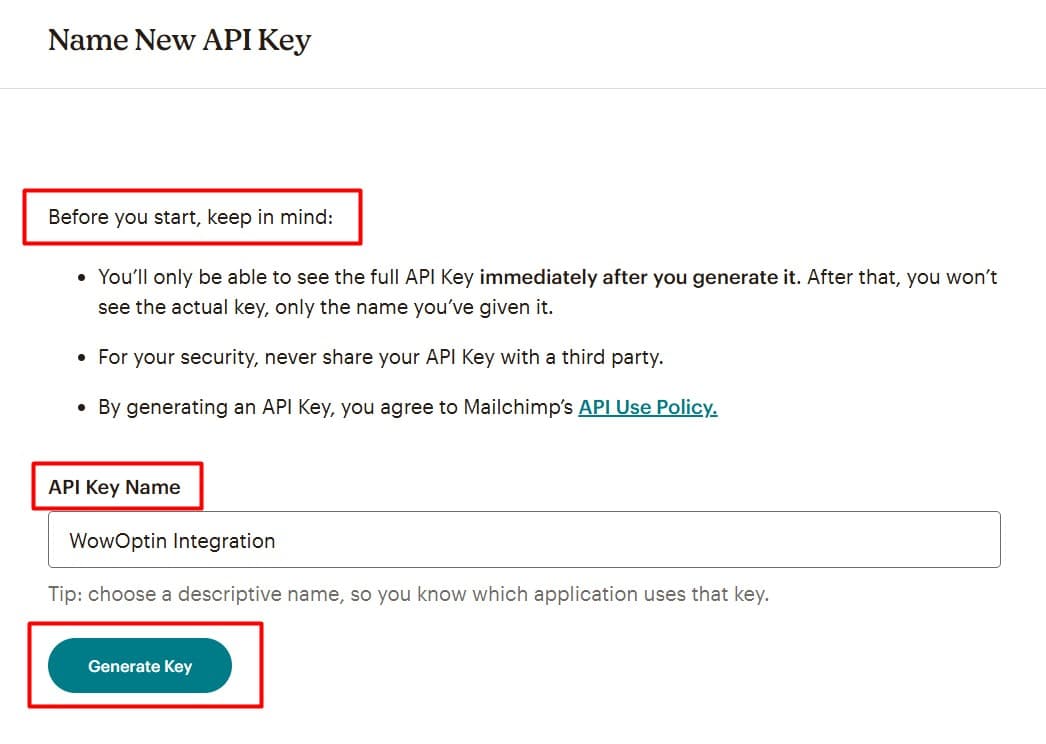
Important: Save the key securely after generation. You won’t see or copy the full key again. Only the name and first 4 digits will be visible. If you lose the key, generate a new one and update the connected integrations.
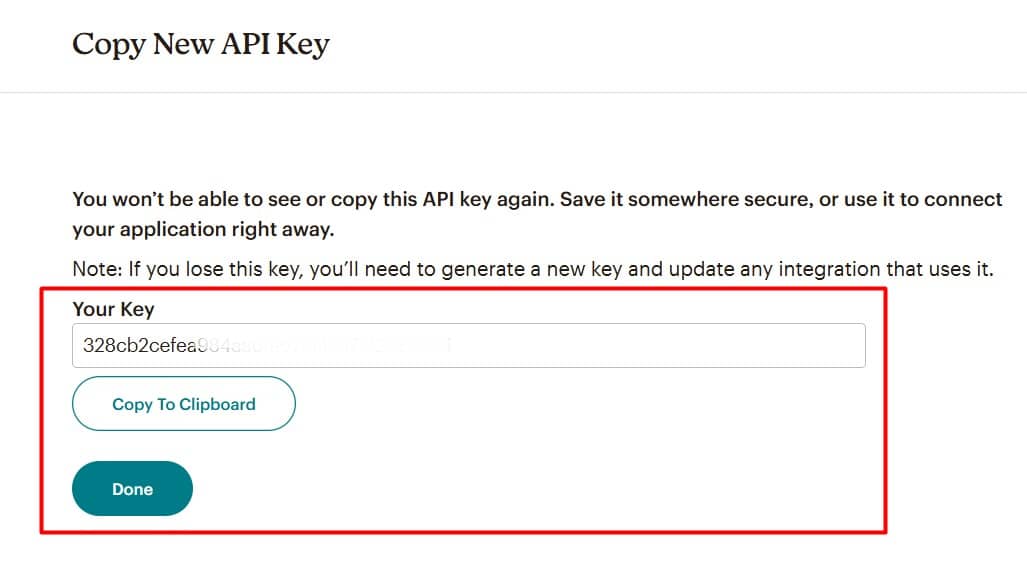
- Click the Generate Key button.
- Click Copy Key to Clipboard.
- If everything seems good, click Done.
#2. Connect Mailchimp to WowOptin
To connect Mailchimp with WowOptin, follow these steps:
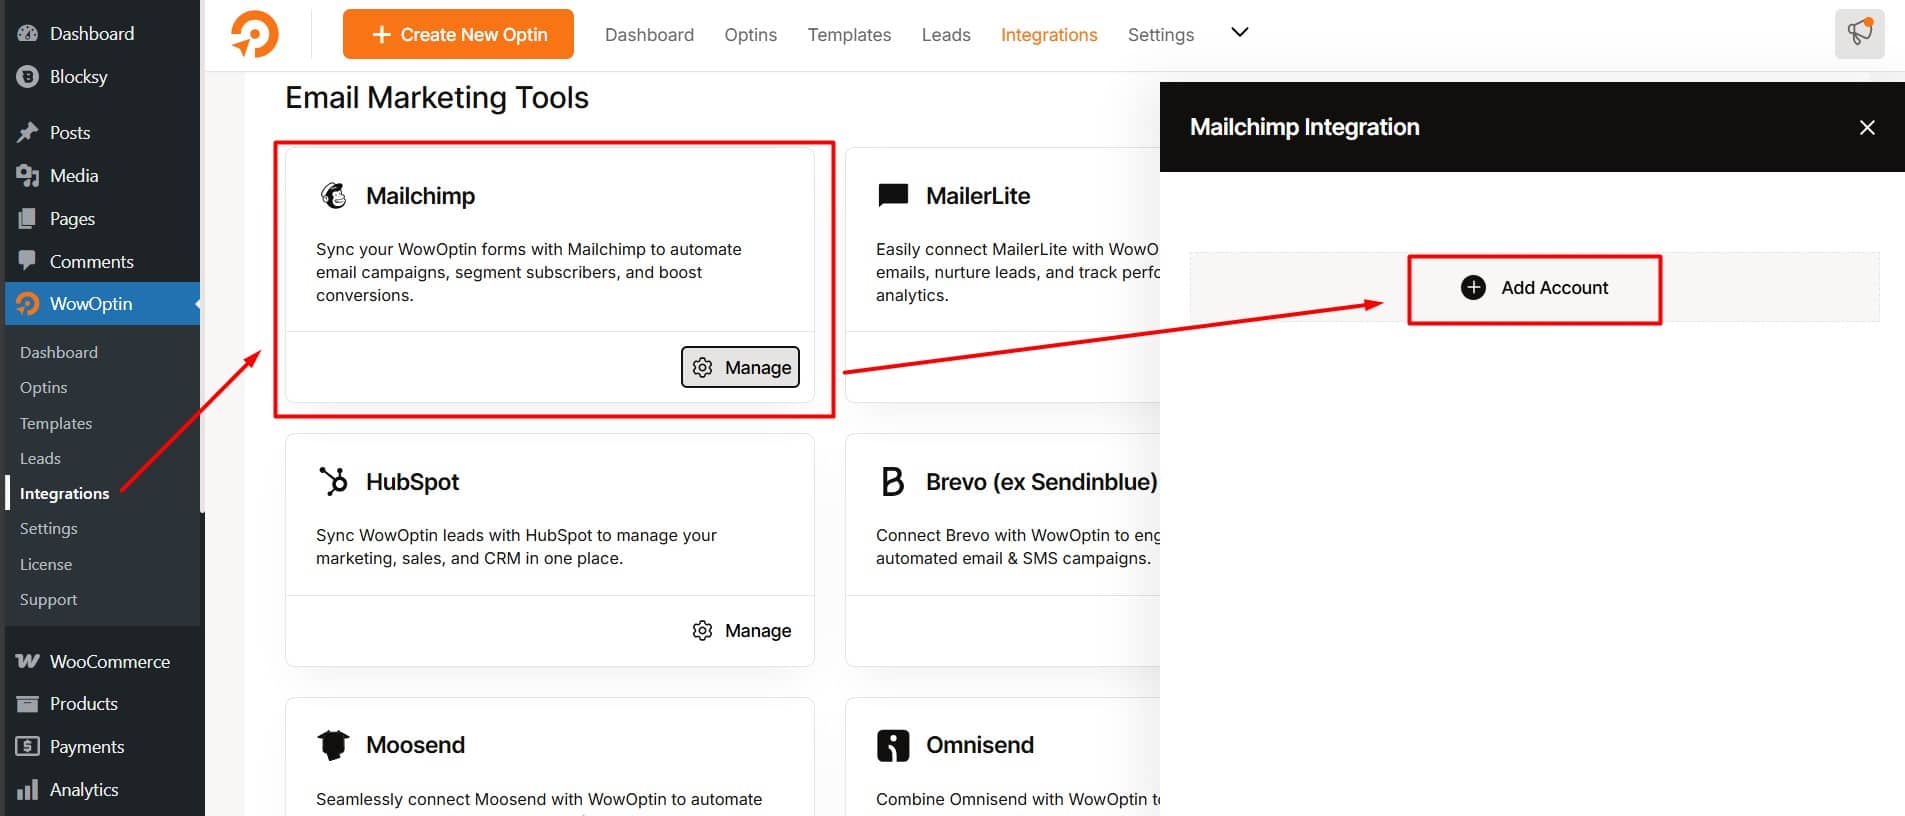
- Go to the Integration page in WowOptin.
- Search for and select Mailchimp from the list.
- Click Manage and then Add Account.
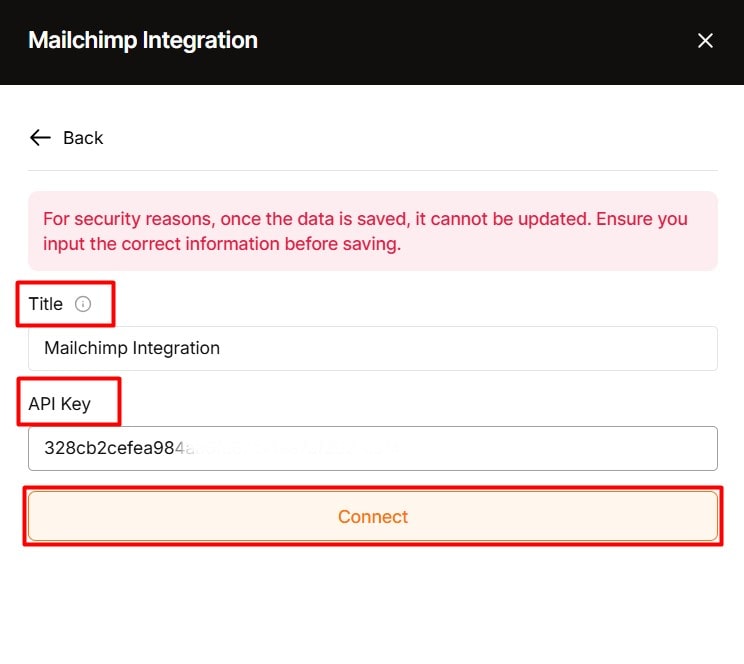
- Add a title for the account.
- Paste the Mailchimp API key you copied earlier.
- Click Connect.
#3. Integrate Your Form with Mailchimp
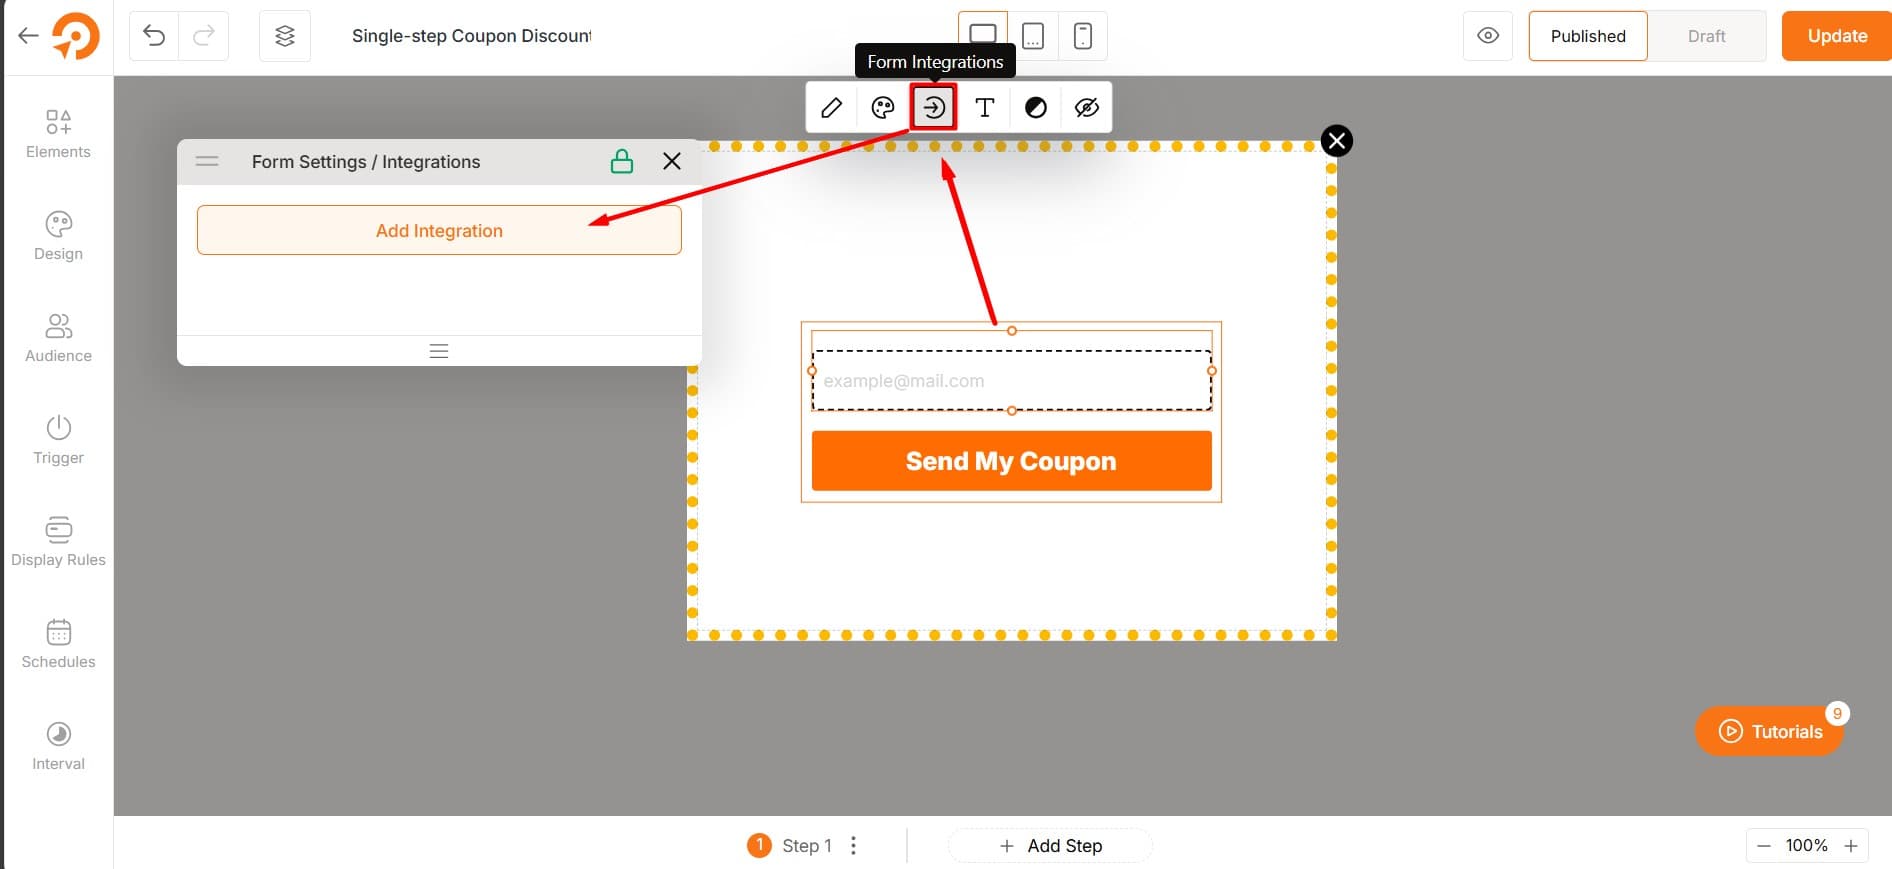
Start by selecting the optin form from the WowOptin builder and then:
- From the top sticky bar, click the Form Integration Icon.
- Click Add Integration.
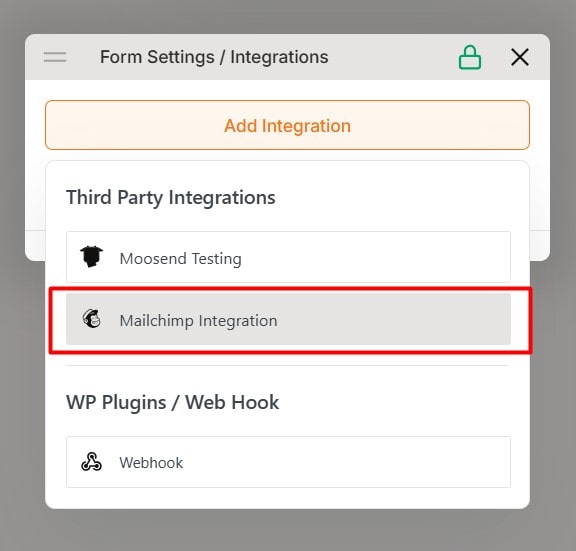
- Choose the Mailchimp account you just created.
#4. Configure the Integration
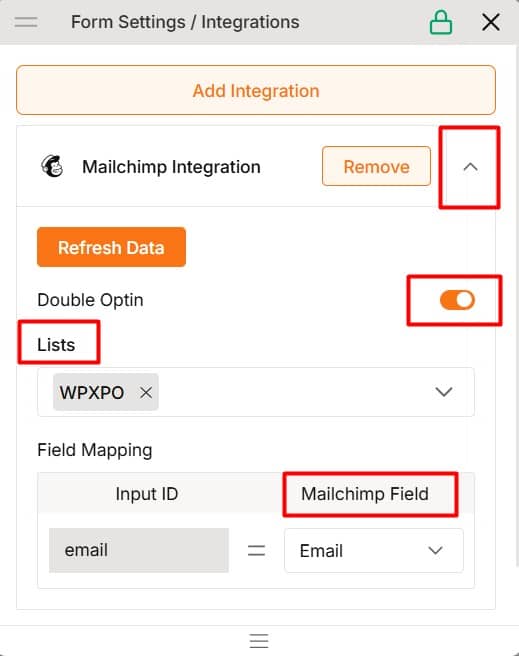
Finally, configure the integration. To do this:
- Click the dropdown icon.
- Select the default audience list (created automatically when you sign up for Mailchimp).
- In the Field Mapping section, map the relevant fields, such as the email field for the email input ID.
You can modify or add new fields to the audience list. Go to Audience → All Contacts → Settings → Edit Audience Fields → Create a new field.
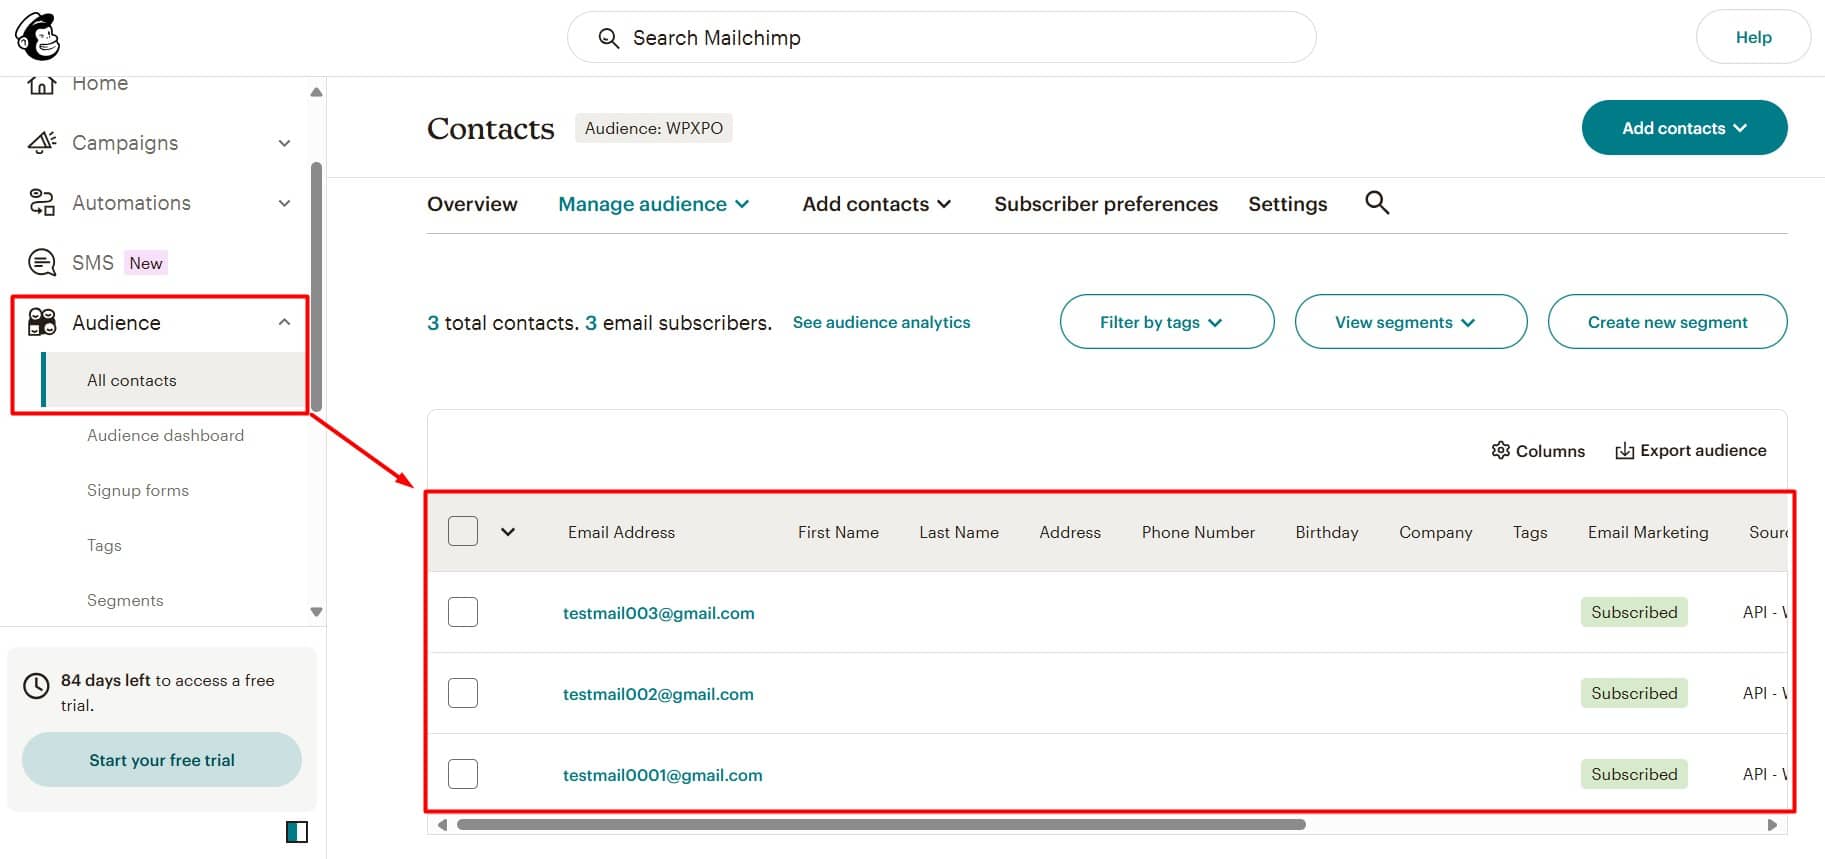
⭐⭐⭐ If you follow these steps correctly, you’ll be able to successfully save your users’ data in the All Contacts section of your Mailchimp Audience.
