In the Display Rules section, you can set and configure conditions to control where your optin appears on your website. By default, a Rule Group box appears, where you can define these conditions.
Let’s look at these conditions to help you personalize your optin for visitors!
Set Up a Rule Group
A Rule Group lets you set conditions for displaying your optin. It acts as a “container” for multiple rules. Each rule follows a simple three‑part recipe: Target, Action, Scope.
The Target tells where the camaign should appears in yoursite, The Action declares whether the popup should appear or stay hidden, and the Scope takes value for the targeted item.
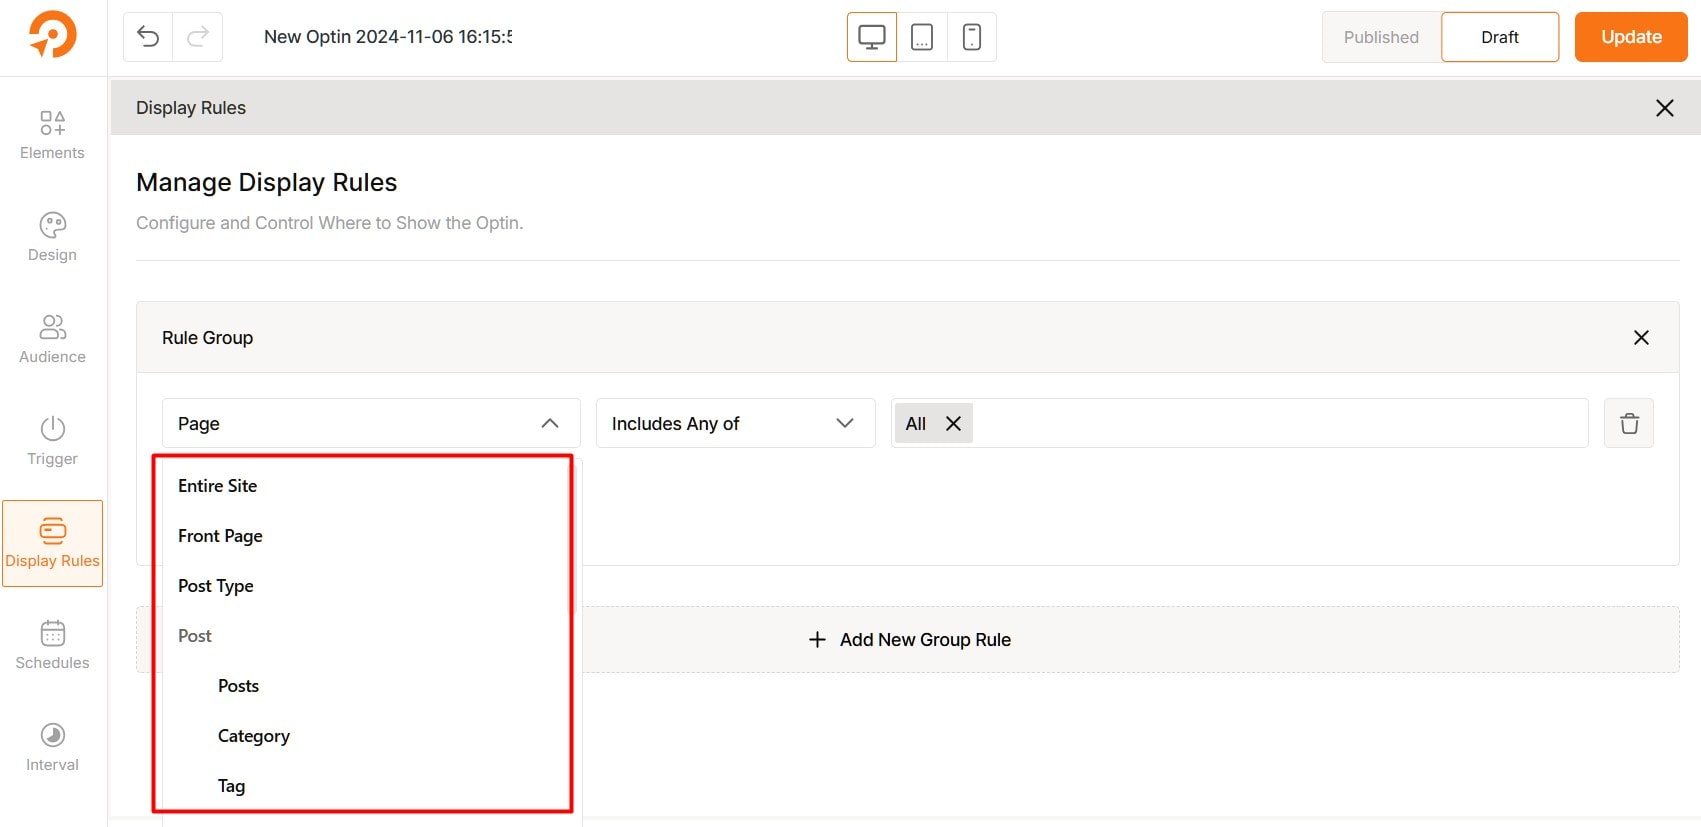
Target: This field lets you choose where your optin appears, from the homepage to specific posts or pages.
Allowed values: Post Type, Posts, Post Category, Post Tag, Page, Author, Products in Cart, etc.
Action: Use this field to control how should your campaign appears or be hidden to visitors on your website.
Allowed values: Show or Hide
Scope: Enter or set the value to finish up the rule. “All” applies the rule to every item under that target, while “Specific” limits it to the exact items you select.
Allowed values: All, Specific
How to Use Display Rules in WowOptin?
There are four main categories for display rules and each category includes a bunch of display rules.
- General Rules
- Post Rules
- WooCommerce-Specific Rules
- EDD-Specific Rules
General Rules
These rules apply universally across your site, regardless of your theme or plugins. They offer flexible control over where your campaign appears. Below are the eight most commonly used general display rules:
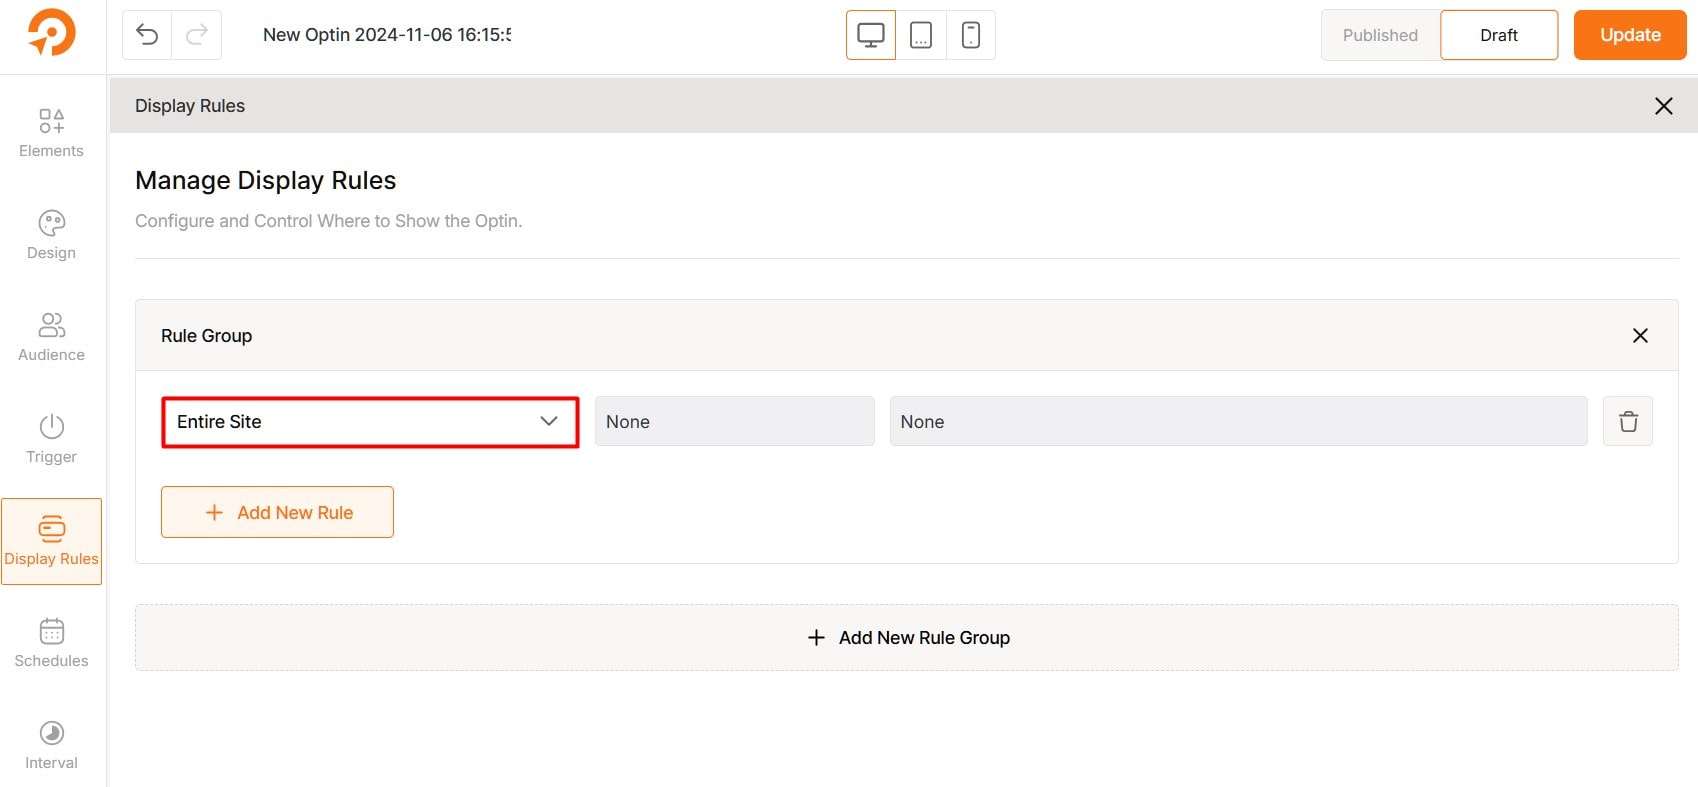
Entire Site
Show the campaign across the whole website.
Home Page
Display only on the homepage (usually your site’s root URL like example.com).
Page
Target specific individual pages, such as “About,” “Contact,” or a sales page.
To set this up, select the desired page from the options field. No further adjustments are needed.
Parent Page
Show on all child pages under a selected parent page. Ideal for grouping related content.
Author
Display content based on the author. Useful for showing different offers or CTAs based on who wrote the post.
Post Type
Show campaigns based on content type:
- Posts
- Pages
- Custom post types (like Products, Courses, Events, etc.)
Cookie
Check the dedicated page for cookie targeting details.
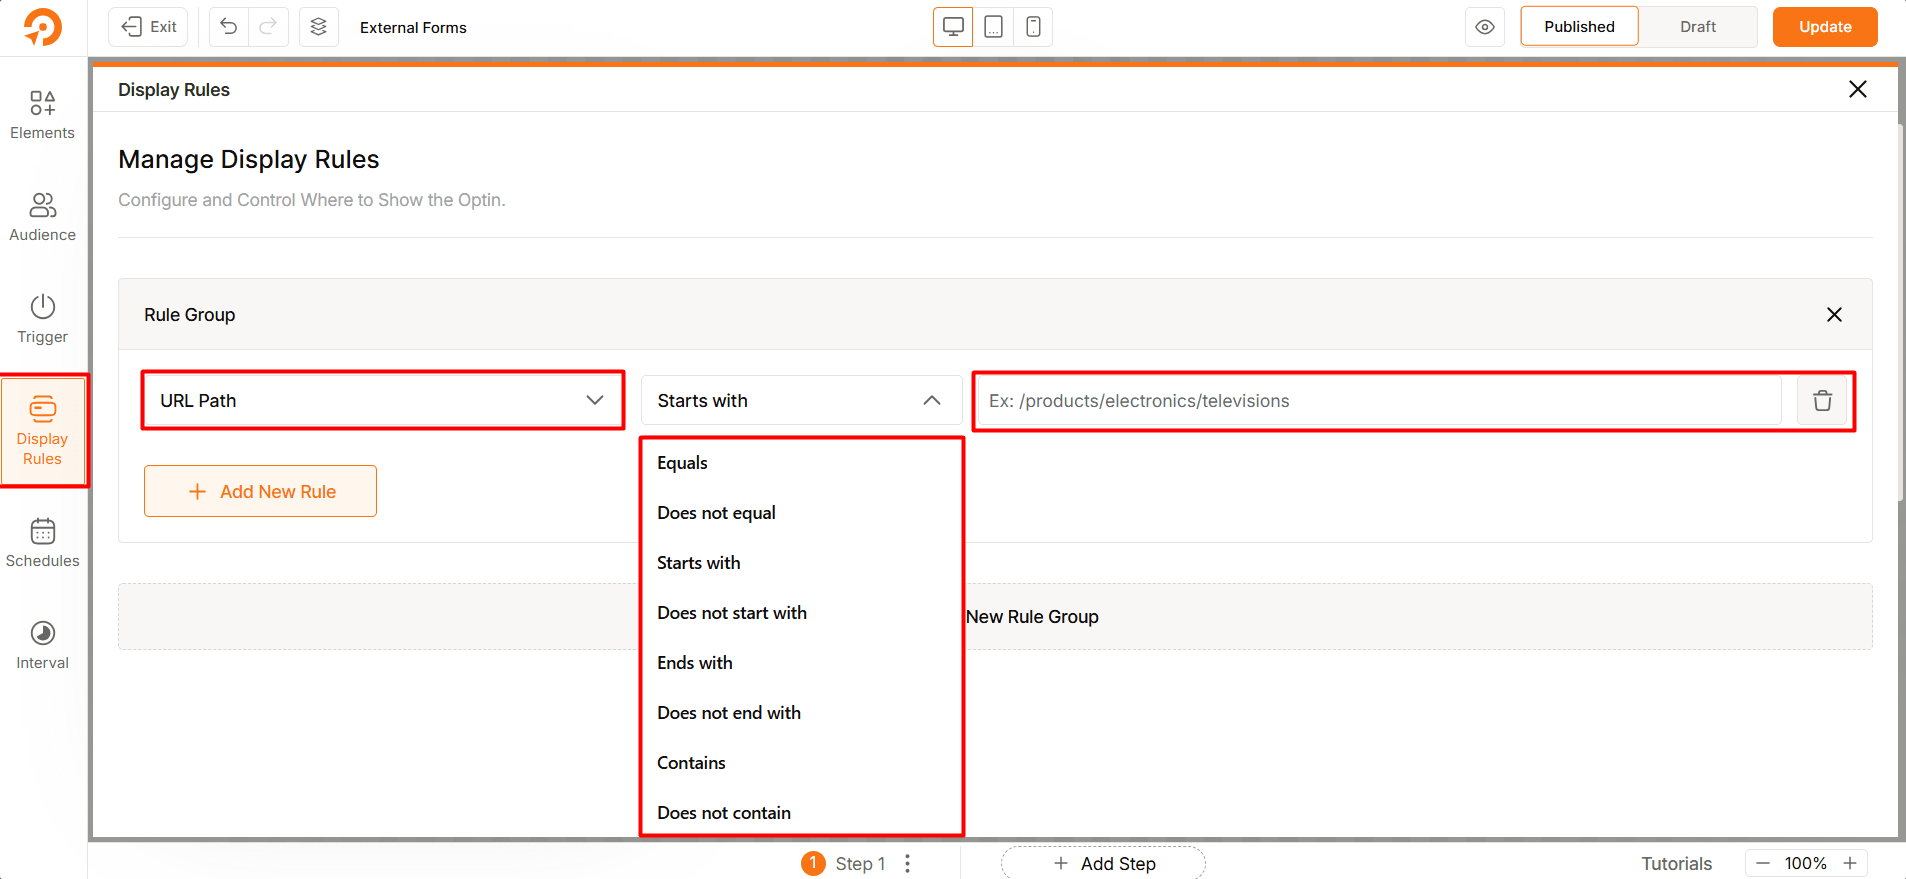
URL Path
The URL Path rule allows you to define conditions based on the structure of a webpage’s URL.
For example, if you want a banner, popup, or widget to show only on certain product pages, you can use the URL Path rule to target those pages.
Rule Options
When setting up a URL Path rule, you can use the following conditions:
- Equals: Matches the exact URL path.
Example:/products/electronics/televisions - Does not equal: Excludes a specific URL path.
Example: Rule applies to all pages except/contact. - Starts with: Matches any URL that begins with the specified path.
Example:/products/electronicswill apply to all pages under electronics, such as/products/electronics/phonesor/products/electronics/tv. - Does not start with: Excludes all URLs beginning with the given path.
Example: Exclude/blog/from a rule. - Ends with: Matches URLs ending with the specified string.
Example:/checkoutwill match any checkout page like/cart/checkout. - Does not end with: Excludes URLs ending with the specified string.
- Contains: Matches URLs containing the specified word or phrase.
Example:salewill match/products/summer-saleand/offers/sale-items. - Does not contain: Excludes URLs containing the specified text.
Example Scenario:
You want to show a promotional popup only on product pages under the electronics category.
Configuration:
- Rule Type: URL Path
- Condition: Starts with
- Value:
/products/electronics/
Result:
The popup will display on pages like:
/products/electronics/televisions/products/electronics/phones/products/electronics/laptops
But it will not display on:
/products/furniture/chairs/about-us/blog/new-launch
Custom URL Parameter
Trigger a campaign when the URL contains specific query parameters.
Example:
If the URL is example.com/?param1=value1¶m2=value2, you can set:Custom URL Parameter → Equal to → param1=value1¶m2=value2
This is great for UTM tracking, email campaigns, or segmented targeting.
Post-Based Display Rules
These rules allow you to control campaign visibility specifically within blog posts, based on various post-related attributes.
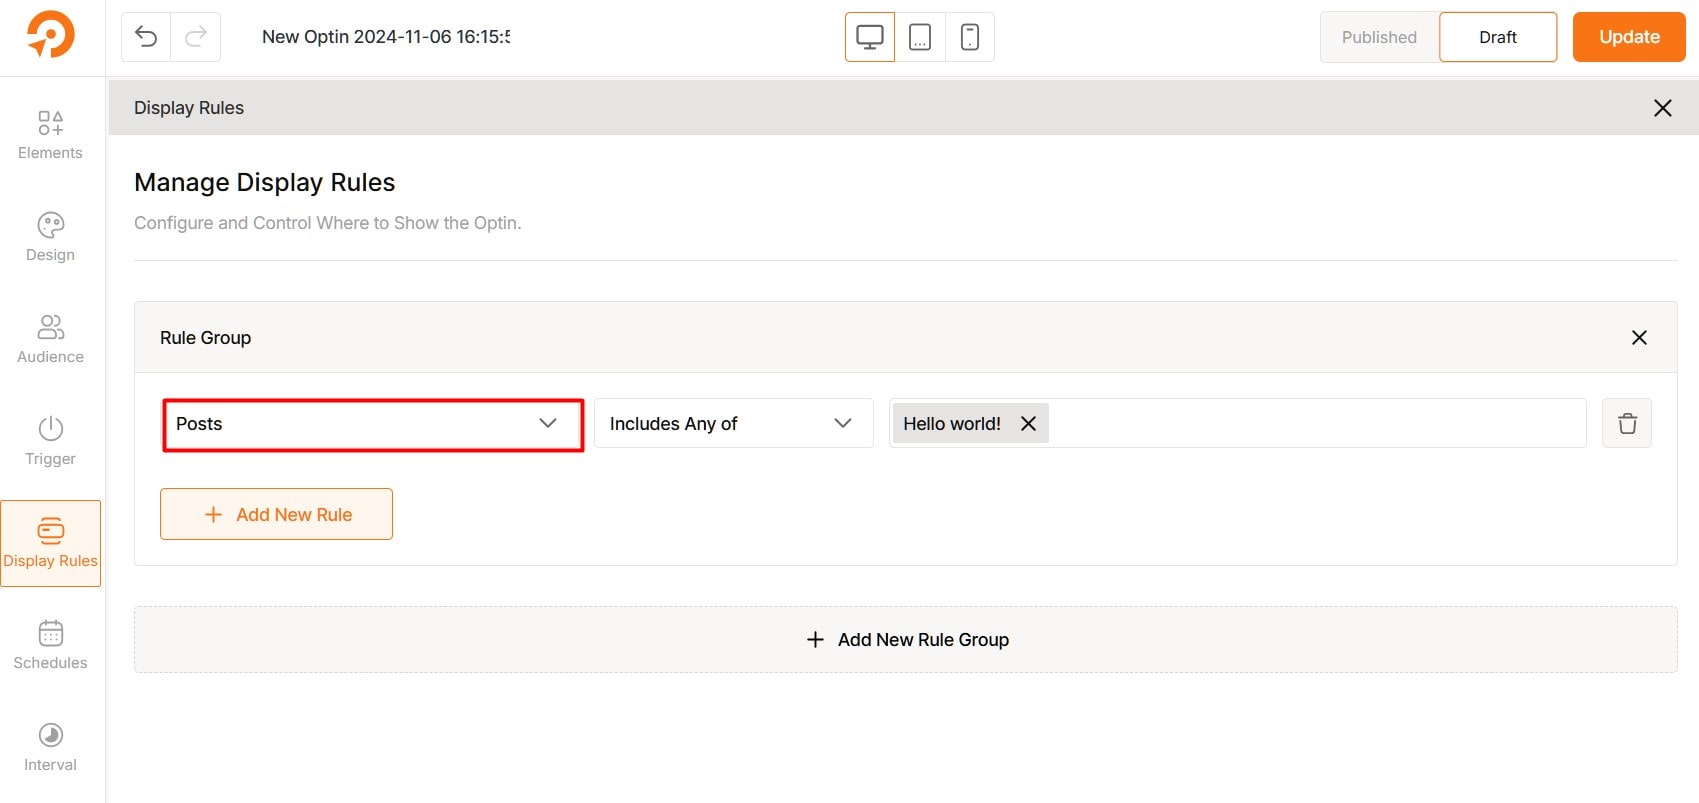
Posts
Show or hide the campaign for specific blog posts. You can target
- All blog posts
- Selected individual posts
Post Category
- Display the campaign based on the category assigned to the post.
Examples:- Show for all posts in the “Tutorials” category
- Hide for posts in the “News” or “Uncategorized” category
Post Tag
- Control visibility based on post tags.
Examples:- Show for posts tagged with “AI” or “Automation”
- Hide for posts tagged with “Outdated” or “Archived”
WooCommerce and EDD-Specific Rules
If you’re operating a WooCommerce or Easy Digital Downloads (EDD) store, you can apply dedicated rules for each platform. The rules are the same for both.
Make sure to apply WooCommerce rules to WooCommerce stores and EDD rules to EDD stores; otherwise, the setup will not work.
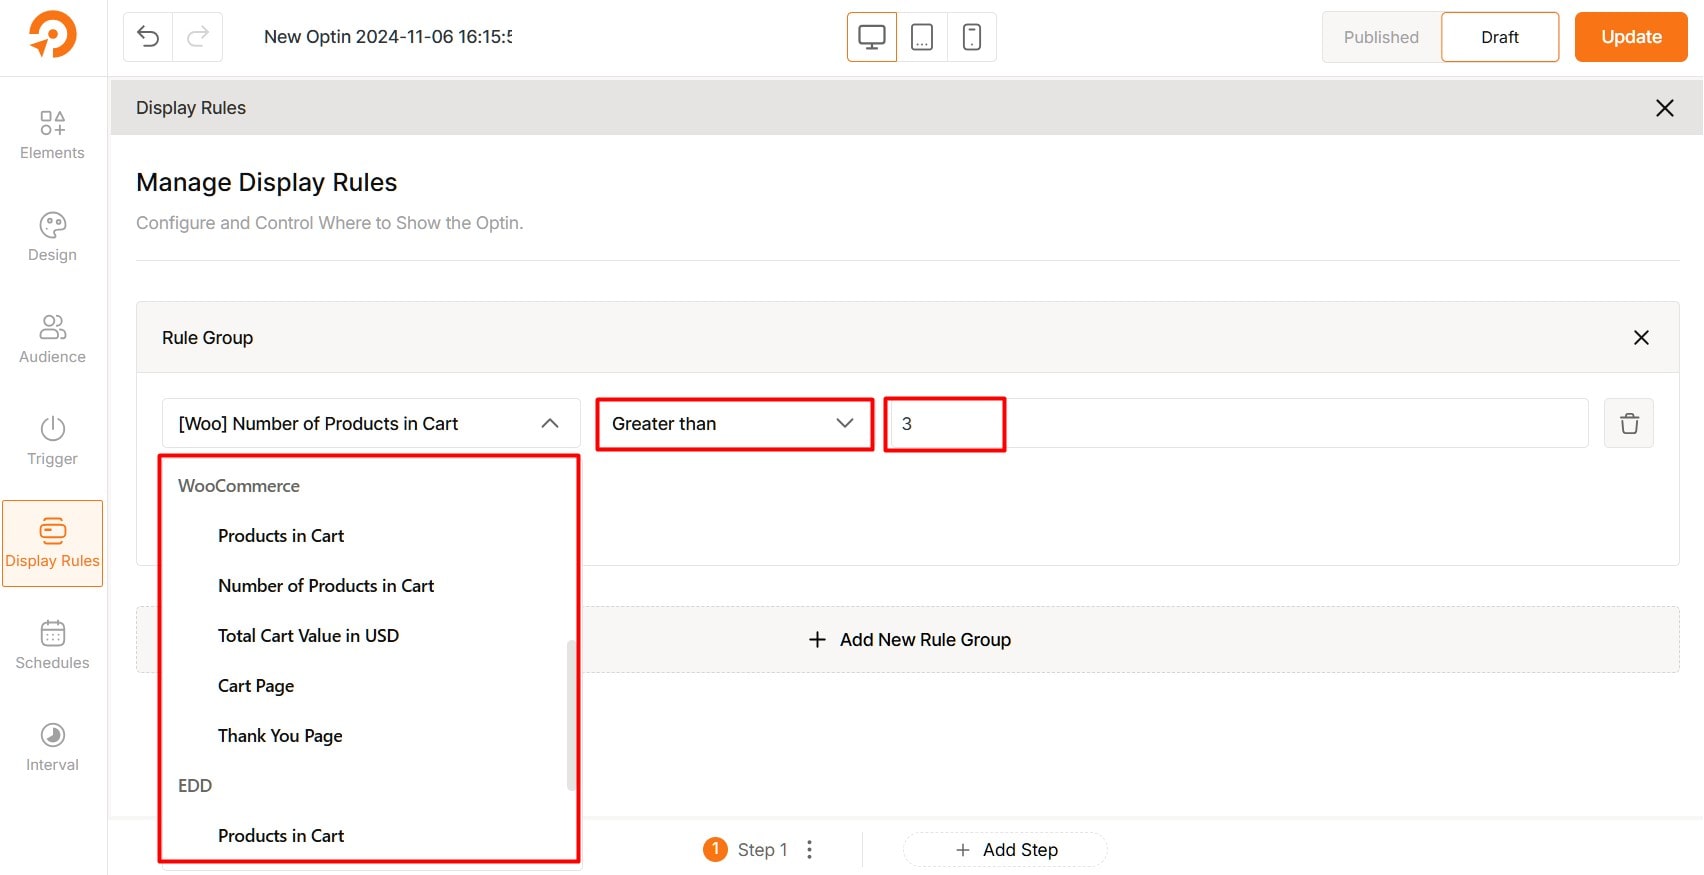
Each category currently includes 5 rules:
Products in Cart: Rules are triggered based on specific items added to the cart.
Number of Products in Cart: Triggered by the number of products in the cart.
Total Cart Value in USD: The rule applies based on the total cart value in USD.
Cart Page: Rules for displaying optins specifically on the cart page.
Thank You Page: Rules for displaying optins on the thank you page.
Add New Rule (Relation AND)
You can add multiple rules by selecting “+ Add New Rule” in a rule group. By default, rules are connected with an “AND” relation. This means that every rule within the group must be met for the optin to display.
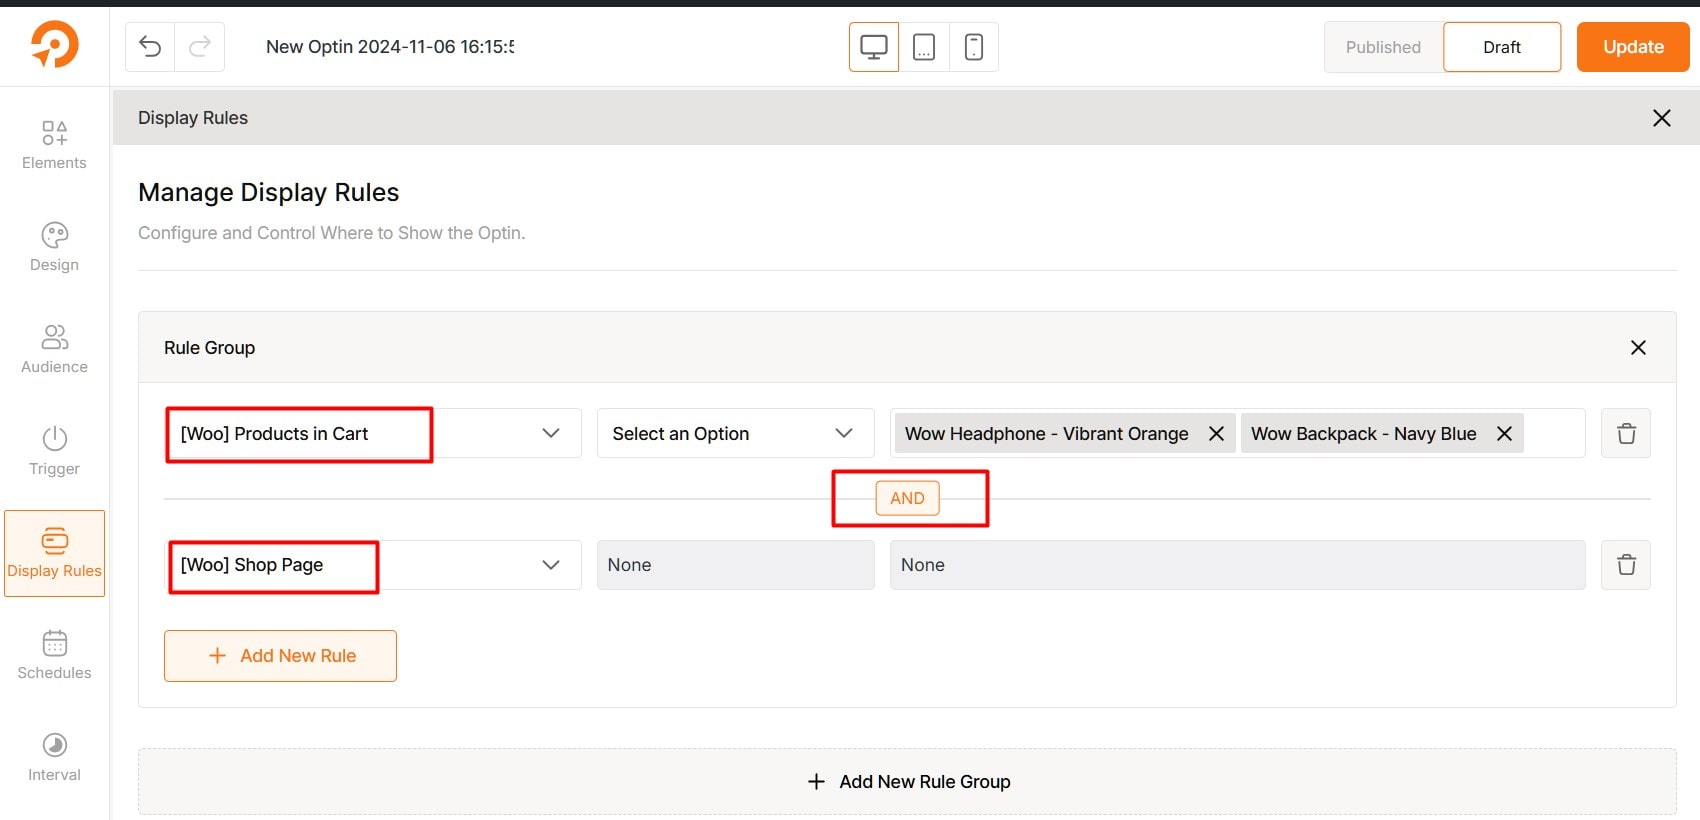
Example Setup:
Let’s say you want an optin to display only if a visitor meets both of the following rules:
- Rule 1: The visitor has added “Product A” and “Product B” to their cart.
- Rule 2: The visitor is on the shop page.
Since both rules are in the same rule group, they are connected with an “AND” relation.
This means the optin will only display if both conditions are met: (The visitor has both “Product A” and “Product B” in their cart and is viewing the shop page.)
If even one rule isn’t met, the optin won’t appear.
Add New Rule Group (Relation OR)
By default, rule groups are set with an “OR” relation. This means only one group of rules needs to be met for the optin to display.
This setup enables broader targeting, as any qualifying rule group activates the option.
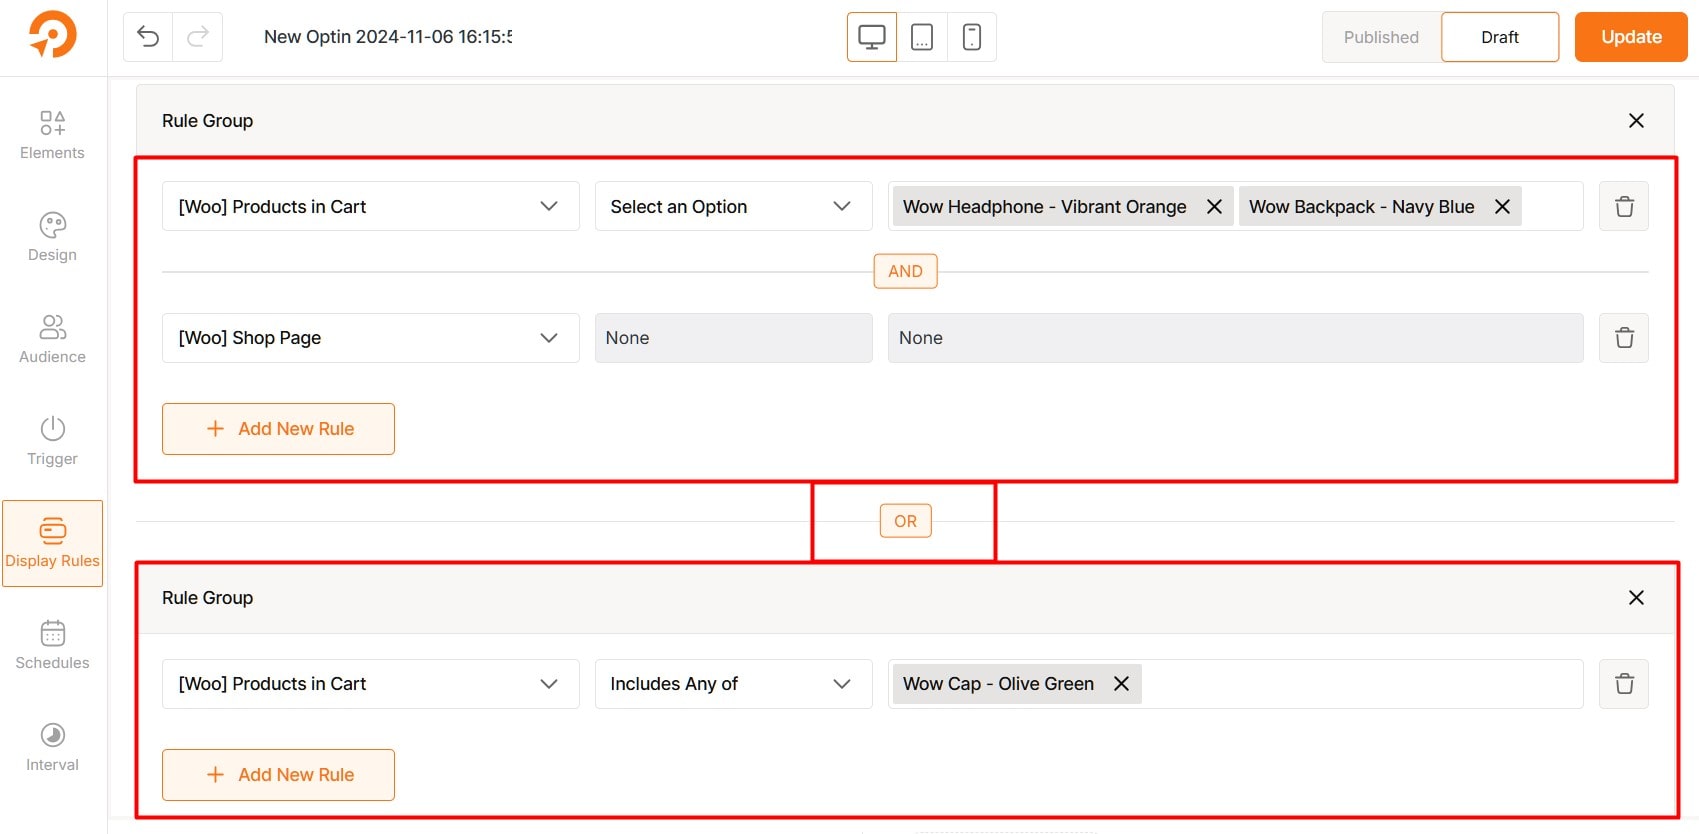
Example Setup:
Let’s say you want to show an optin offer for product C if a visitor meets any of the following:
- Rule Group 1:
- Rule 1: Customers add Products A and B to their cart.
- Rule 2: Customers then visit the shop page.
- (Both conditions must be true for Rule Group 1 to apply.)
- Rule Group 2:
- Rule 1: Customers view Product C’s page.
If either Rule Group 1 or Rule Group 2 is met, a special offer for Product C could be displayed to encourage the customer to add it to their cart.
Tips for Effective Display Rules
- Combine Rules for Precision: Target users more accurately by combining rules based on factors like pages visited, device type, or browsing history.
- Test Setups: Use draft mode to try different rule setups and find the most effective one.
- Layer Rules for Targeting: Stack multiple rules within groups to create specific audience segments and customize opt-ins for each.