The Countdown Element is a powerful tool for creating urgency and encouraging user action. Whether you’re running a limited-time offer, launching a product, or counting down to an event, this element offers various customization options to fit your needs.
How to Use Countdown Element
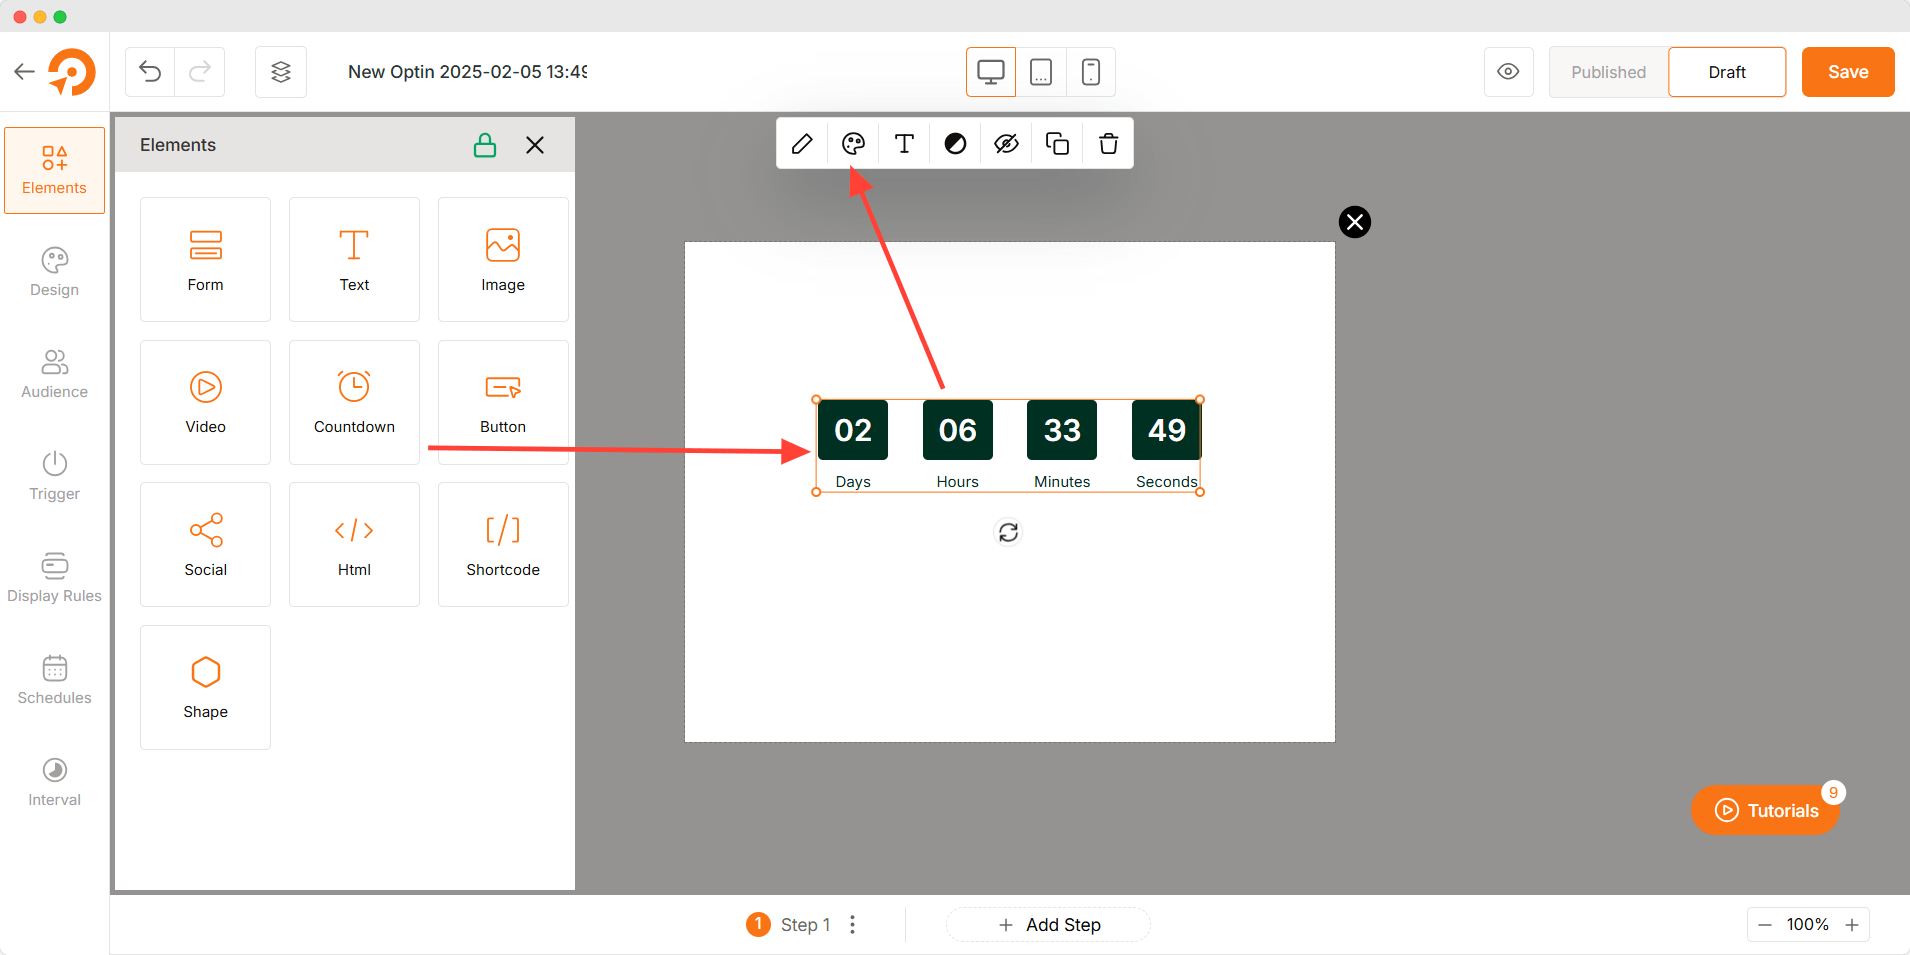
Here’s how you can start customizing the Countdown element:
- Drag and drop the Countdown Element into the canvas.
- Choose a countdown type (Static or Evergreen) and configure its settings.
- Customize the display, styles, and typography to match your design.
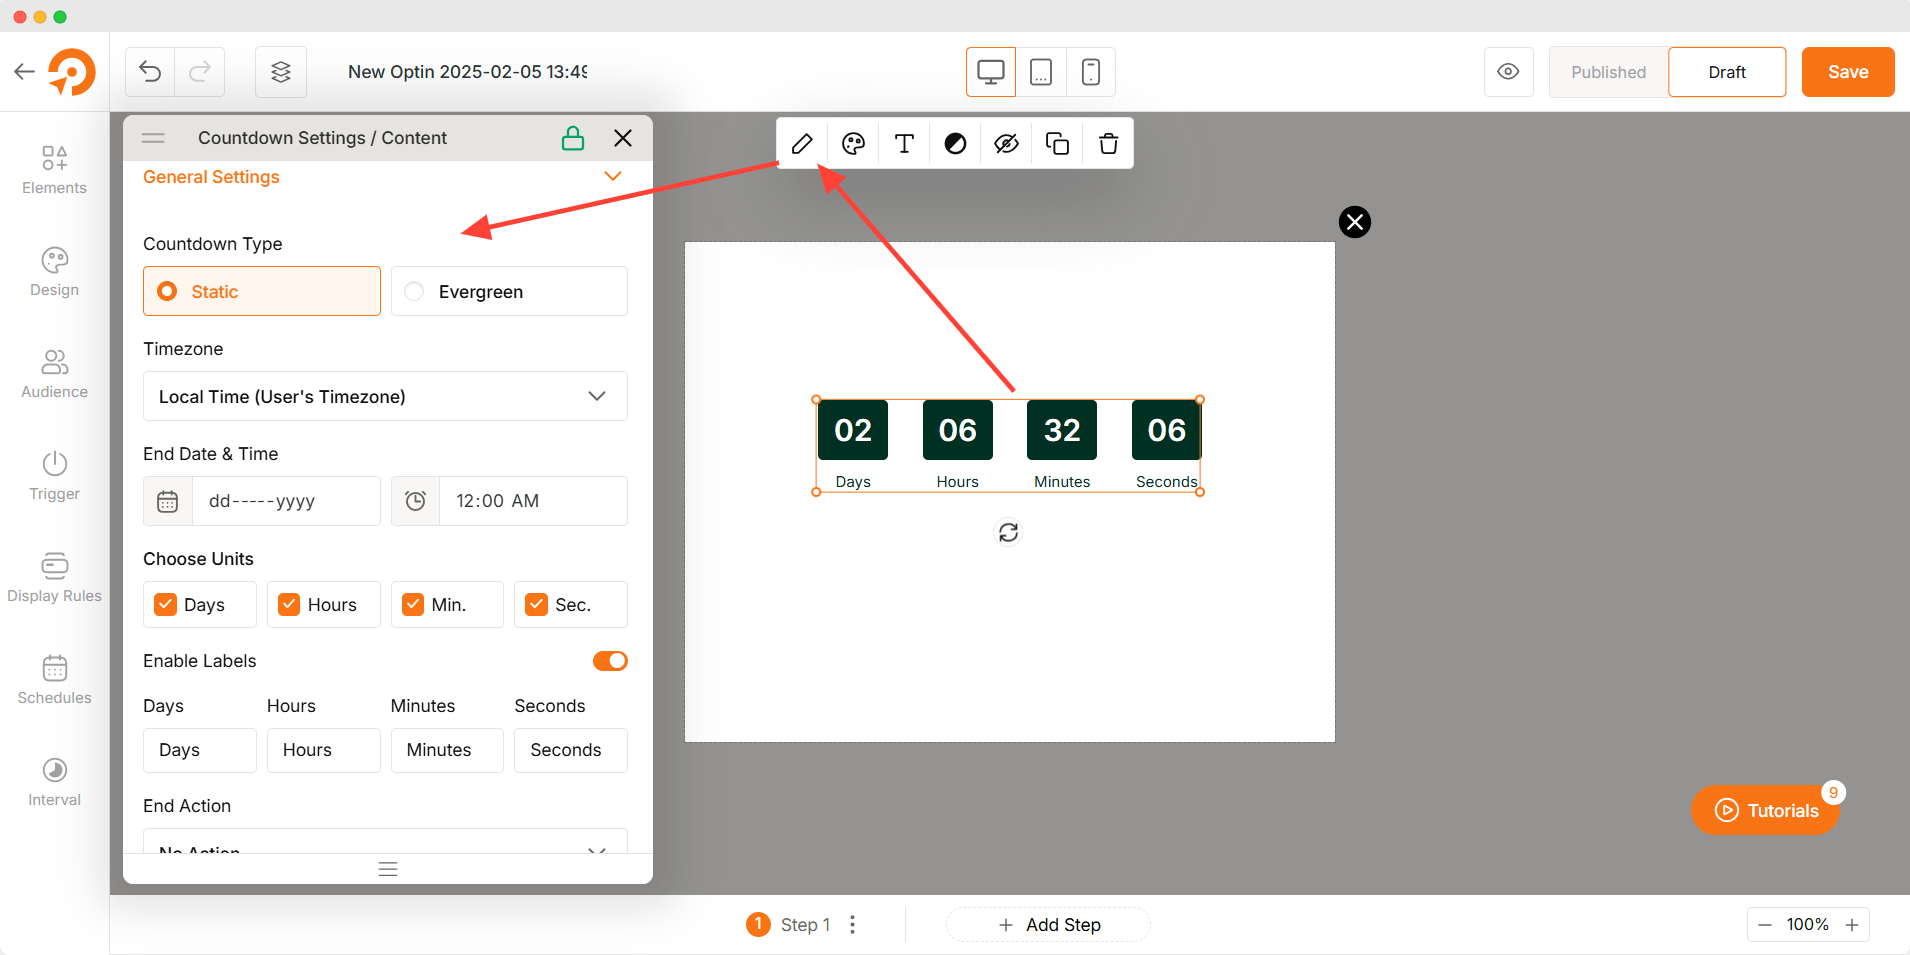
Countdown Type
There are two countdown types:
Static Countdown
- Timezone: Set a specific timezone for the countdown.
- End Date & Time: Define the exact date and time when the countdown expires.
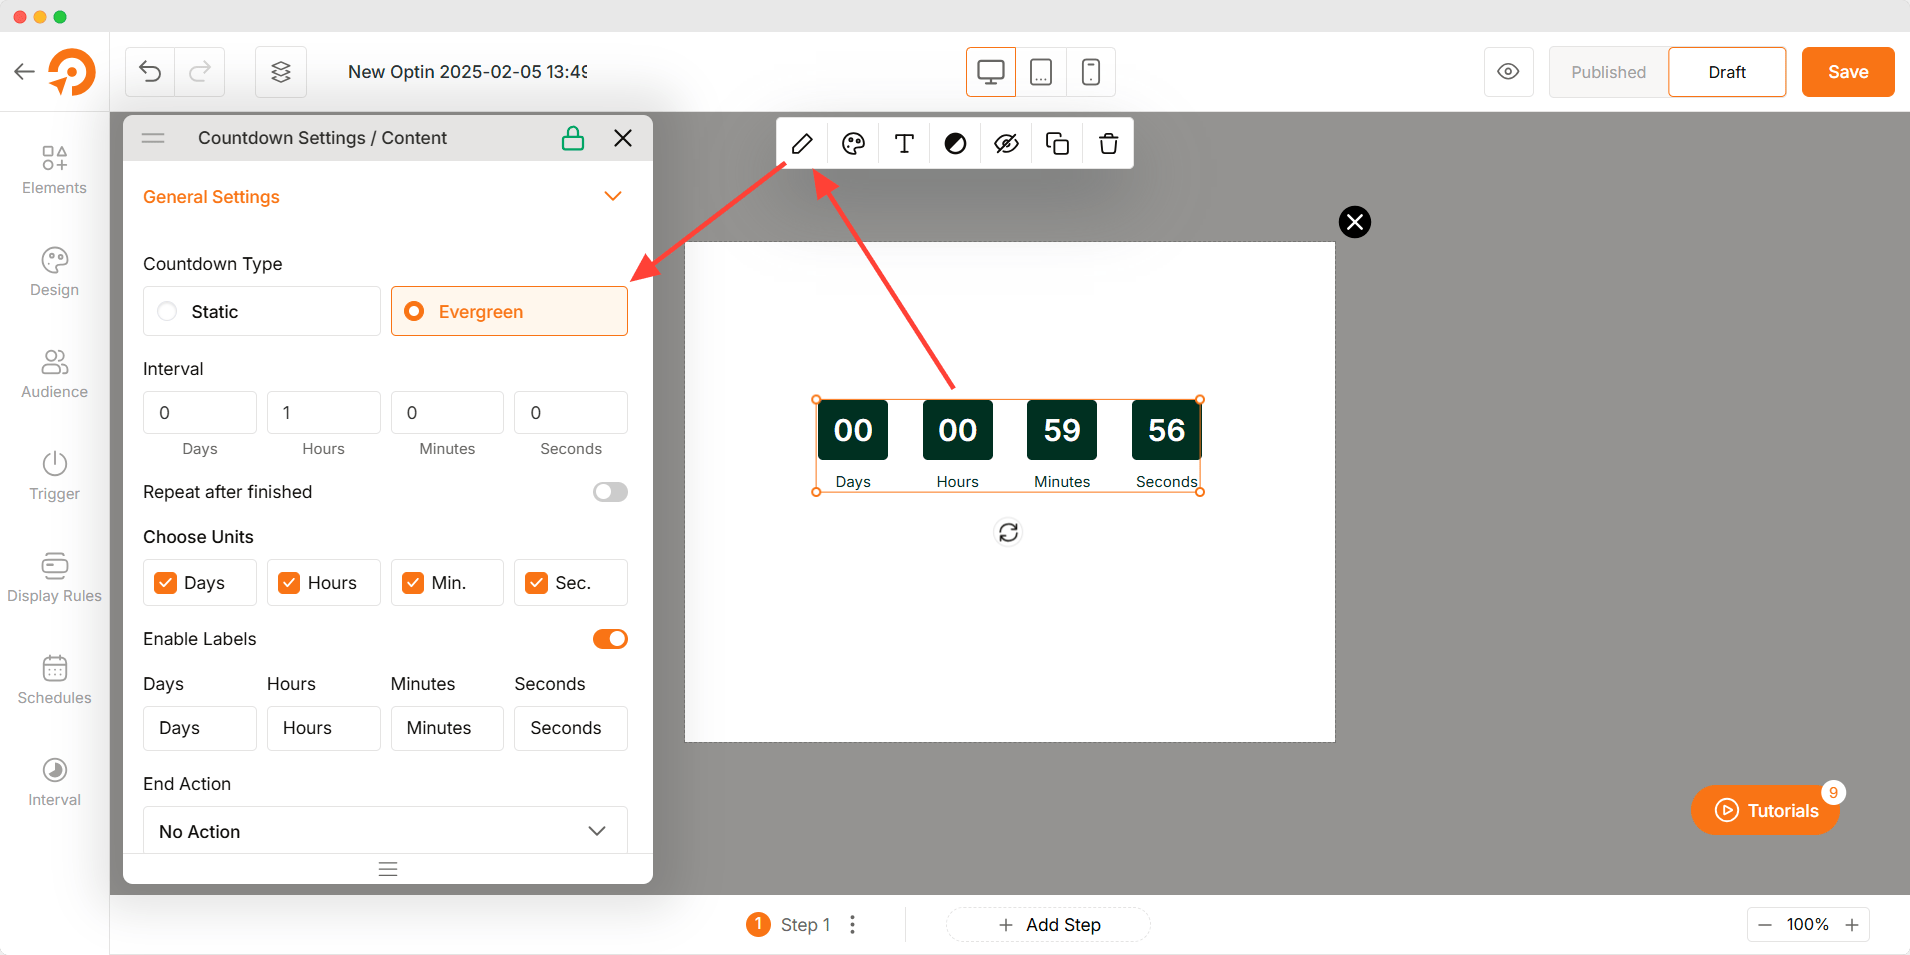
Evergreen Countdown
- Interval: Set a recurring countdown with Days, Hours, Minutes, and Seconds.
- Repeat After Finished: Automatically restart the countdown after completion.
Countdown Settings
- Choose Units: Select which units (Days, Hours, Minutes, Seconds) to display.
- Enable Labels: Show or hide unit labels (e.g., “Days,” “Hours”).
- End Action:
- No Action: Keep the countdown visible after expiration.
- Hide Countdown: Automatically remove the countdown upon completion.
- Custom Message: Replace the countdown with a message (e.g., “Offer Expired”).
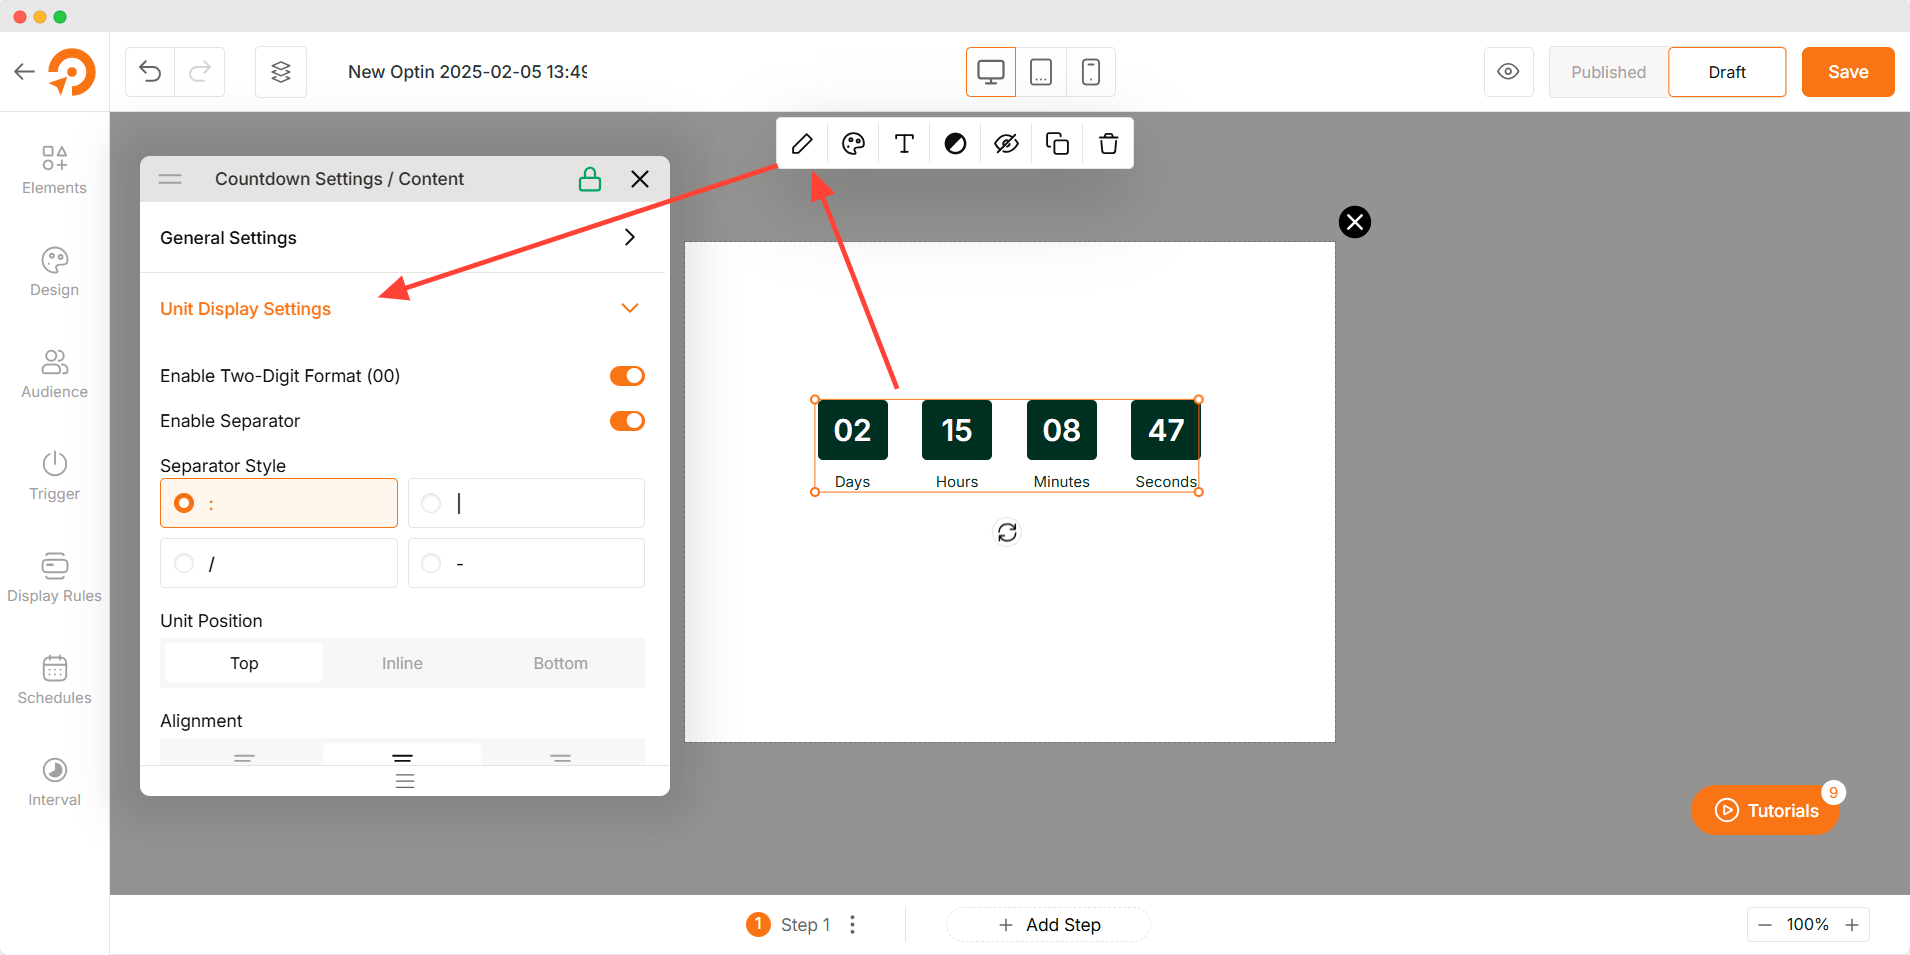
Unit Display Settings
- Enable Two-Digit Format (00): Display numbers in a two-digit format for consistency.
- Enable Separator: Add a separator between countdown units (e.g.,
:or|). - Separator Style: Choose from various separator designs.
- Unit Position: Adjust the placement of units relative to labels.
- Alignment: Align the countdown centrally, left, or right.
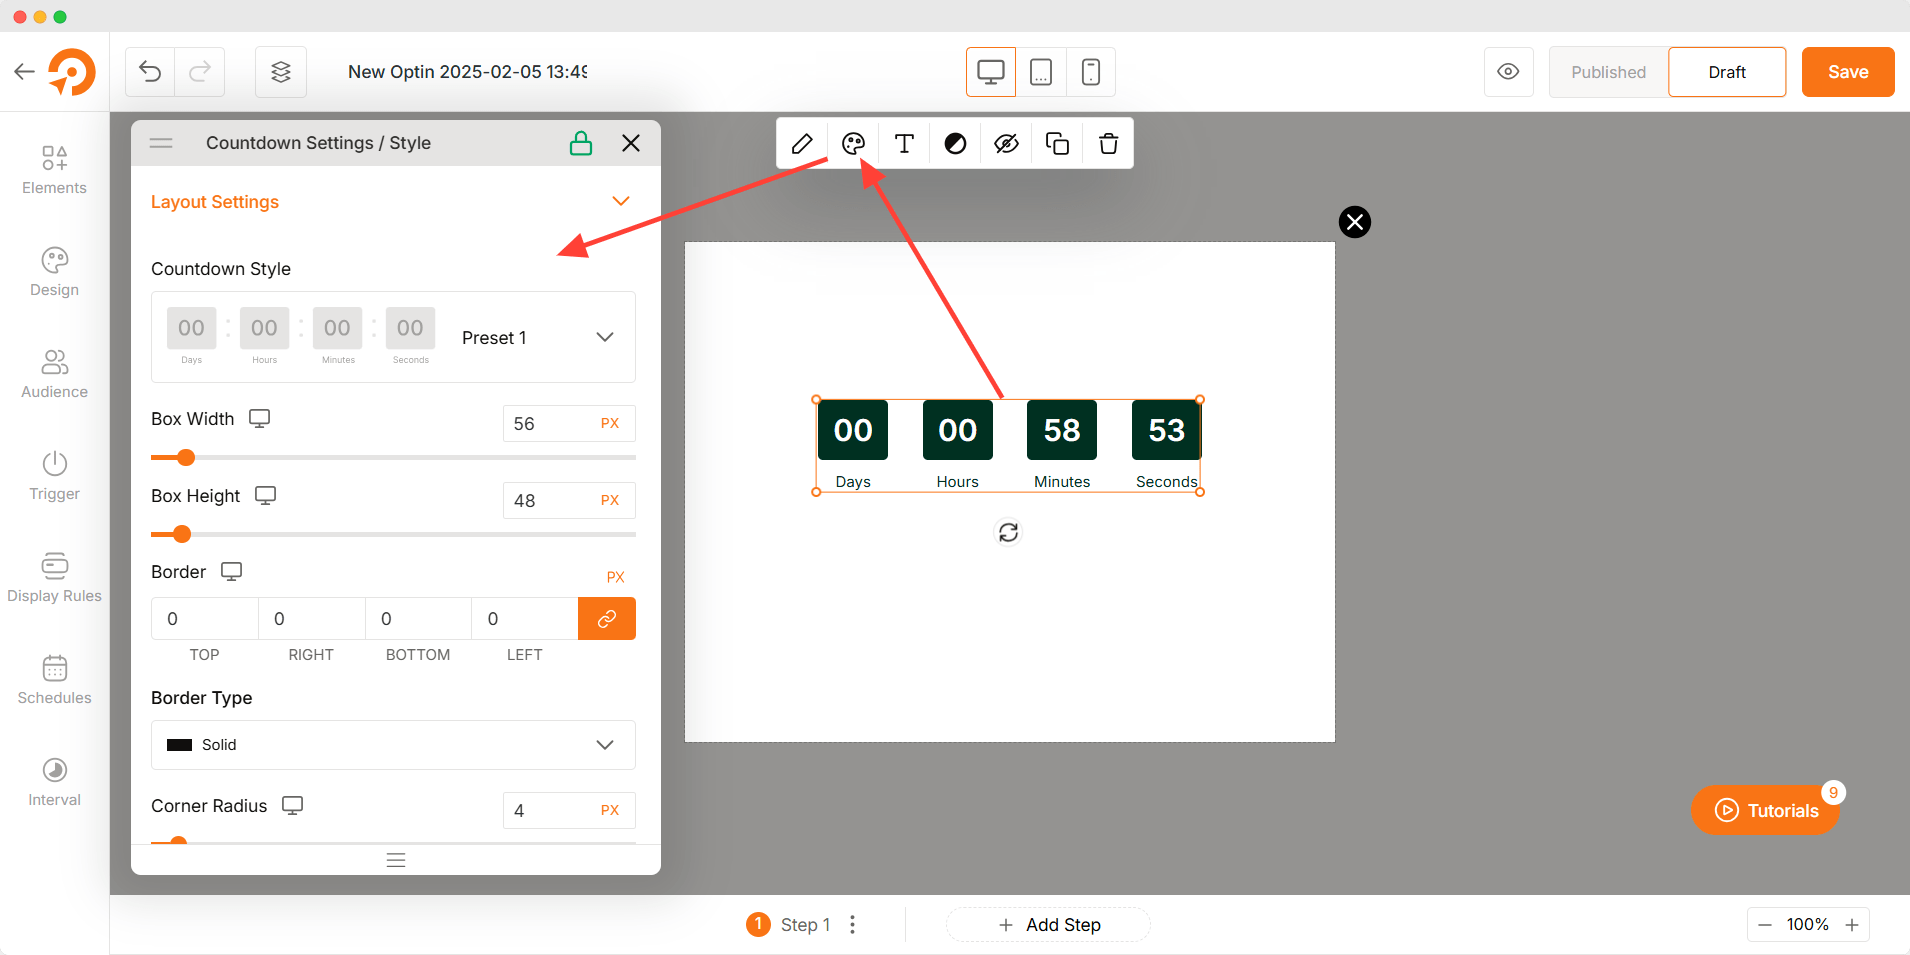
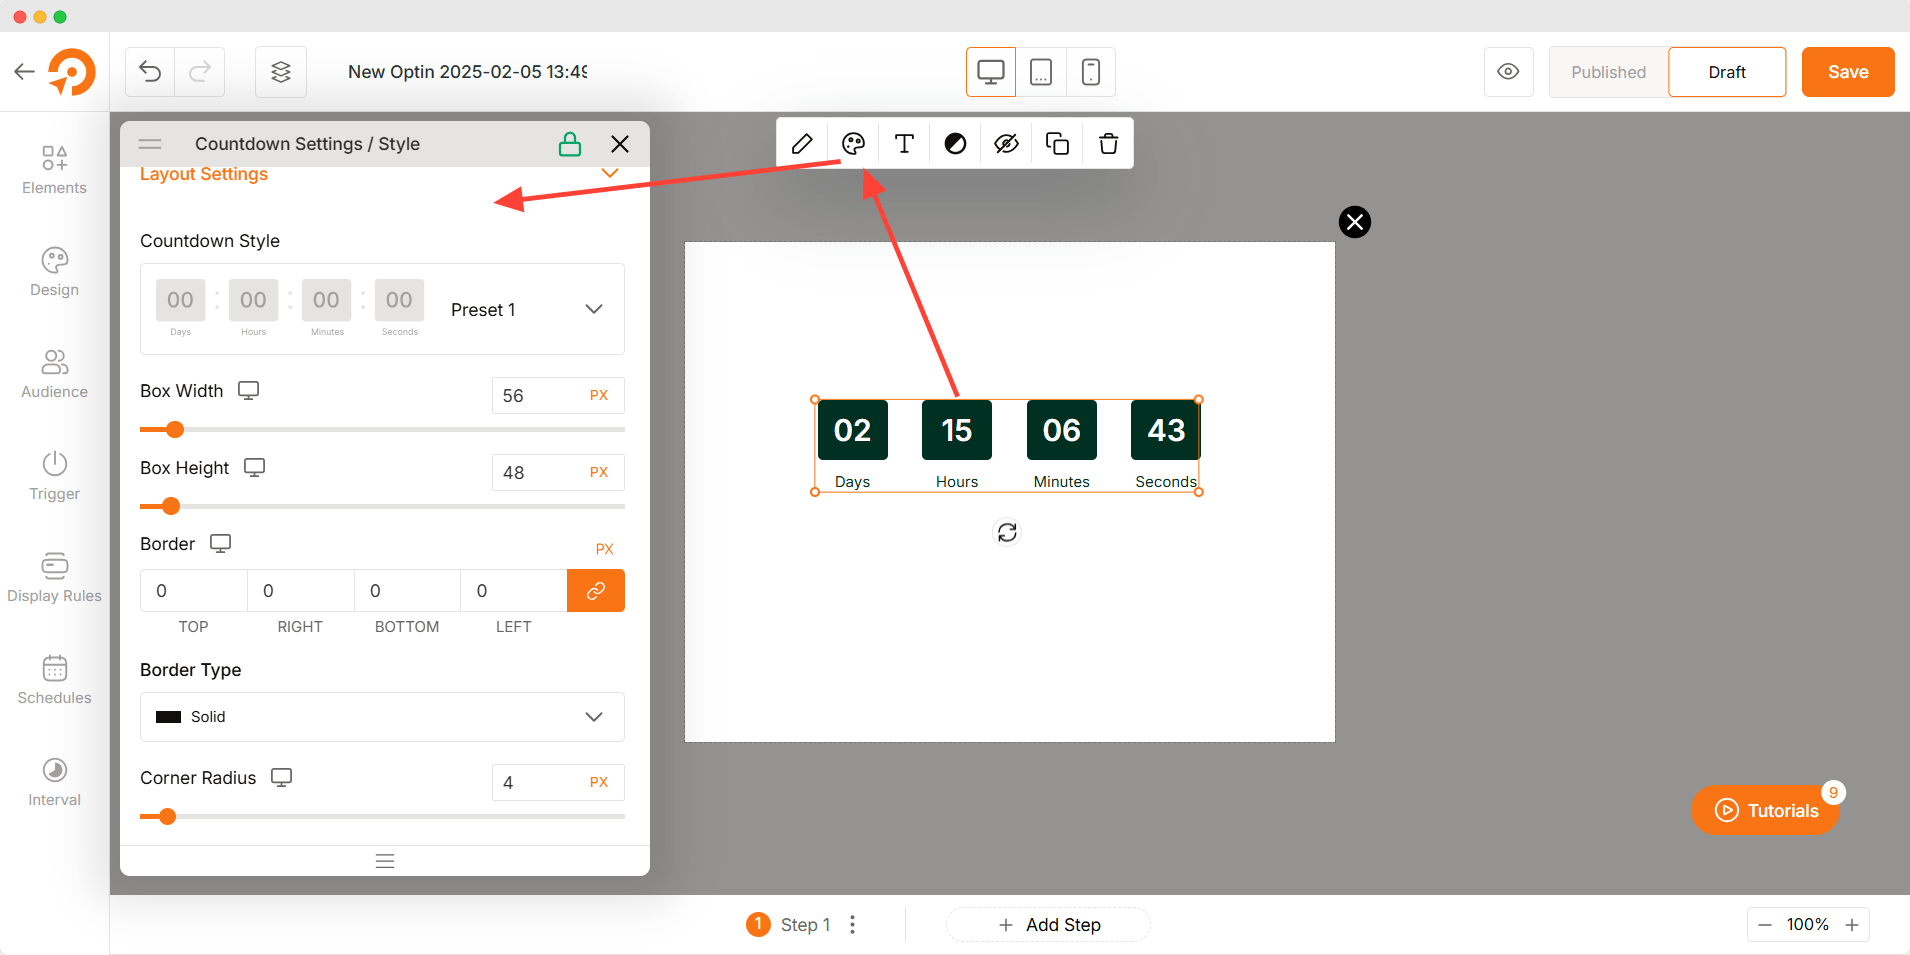
Countdown Styles
- Countdown Style: Choose from 8 predefined countdown designs.
- Box Width & Height: Adjust the size of countdown blocks.
- Border Type: Select a border style (solid, dashed, dotted).
- Border Radius: Round the corners for a softer look.
- Spacing Settings:
- Space Between Blocks: Adjust the distance between countdown units.
- Space Between Label & Unit: Control the gap between labels and numbers.
- Shadow: Add a shadow effect to enhance the countdown’s visibility.
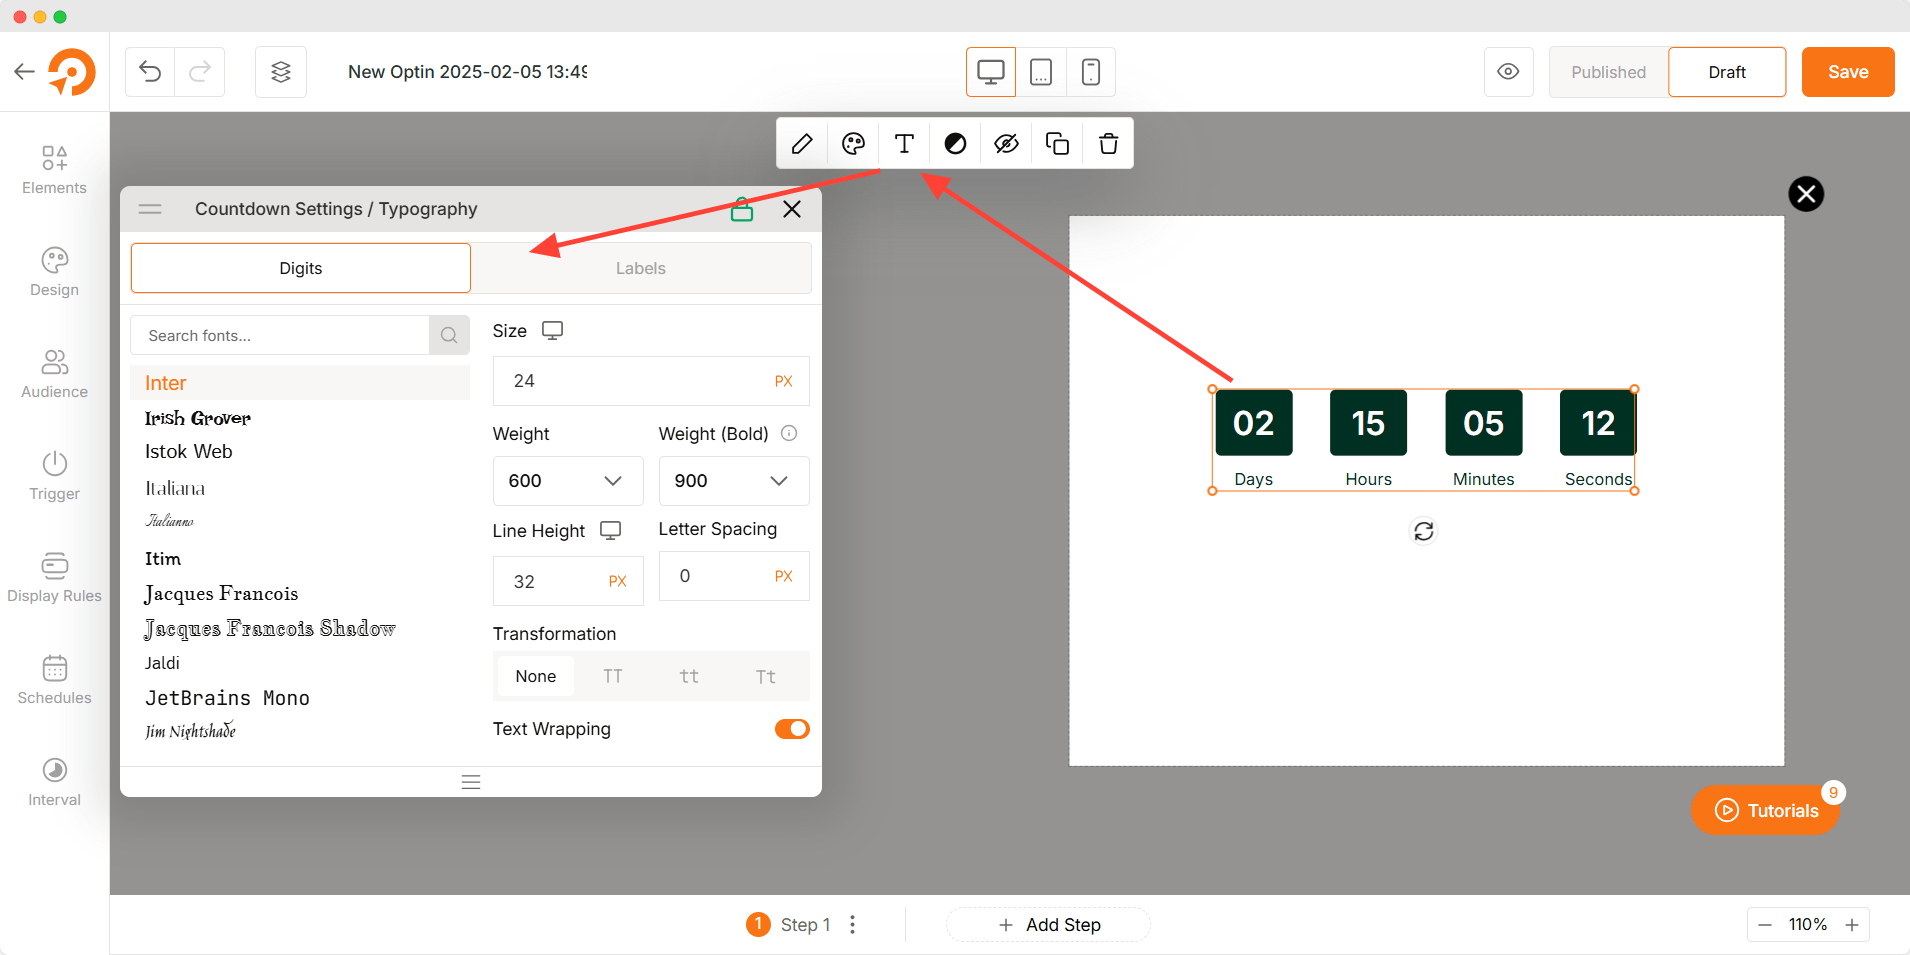
Typography
- Font Selection: Choose a font that aligns with your brand style.
- Font Size: Adjust the size of the countdown text.
- Font Weight: Modify text thickness from light to bold.
- Line Height & Letter Spacing: Customize spacing for better readability.
- Text Transformation: Convert text to uppercase, lowercase, or capitalize.
- Text Wrapping: Manage how text flows within its container.
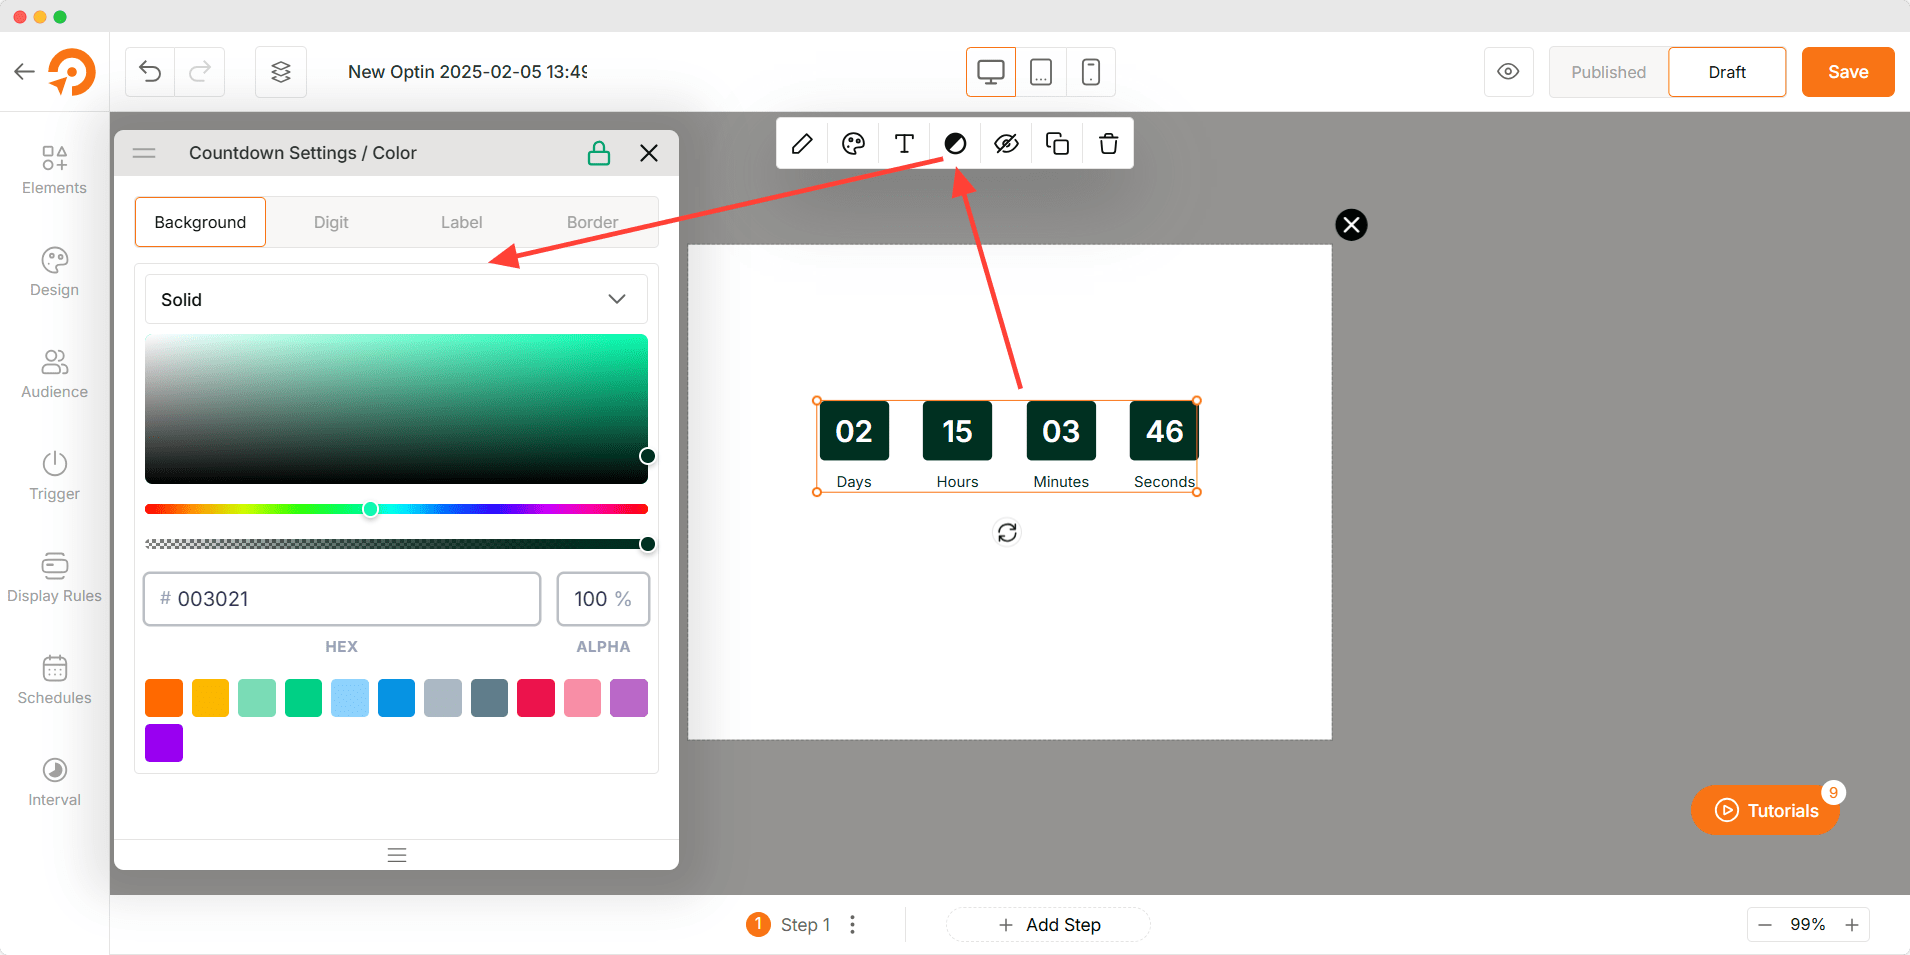
Color Customization
- Background: Set a solid or gradient background for the countdown.
- Digit Color: Define the color of the countdown numbers.
- Label Color: Adjust the color of unit labels.
- Border Color: Customize the border color to match your design.
Troubleshooting
- Alignment Issues: Adjust spacing settings and unit position for better layout.
- Countdown Not Displaying Properly: Ensure all settings are correctly configured.
- Time Not Updating: Check the selected countdown type and refresh the editor.
- End Action Not Working: Verify that the correct end action is selected.