If you use Contact Form 7 for your forms and want to use it with WowOptin popups or other campaigns, you can. You can also track form submission conversions and view the stats in WowOptin analytics for that specific campaign.
In this article, you’ll learn how to add a Contact Form 7 form to a WowOptin campaign. The good news is, it only takes a few simple steps.
How to Add Your Contact Form 7 to WowOptin
Follow these steps to connect the Contact Form 7 form with WowOptin:
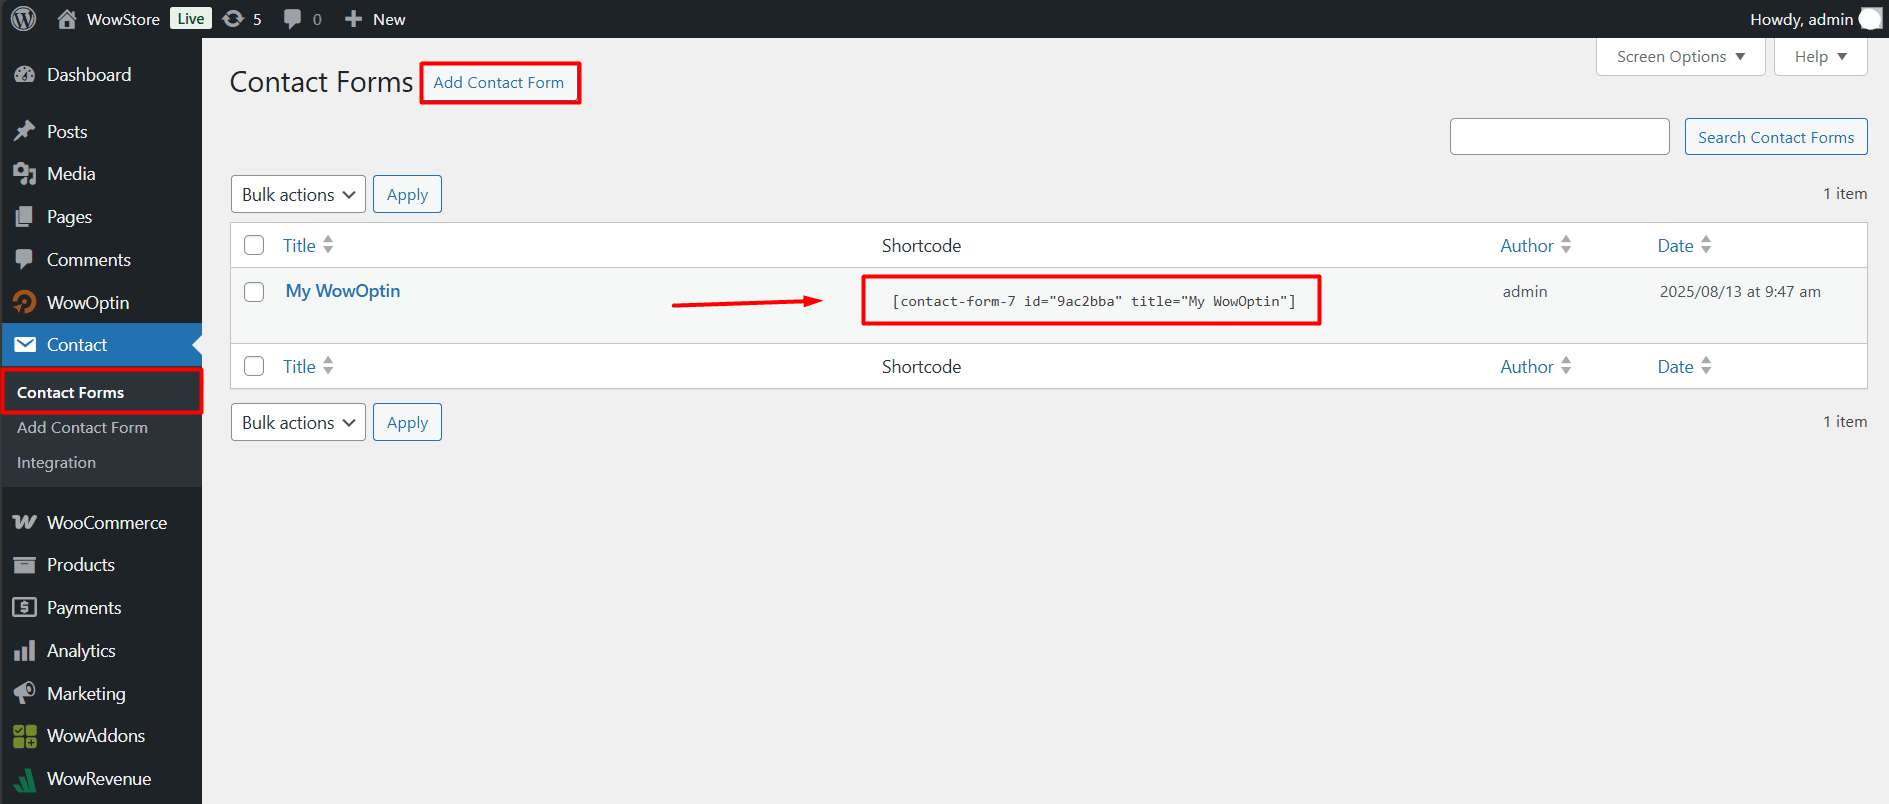
- From your WordPress dashboard go to Contact > Contact Forms.
- Create a new form or use an existing one.
- Copy the form shortcode (example:
[contact-form-7 id="9ac2bba" title="My WowOptin"]).
- Open your WowOptin campaign and add the Shortcode element on the canvas.
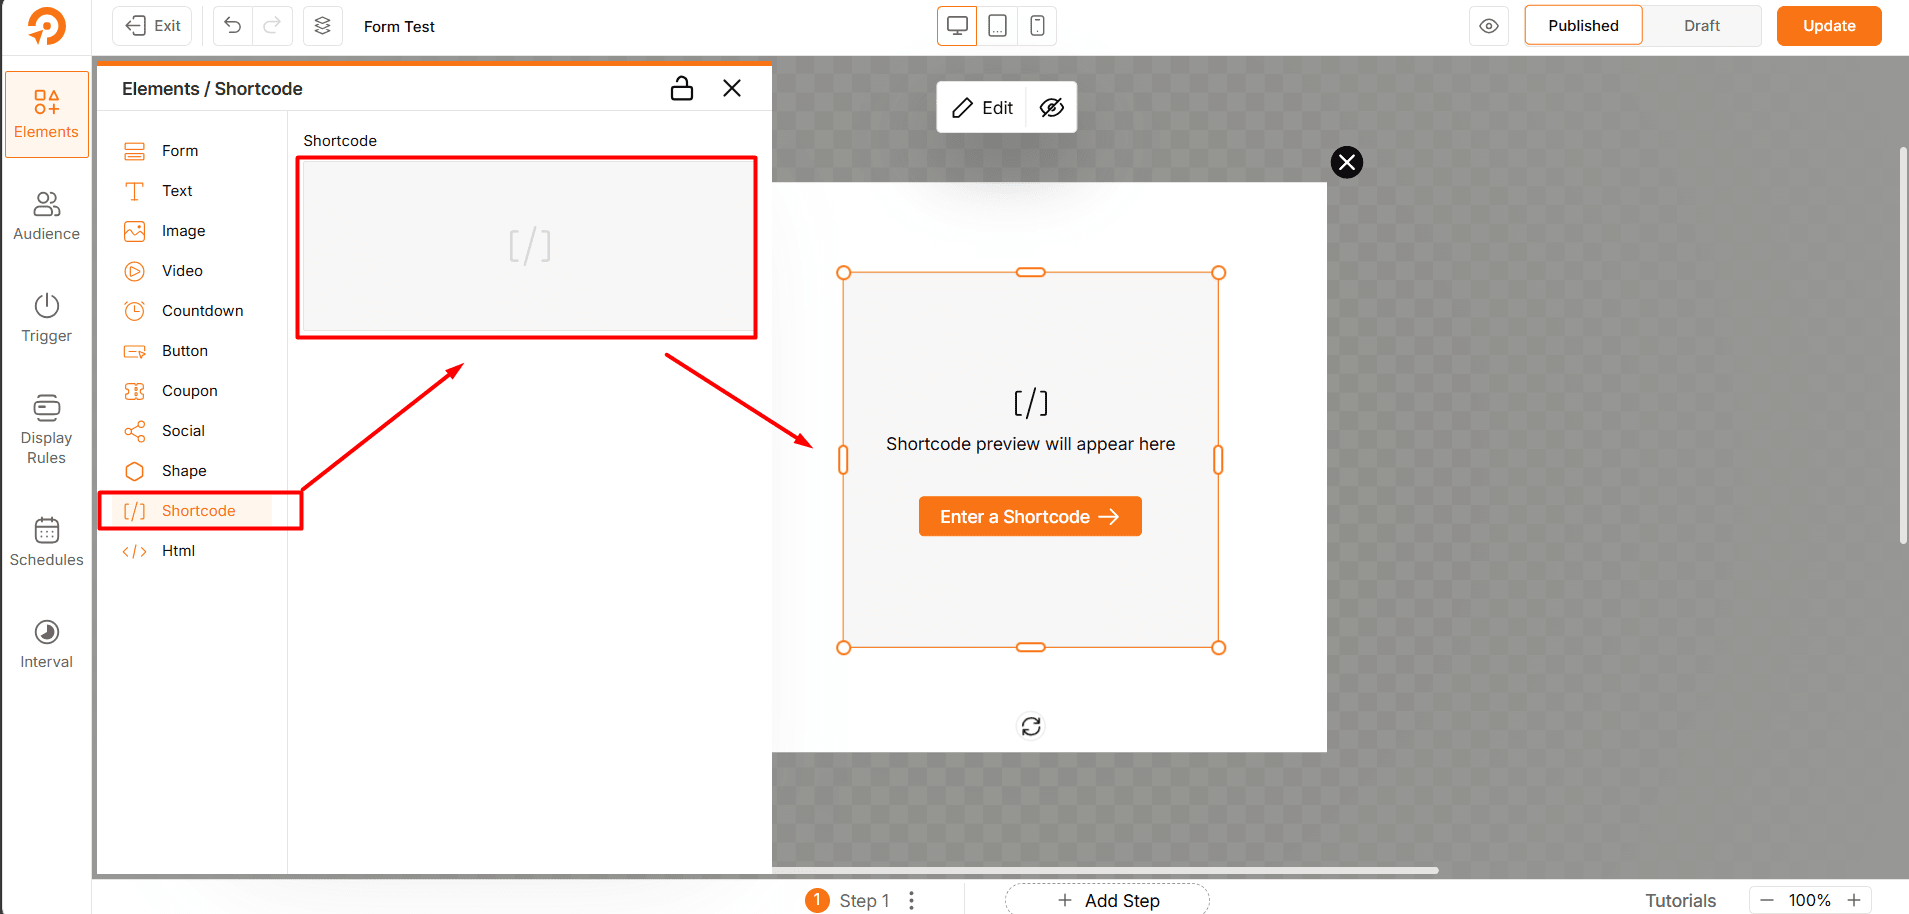
- Add the Contact Form 7 shortcode you copied, and the form will show up.

Make adjustments if needed and publish the campaign.
How to Track Contact Form 7 Conversions with WowOptin
For WowOptin to know when a visitor successfully submits your form via Contact Form 7, there are two methods.
- Using a CSS class on the submit button (quick and easy).
- Using a JavaScript code(more accurate).
Both methods let WowOptin show your campaign’s conversion rate inside its analytics.
Method 1: Track Conversions with a CSS Class
This can be set up with these simple steps:
- Just head over to Contact > Contact Forms, and pick the one you’re using with WowOptin
- Click “Edit” to open the editor
- Find the submit button code (usually at the end). By default, it looks like:
[submit "Submit"]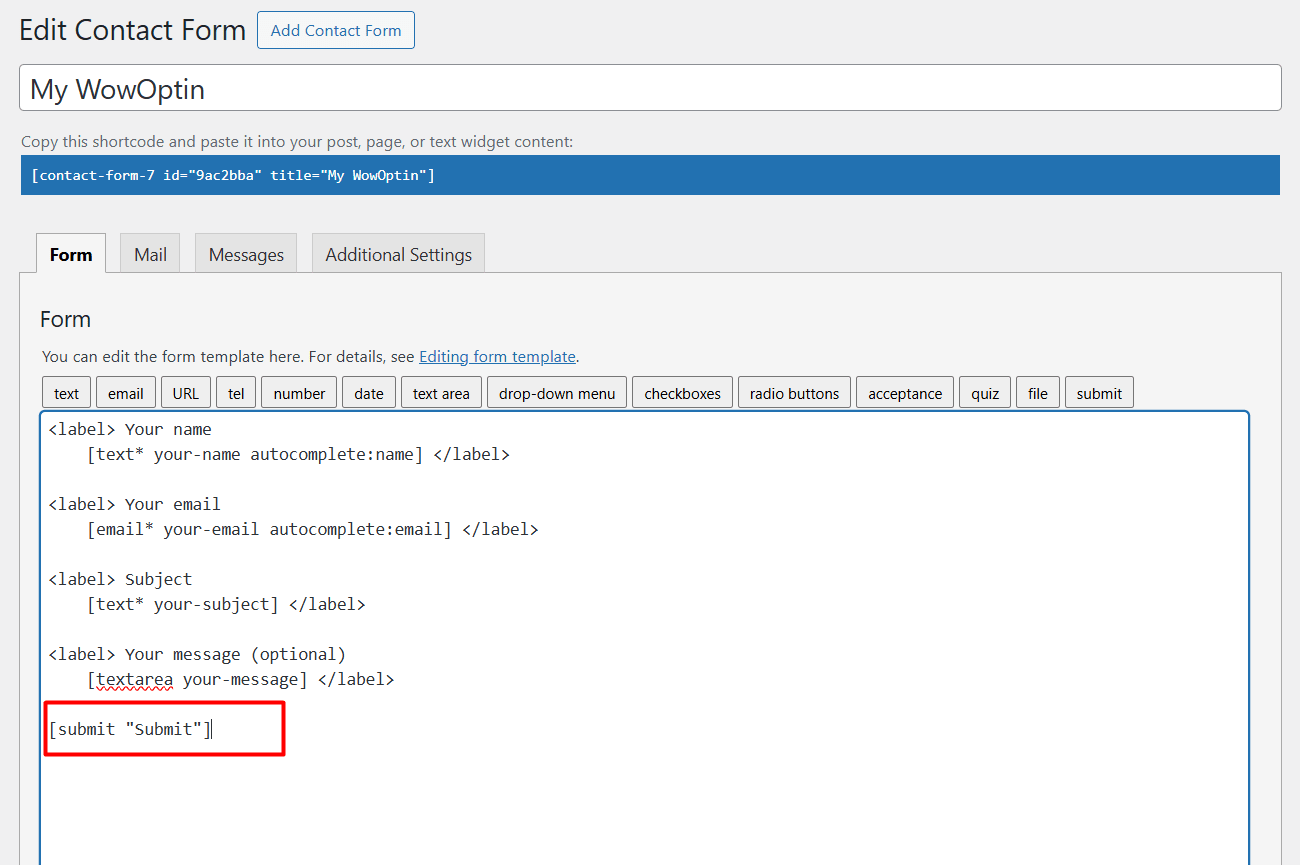
Simply update the tag with this WowOptin class
class:optn-trigger-conversionLike this 👇
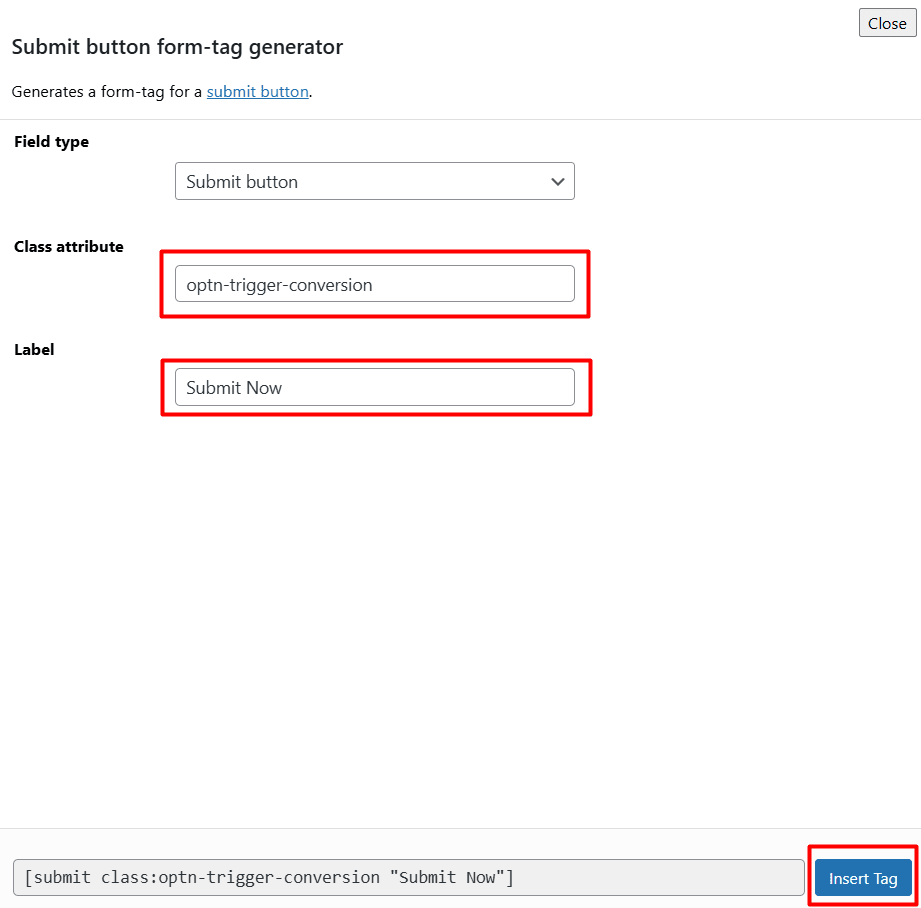
[submit class:optn-trigger-conversion "Submit Now"]You can do it manually or using the Submit tag.
- Cilck on the Submit tag
- In the Class attribute field paste the class we provided.
- Add a label in the Label field like “Submit Now”
That’s it. Now every time someone submits the form, WowOptin will log the conversion.
Method 2: Track Conversions with JavaScript (More Accurate)
For more precise tracking, you can use a JavaScript code. To do this, you’ll need a code snippet plugin (such as Code Snippets).
Add this code using the code snippet plugin you’re using:
document.addEventListener( 'wpcf7submit', function( event ) {
    if ( 561 == event.detail.contactFormId ) { // Form ID
        window.optin.convert(45);
        window.optin.next(45); // Optional: If you want to go to the next step.
    }
} );
Step 1: Find the Contact Form 7 ID
- Go to Contact > Contact Forms and select your form.
- Click “Edit” to open the editor.
- In the browser URL, look for
post=value.
Example:
http://example.com/wp-admin/admin.php?page=wpcf7&post=561&action=editHere, 561 is the form ID.
Step 2: Find the WowOptin Campaign ID
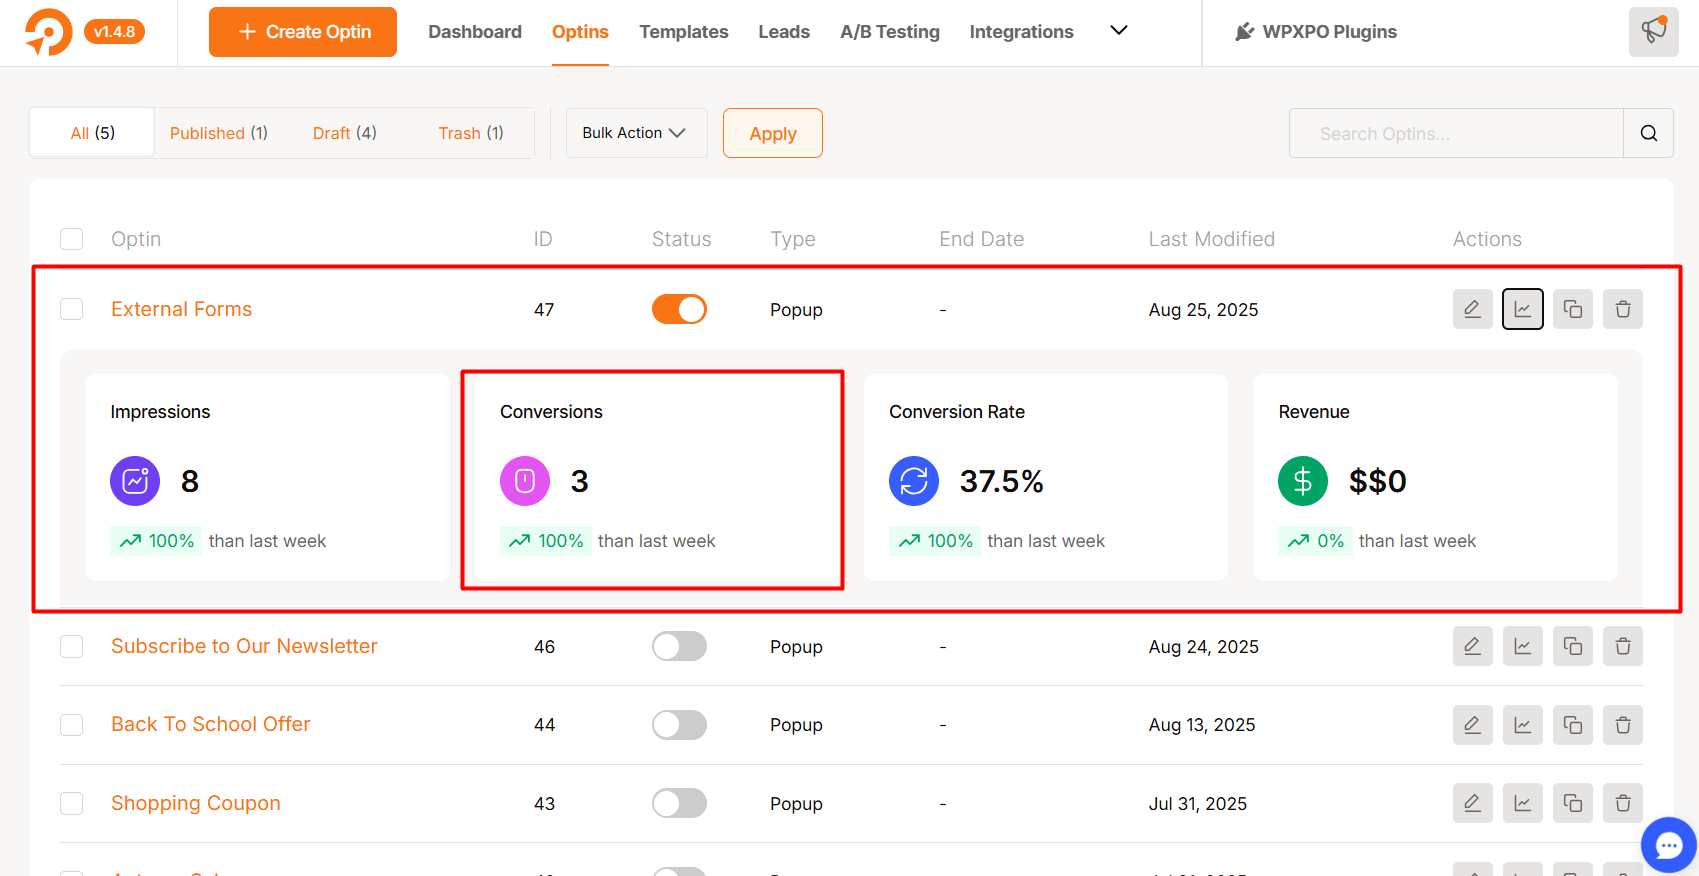
- Go to WowOptin > Optins.
- Copy the ID from the campaign list where your Contact Form 7 shortcode is used.

Step 3: Update the JavaScirpt Code
- Replace
561with your Contact Form 7 ID. - Replace
45with your WowOptin Campaign ID.
Now your setup is complete. Each time the form is submitted, WowOptin will record it as a conversion and display it in your campaign stats.
Now you can view analytics for a specific campaign 👇 or see overall insights in WowOptin Analytics.