The Schedule Settings in WowOptin help you control how long your campaign runs or stay active. You can
- Run a one-time campaign by setting a specific launch and end date.
- Or repeat on selected days and times using the recurring schedule option.
How to Schedule a Campaign in WowOptin?
To schedule your campaign, follow these 3 simple steps:
- Choose Your Time Zone
- Set a Timeframe
- Or Use Recurring Timing
Step #1: Set the Timezone
Set the time zone based on your target audience or campaign location.
Time Zone Options:
- UTC – Use Coordinated Universal Time (UTC), the global standard.
- Custom – Choose a specific time zone based on your audience region.
Local Time (User TZ) – The campaign will run based on each visitor’s local time. This dynamic time adjusts based on the visitor’s location.
💡 For Example:
If your campaign is set for 9:00 AM to 5:00 PM, visitors across the world will see it during that timeframe in their own time zone. This ensures time consistency for everyone, wherever they are.
Step #2: Specify a Timeframe
Define a launch and end date to run the campaign for a specific period. There are two options to choose from.
Launch Date Options:
- Immediately – Run the campaign as soon as it’s published.
- Custom – Choose a specific date and time to begin. Great for planned promotions or event launches.
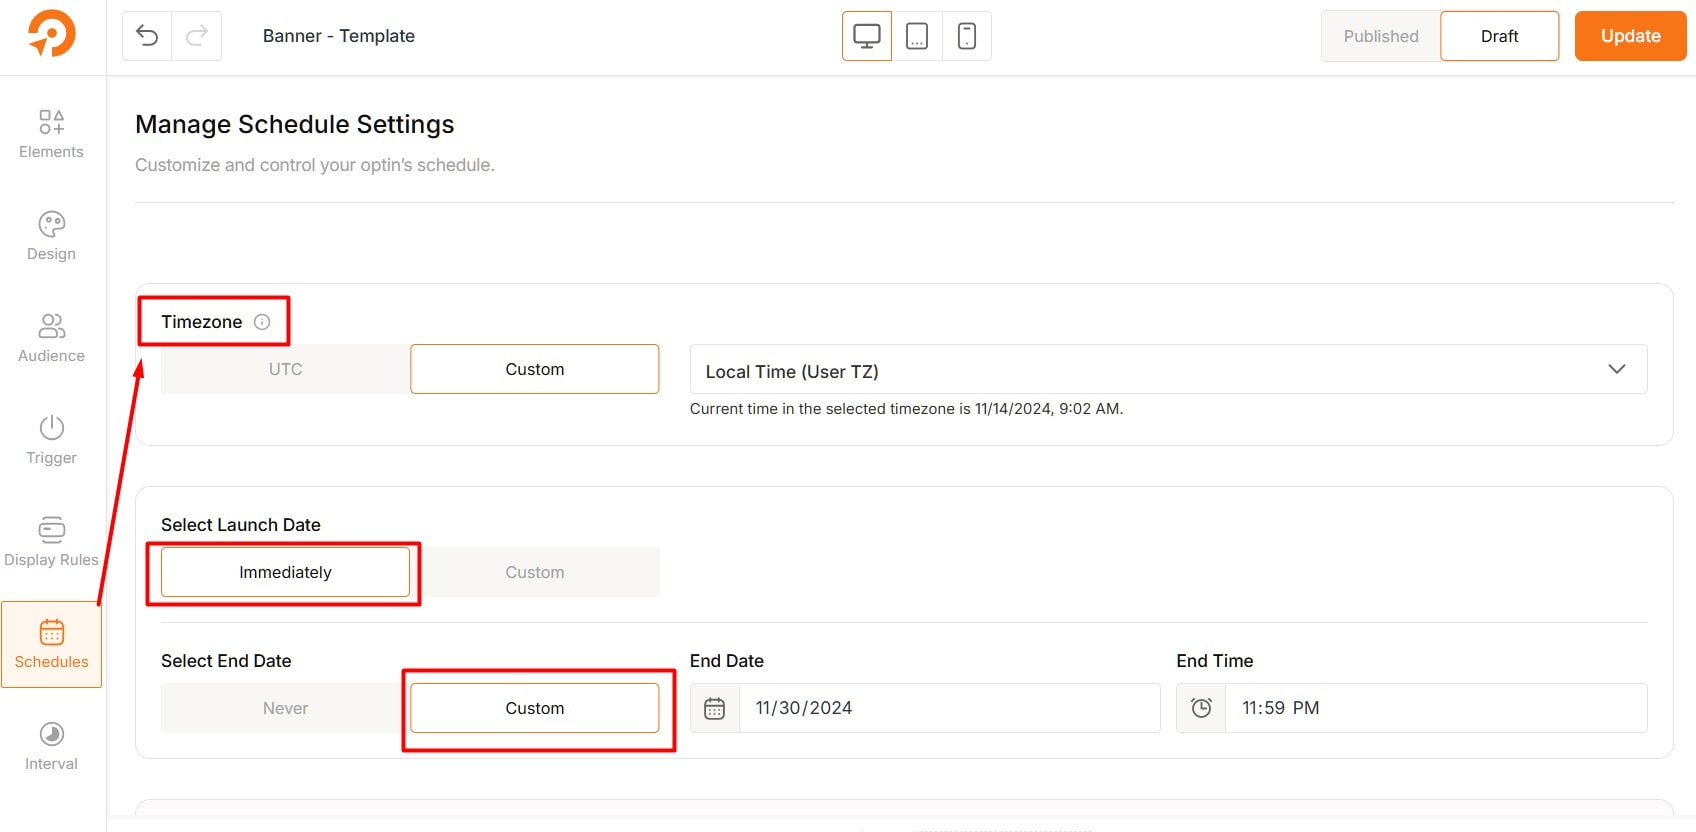
End Date Options:
- Never – Keep the campaign running indefinitely.
- Custom – Set an end date and time. Ideal for time-sensitive offers like flash sales or seasonal promos.
Step #3: Or Use Recurring Timing
If you don’t want a fixed duration, enable Recurring Schedule instead. Choose specific days and even times on that days to repeat the campaign dynamically. You can control:
- Days – Run campaign Everyday or on Selected Weekdays (e.g., Mon, Wed, Fri).
- Times – Set custom time ranges for each day.
💡 For Example:
- Everyday: 9:00 AM – 11:00 AM and 2:00 PM – 6:00 PM
- Or Sunday: 8:00 AM – 5:00 PM
- And Tuesday: 10:00 AM – 11:00 PM
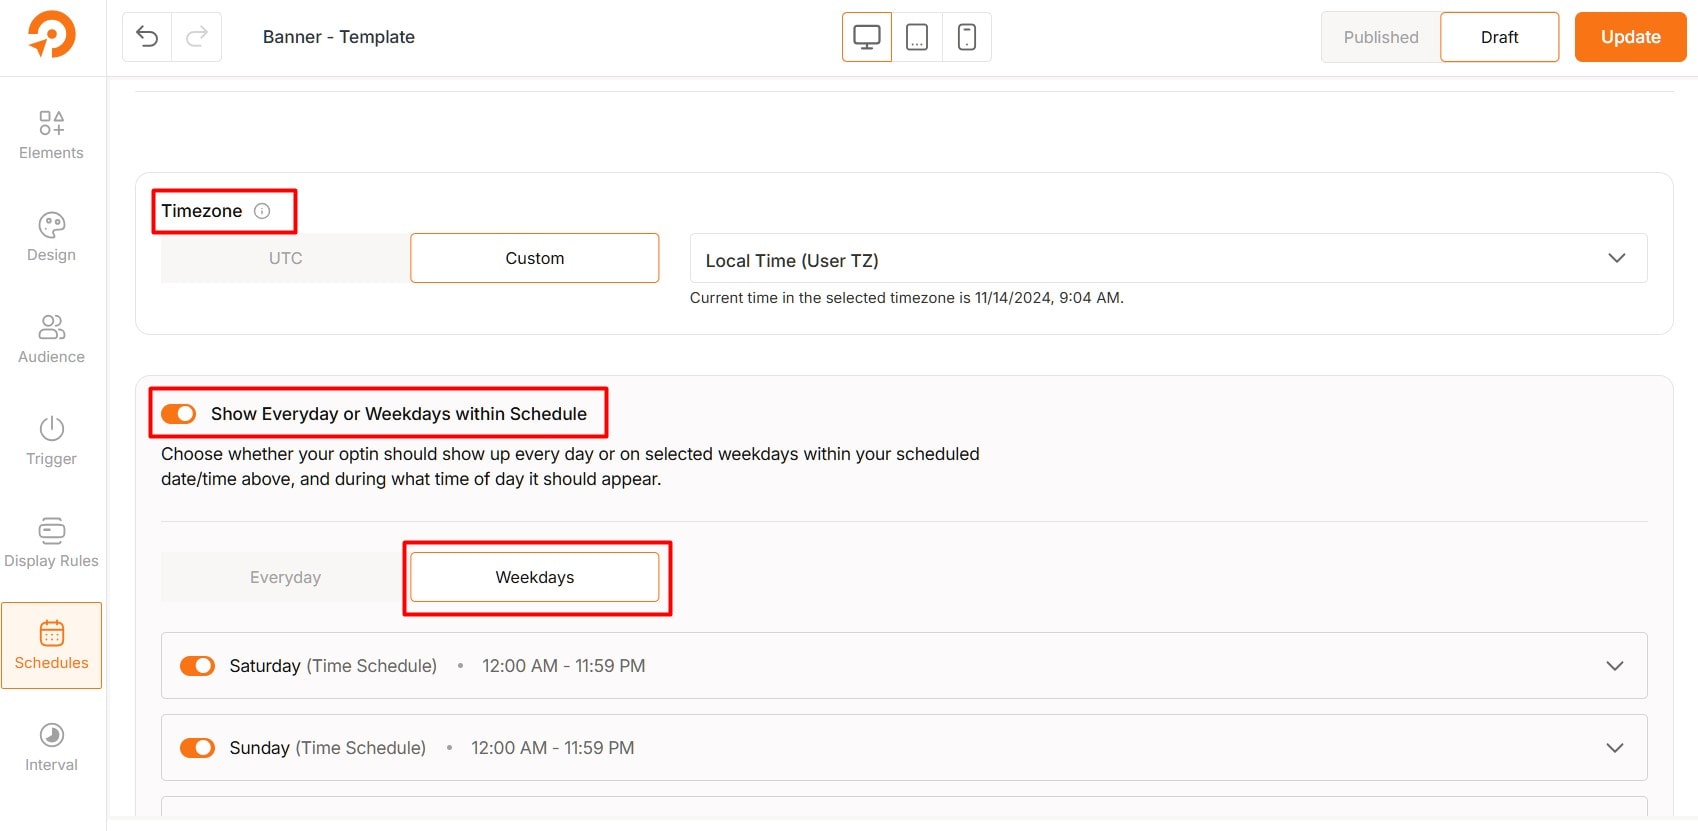
Here’s how to set it up:
- Choose either Everyday or Weekdays.
- If you picked Weekdays, select which days to enable or disable.
- Expand the row and set time ranges for the days.
- Add a Start and End time. You can add multiple time slots in a day.
- Click the Plus (+) icon to add another time slot.
- When you’re done, make sure to hit the Update button at the top right.