This guide will walk you through integrating WowOptin with Campaign Monitor, allowing you to seamlessly sync your email lists for more effective marketing campaigns.
Follow these simple steps to connect WowOptin with Campaign Monitor!
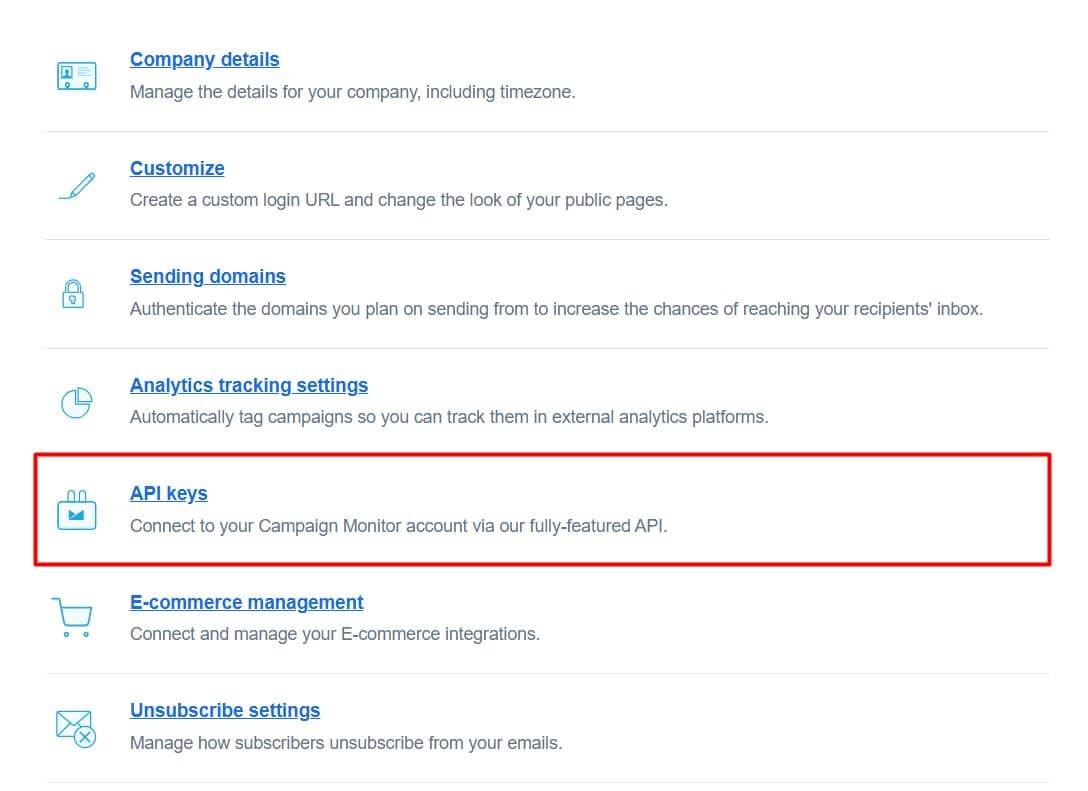
#1: Get the API Key & Client ID from Campaign Monitor
To connect WowOptin with Campaign Monitor, you’ll need the API key & Client ID. Here’s how to get it:
- Log in to your Campaign Monitor account
- Click on your profile icon and select Account Settings
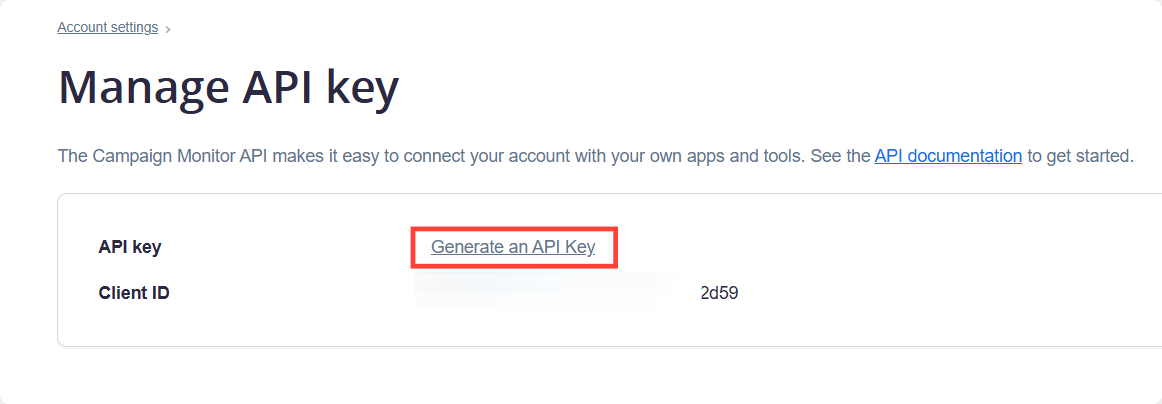
- Find and select API Keys from the list.
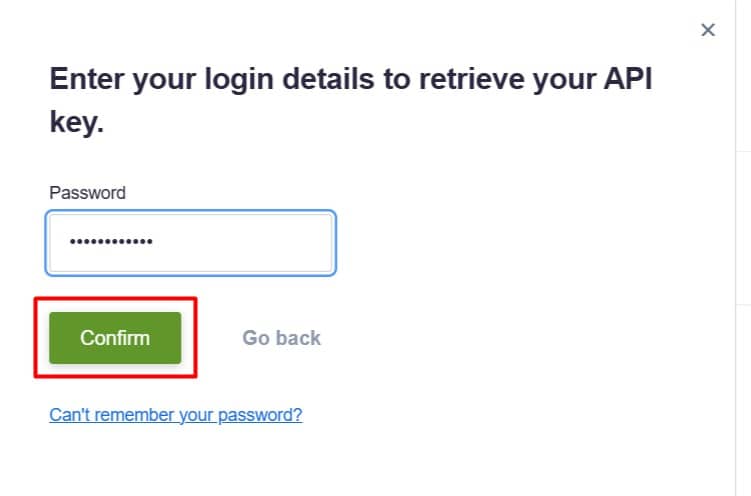
- Click Generate an API Key (if you don’t have one already).
- Enter your account password when asked.
- Copy your API Key and Client ID
#2: Connect WowOptin to Campaign Monitor
Now, establish the connection between WowOptin and Campaign Monitor:
- Go to the Integration page in WowOptin.
- Search for and select Campaign Monitor from the available integrations.
- Click Manage, then select Add Account.
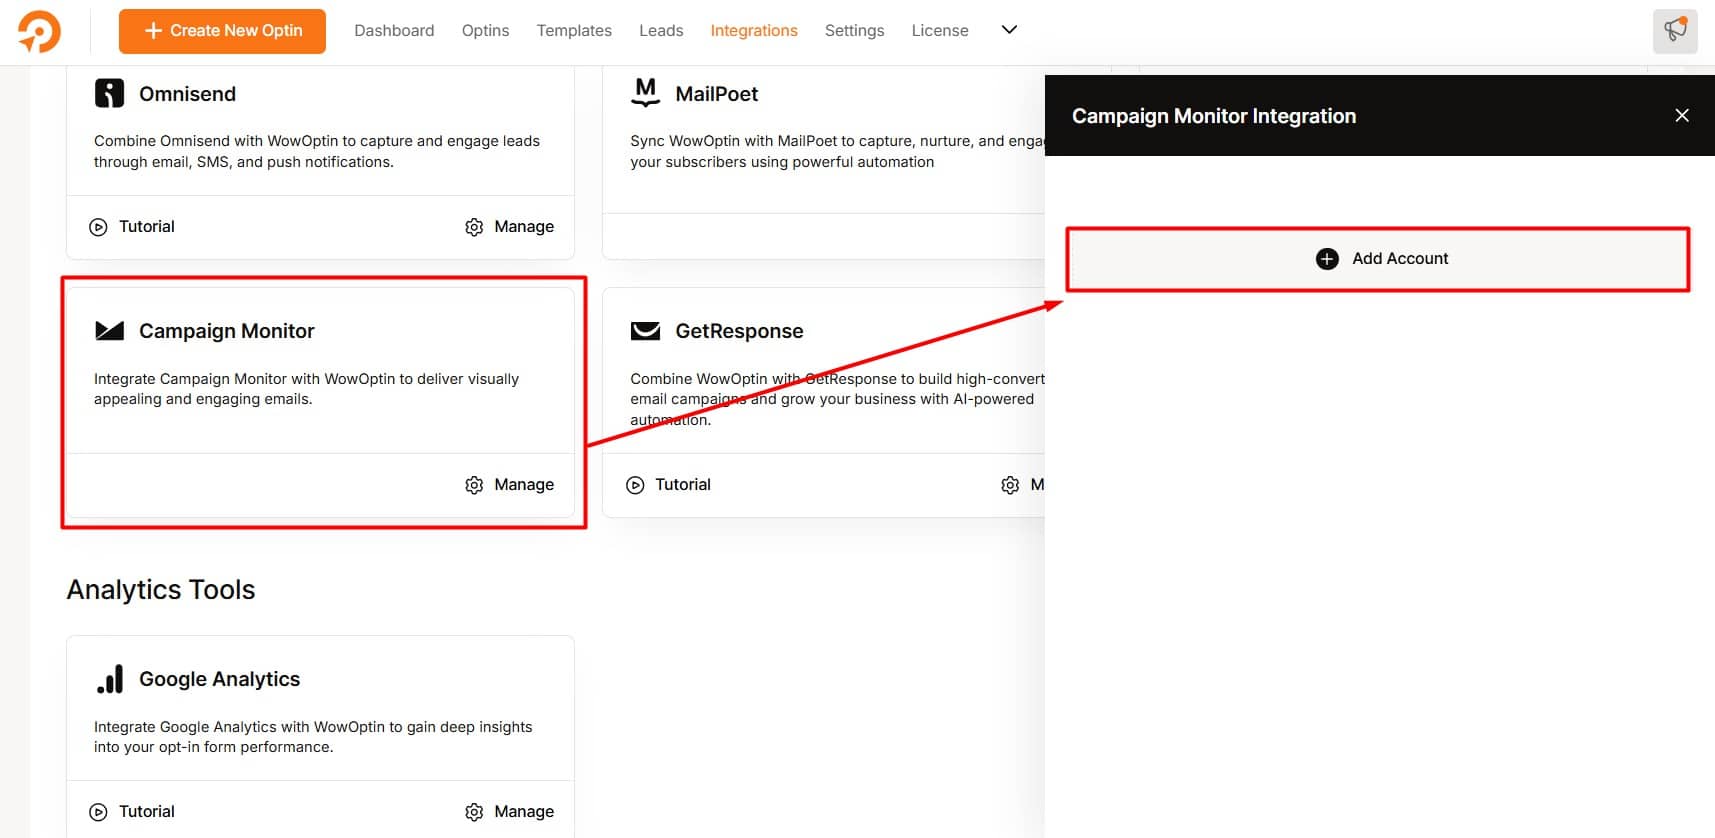
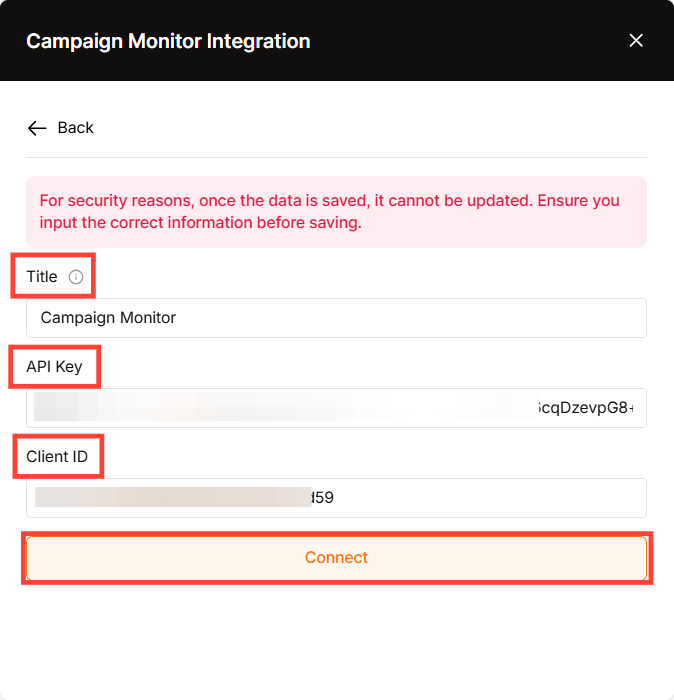
- Enter a descriptive title for your account.
- Paste your Campaign Monitor API Key and Client ID.
- Click Connect to finalize the integration.
#3: Link an Optin Form to Campaign Monitor
To link your optin form to Campaign Monitor:
- Open the WowOptin builder and select your optin form.
- Click the Form Integration Icon from the top sticky bar.
- Select Add Integration.
- Choose the Campaign Monitor account you just configured.

#4: Configure the Integration
For the best results, configure your Campaign Monitor settings:
- Click the dropdown icon to view your available lists.
- Select your email list (or create a new one if needed).
- In the Field Mapping section, match the required fields (e.g., map the email field to the email input
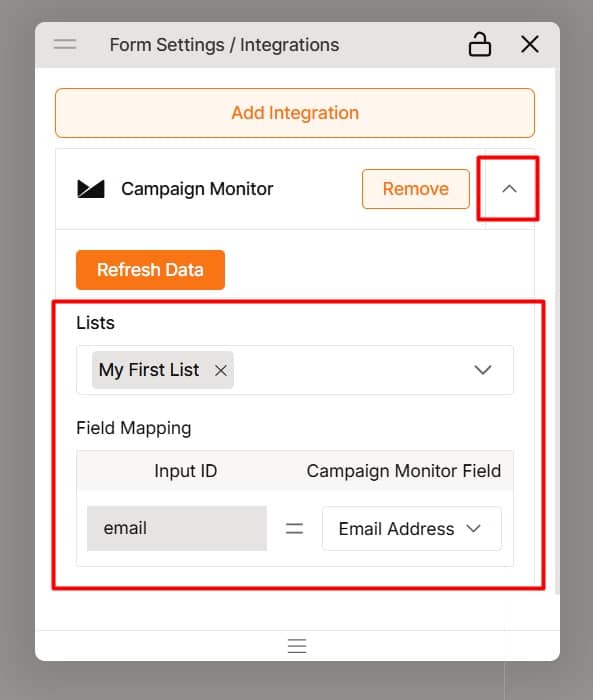
Campaign Monitor provides default field mapping options, but you can also add custom fields as needed.
⭐⭐⭐ Once everything is set up, your optin form will start collecting submissions, and all audience data will be stored in Campaign Monitor.