This guide will help you connect WowOptin with HubSpot to effortlessly sync your email lists and supercharge your email marketing campaigns.
Follow these simple steps to get started!
Step 1: Get Your HubSpot Private App Token
To link WowOptin with HubSpot, you’ll need a private app token from HubSpot. Here’s how to obtain it:
- Log in to your HubSpot account.
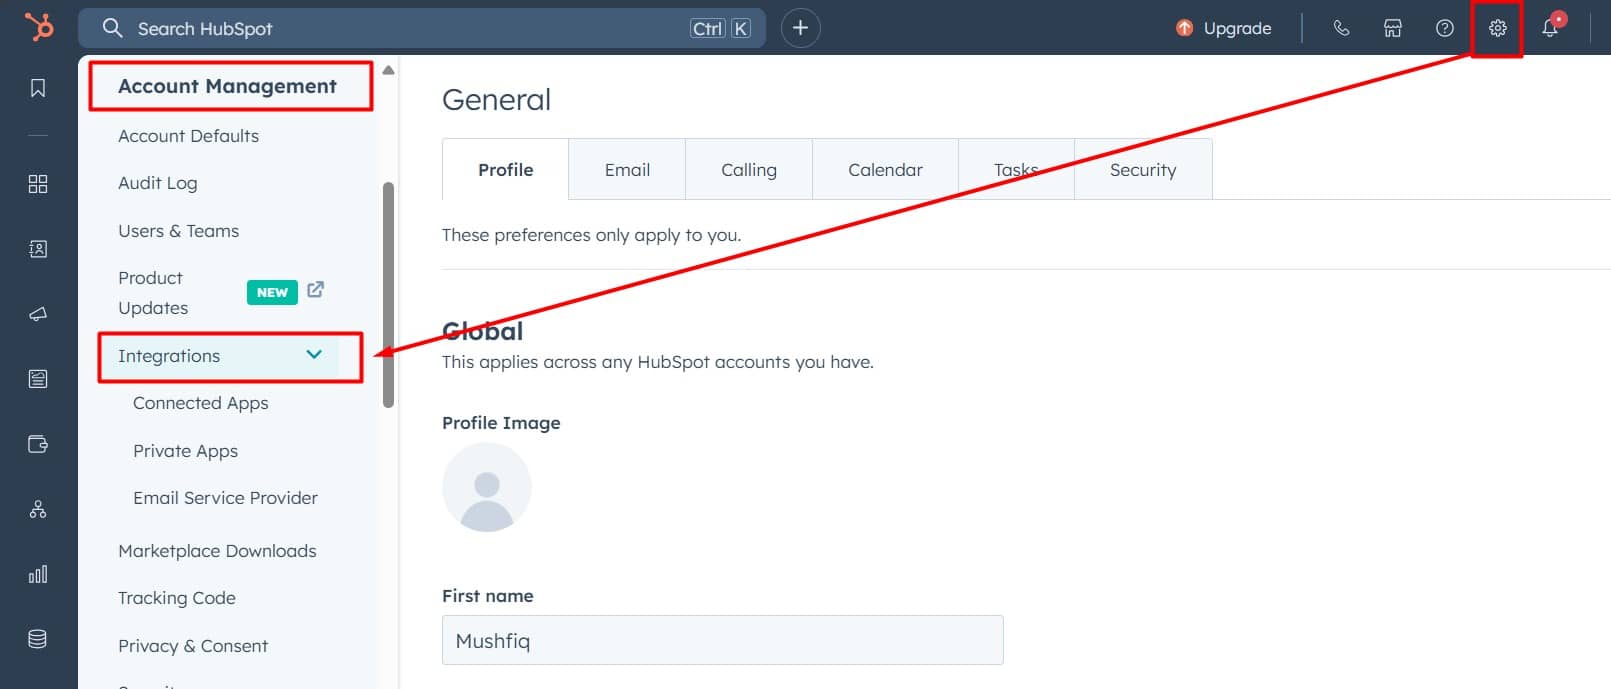
- Click the Gear icon in the top-right corner and select Integrations.
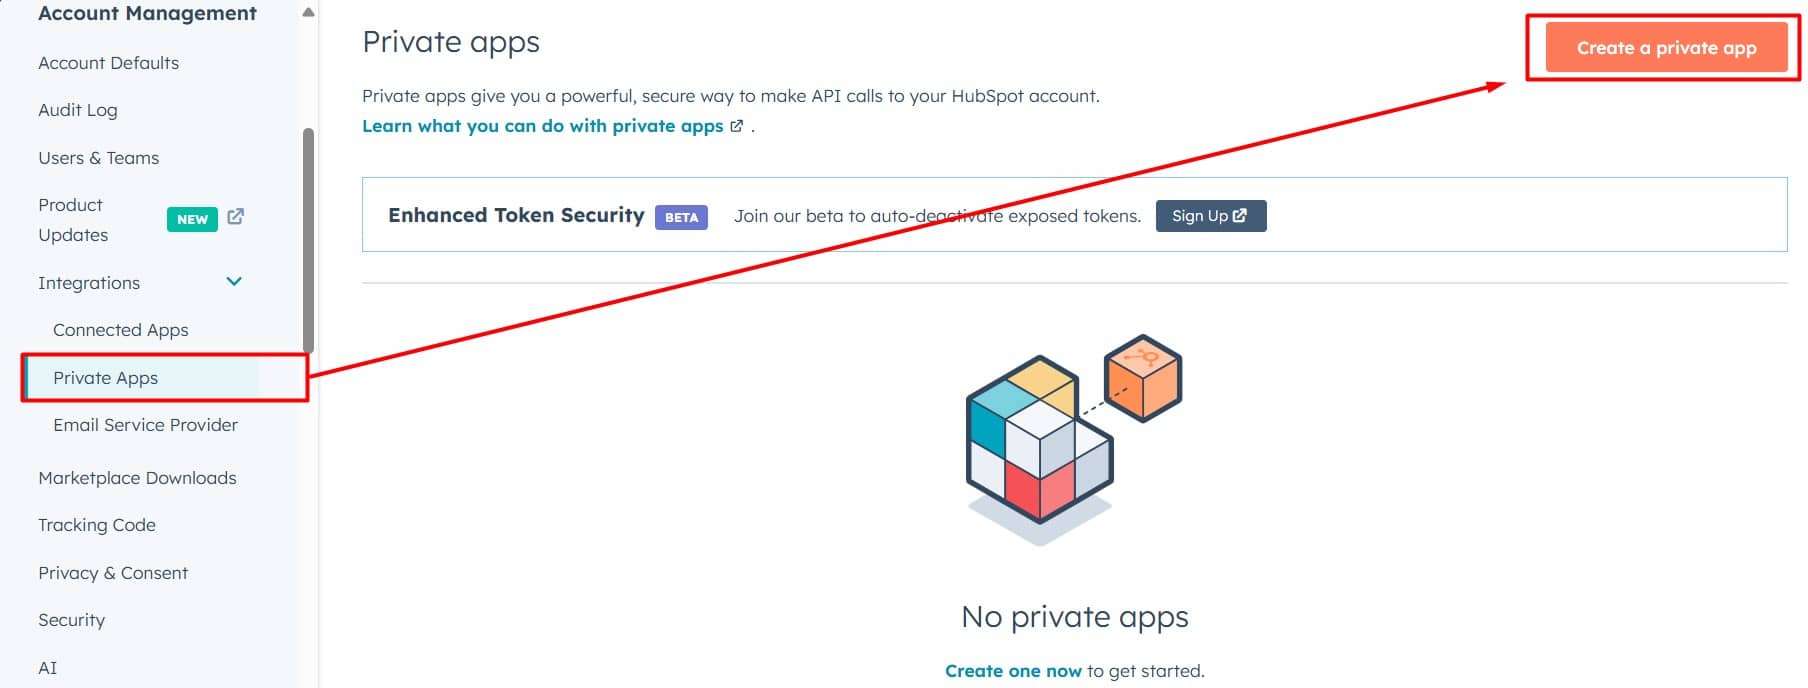
- Go to Private Apps and click Create a Private App.
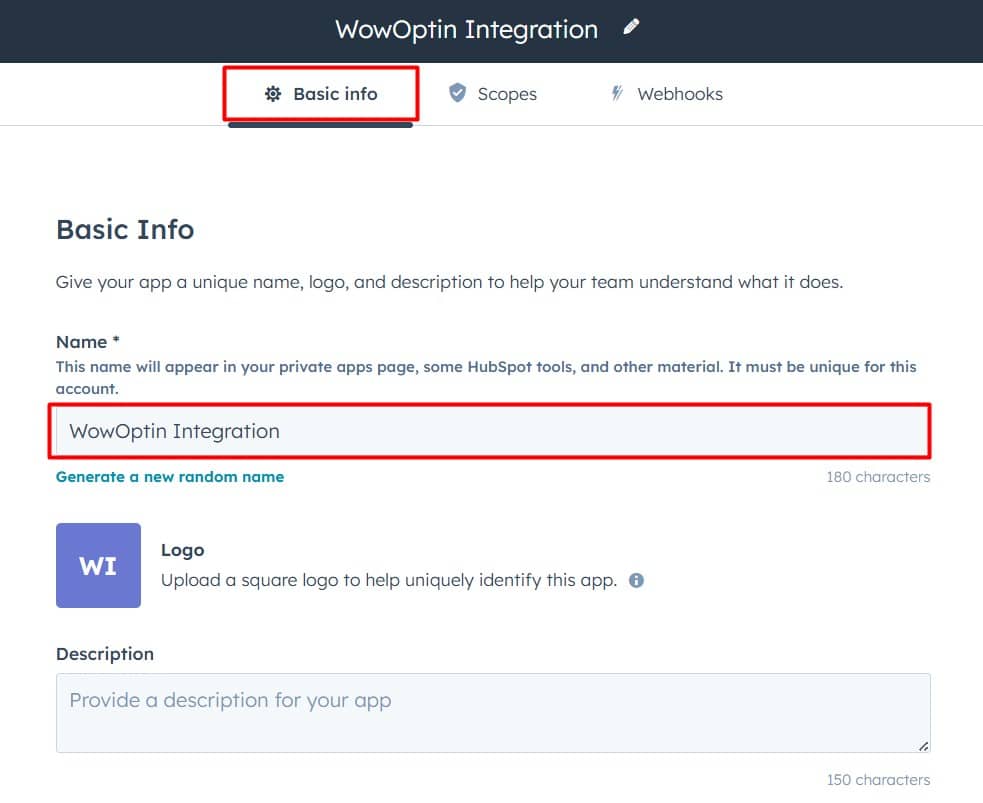
- In the Basic Info tab, give your app a name.
- Switch to the Scopes tab and click Add New Scope (this is key!).

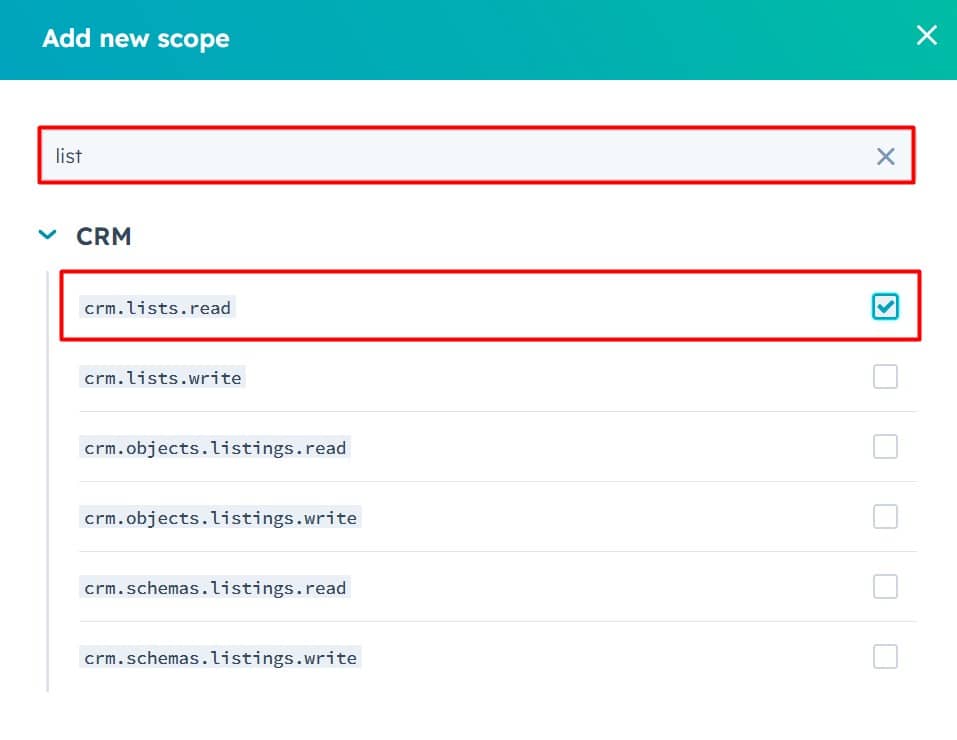
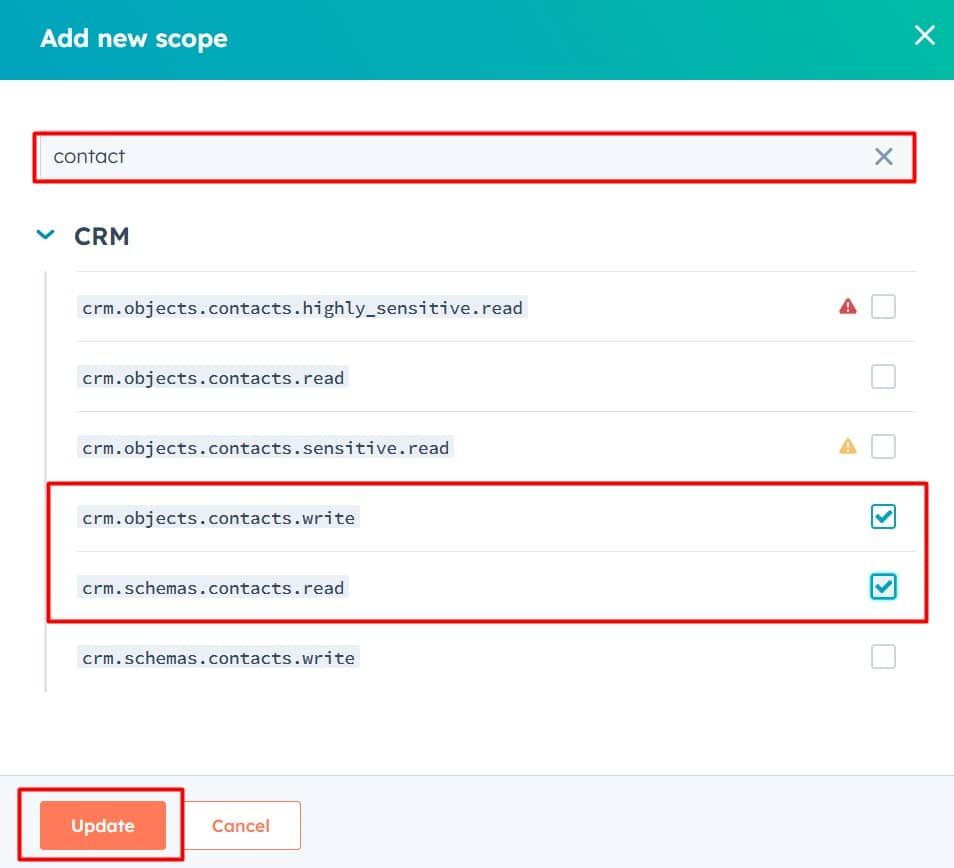
- In the sidebar, search for “list” and carefully select crm.lists.read.
- Again, search for “contact” and carefully select crm.objects.contacts.write and crm.schemas.contacts.read, then click Update.
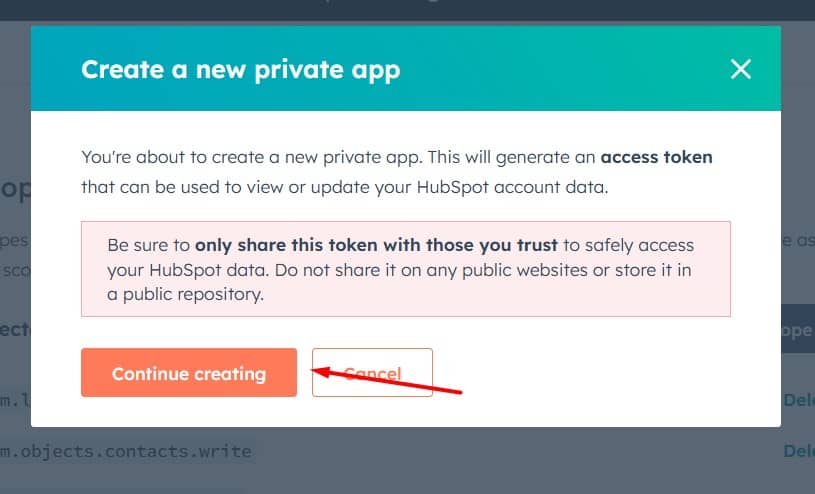
- In the popup, carefully read the instructions and click Continue.
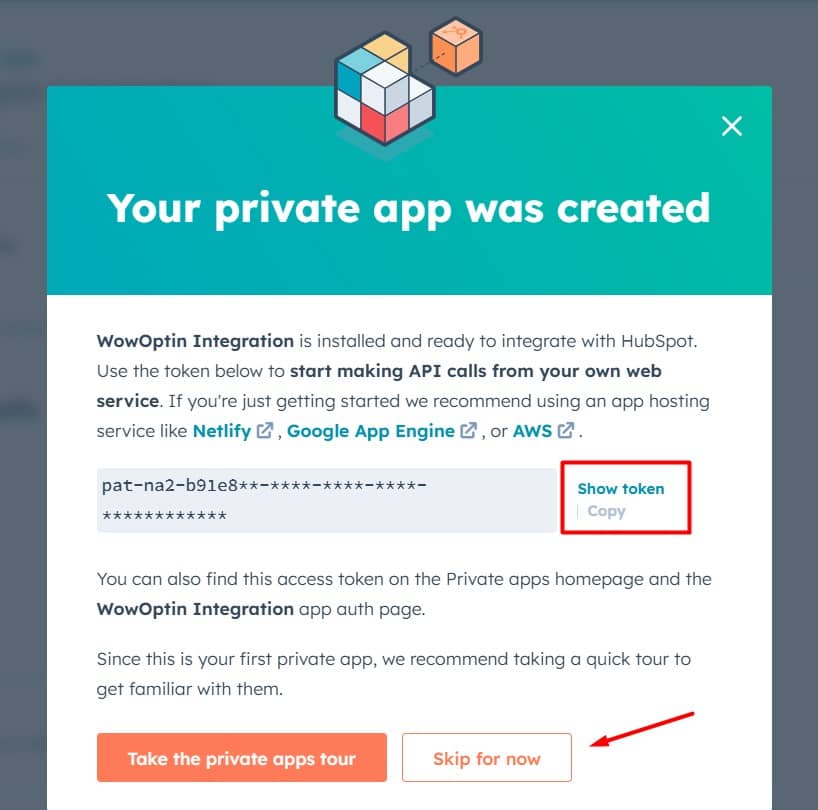
- Click Show Token, then Copy it.
- Click Skip for Now to complete the setup.
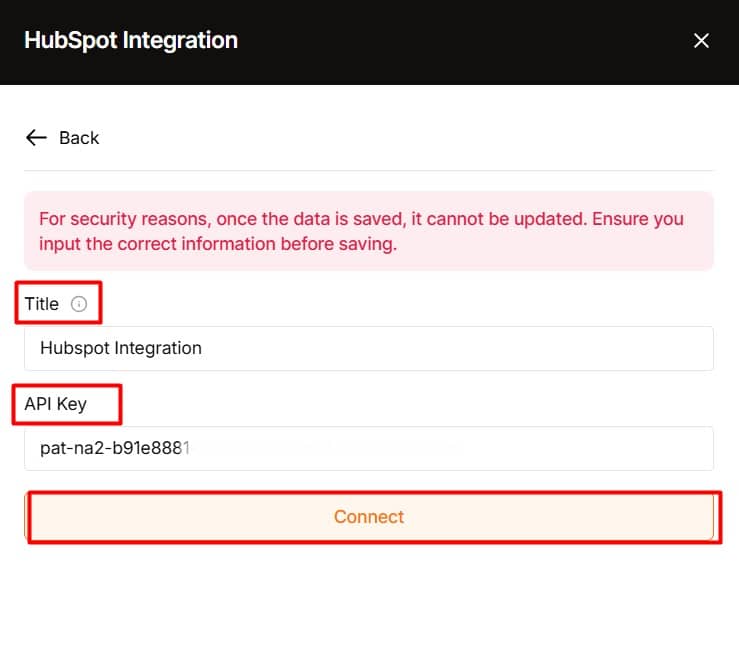
Step 2: Connect WowOptin to HubSpot
Now, set up the HubSpot integration in WowOptin:
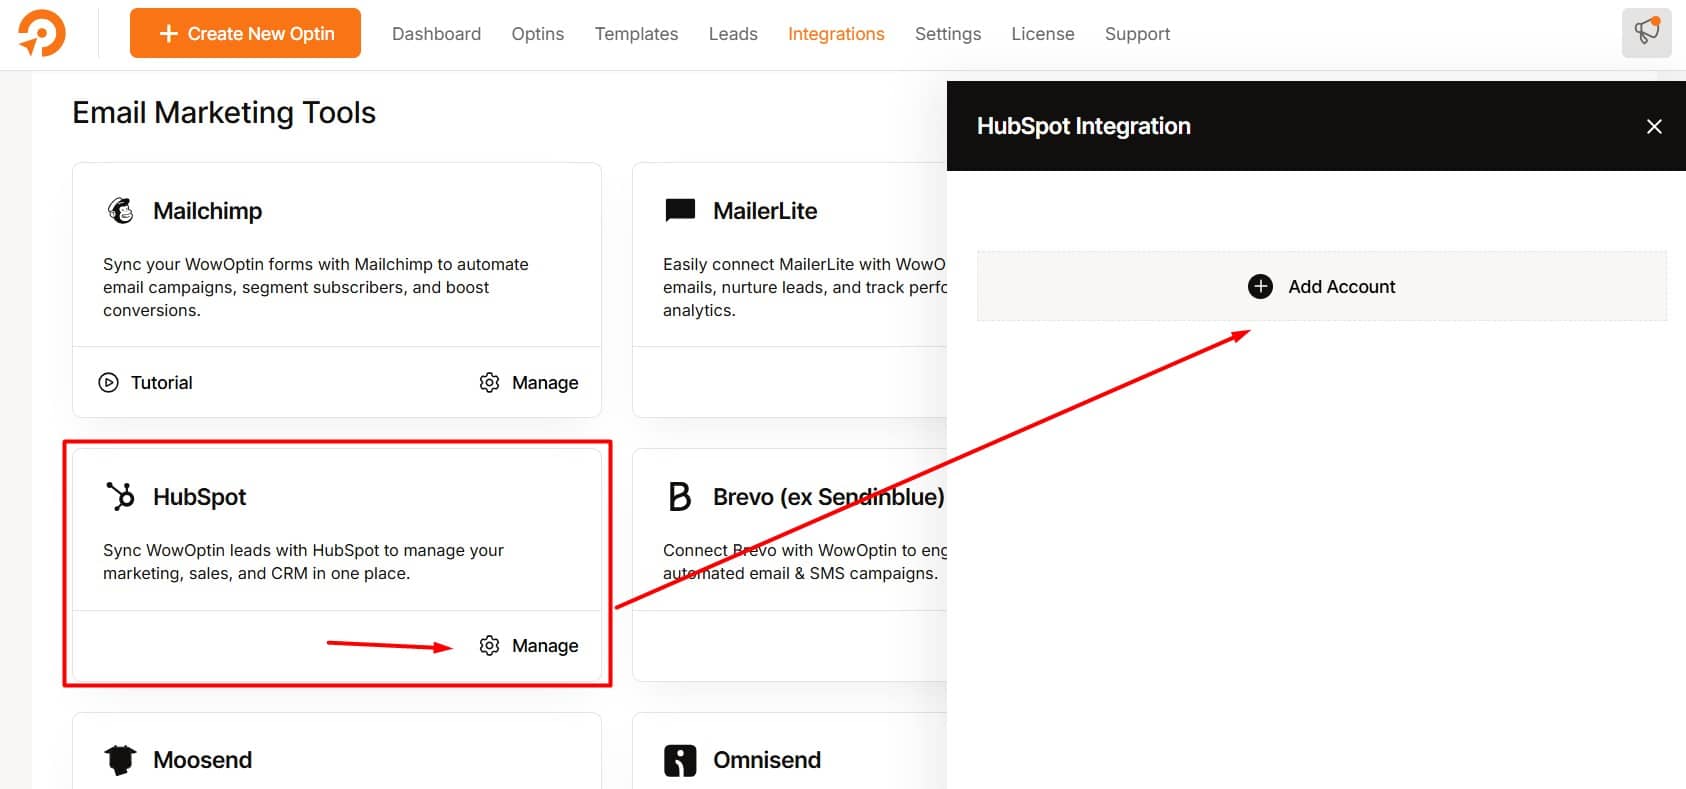
- Navigate to the Integration page in WowOptin.
- Find and select HubSpot from the list.
- Click Manage, then Add Account.
- Enter a clear, descriptive title for the account.
- Paste your HubSpot token.
- Click Connect.
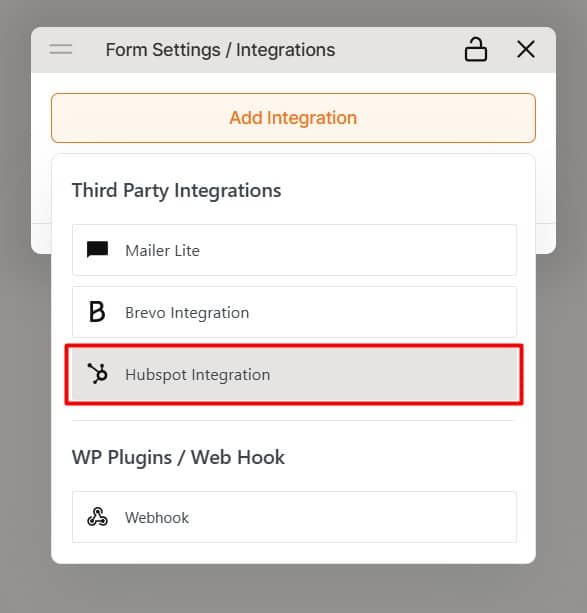
Step 3: Link an Optin Form to HubSpot
Integrate your optin form with HubSpot in the WowOptin builder:
- Open your desired optin form.
- Click the Form Integration Icon in the top sticky bar.
- Select Add Integration.
- Choose the HubSpot account you just connected.
Step 4: Configure the HubSpot Integration
Finalize the setup:
- Click the dropdown icon.
- Select your audience list (automatically created when you signed up for HubSpot, but you can customize or even create from scratch).
- Go to the Field Mapping section.
- Map key fields (e.g., link the email field to the email input ID).
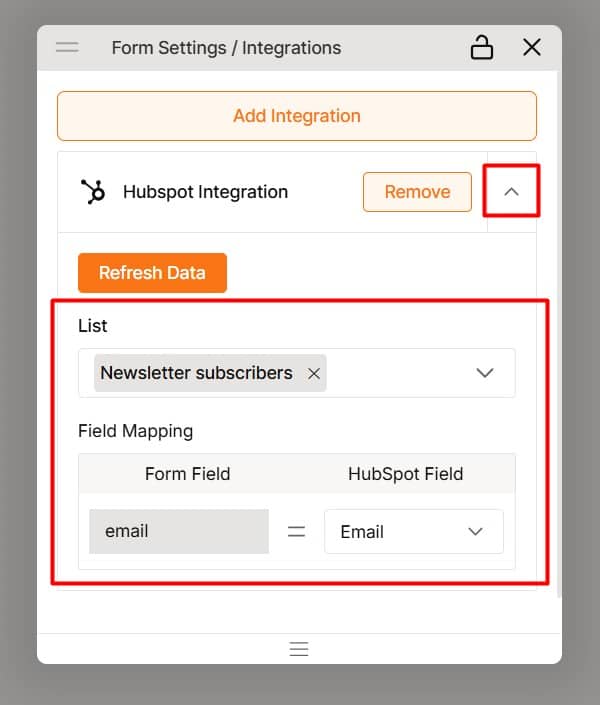
HubSpot offers default fields for mapping, but you can add custom fields if needed.
⭐⭐⭐ Once these steps are completed, your submissions will flow seamlessly into HubSpot, keeping your audience data organized and ready for action.