This guide will explain how to integrate WowOptin with Moosend to seamlessly connect your email lists and forms for effective email marketing campaigns.
Follow these simple steps to Integrate WowOptin with Moosend
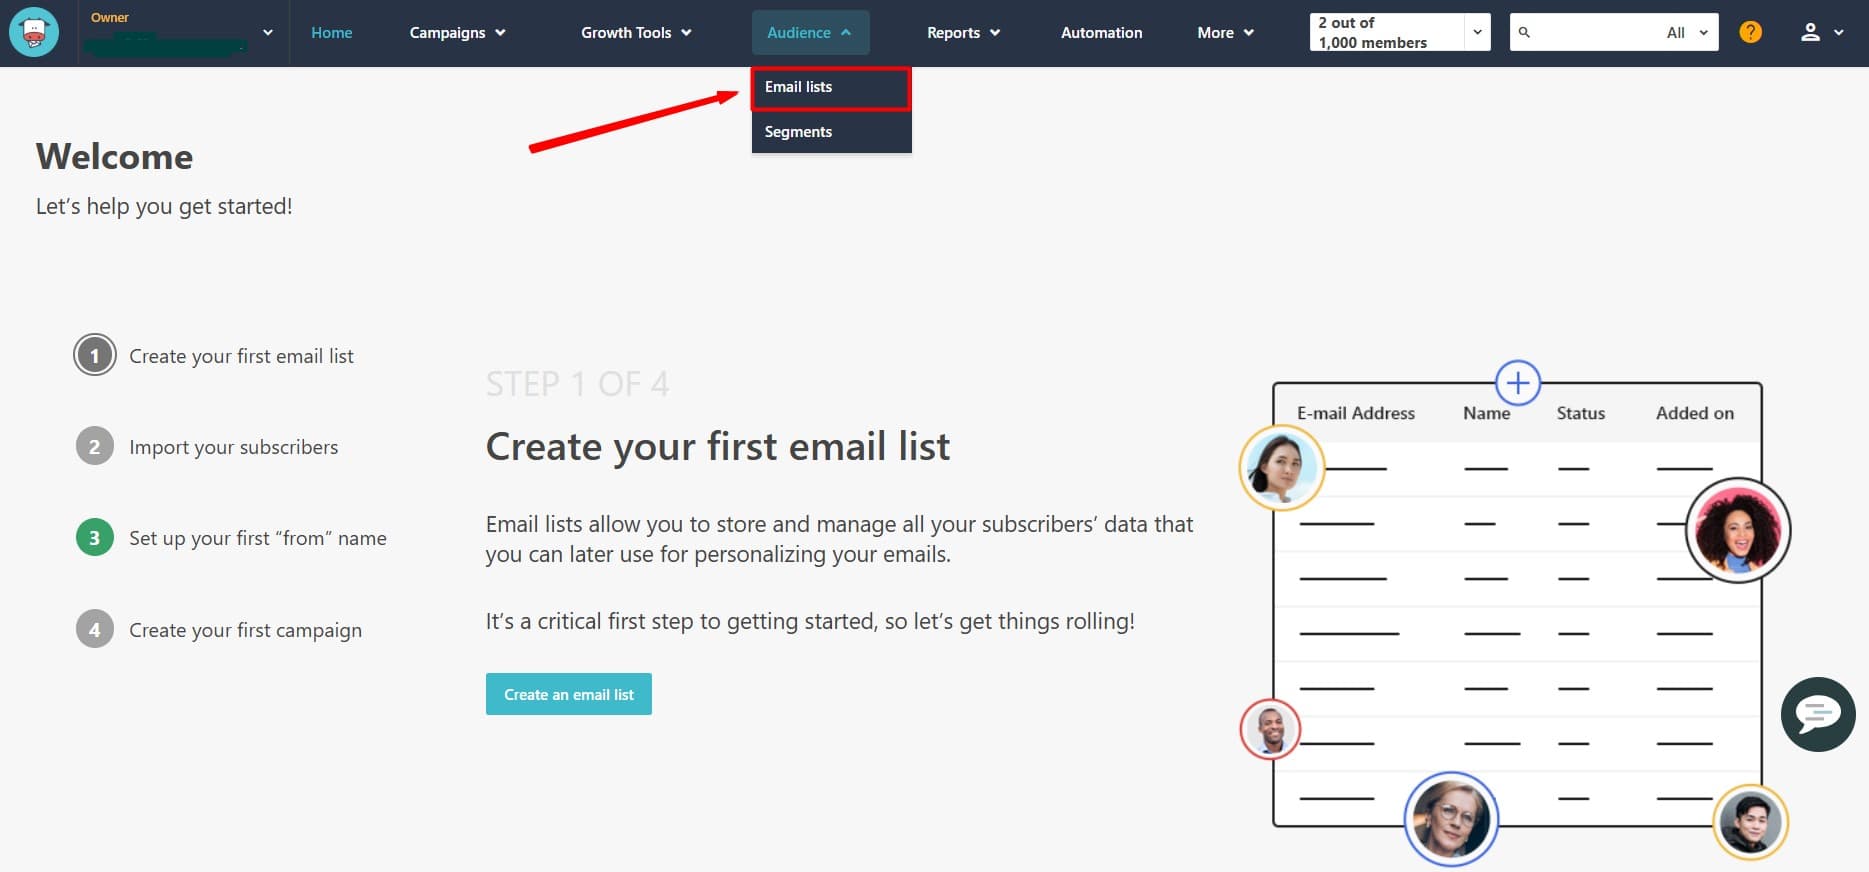
1. Create an Email List in Moosend
If you don’t already have an email list in Moosend, create an email list first. To do this:
- Log in to your Moosend account.
- Navigate to the Audience section and click on Email Lists.
Note: To store form submission data, you must have an email list created in Moosend.
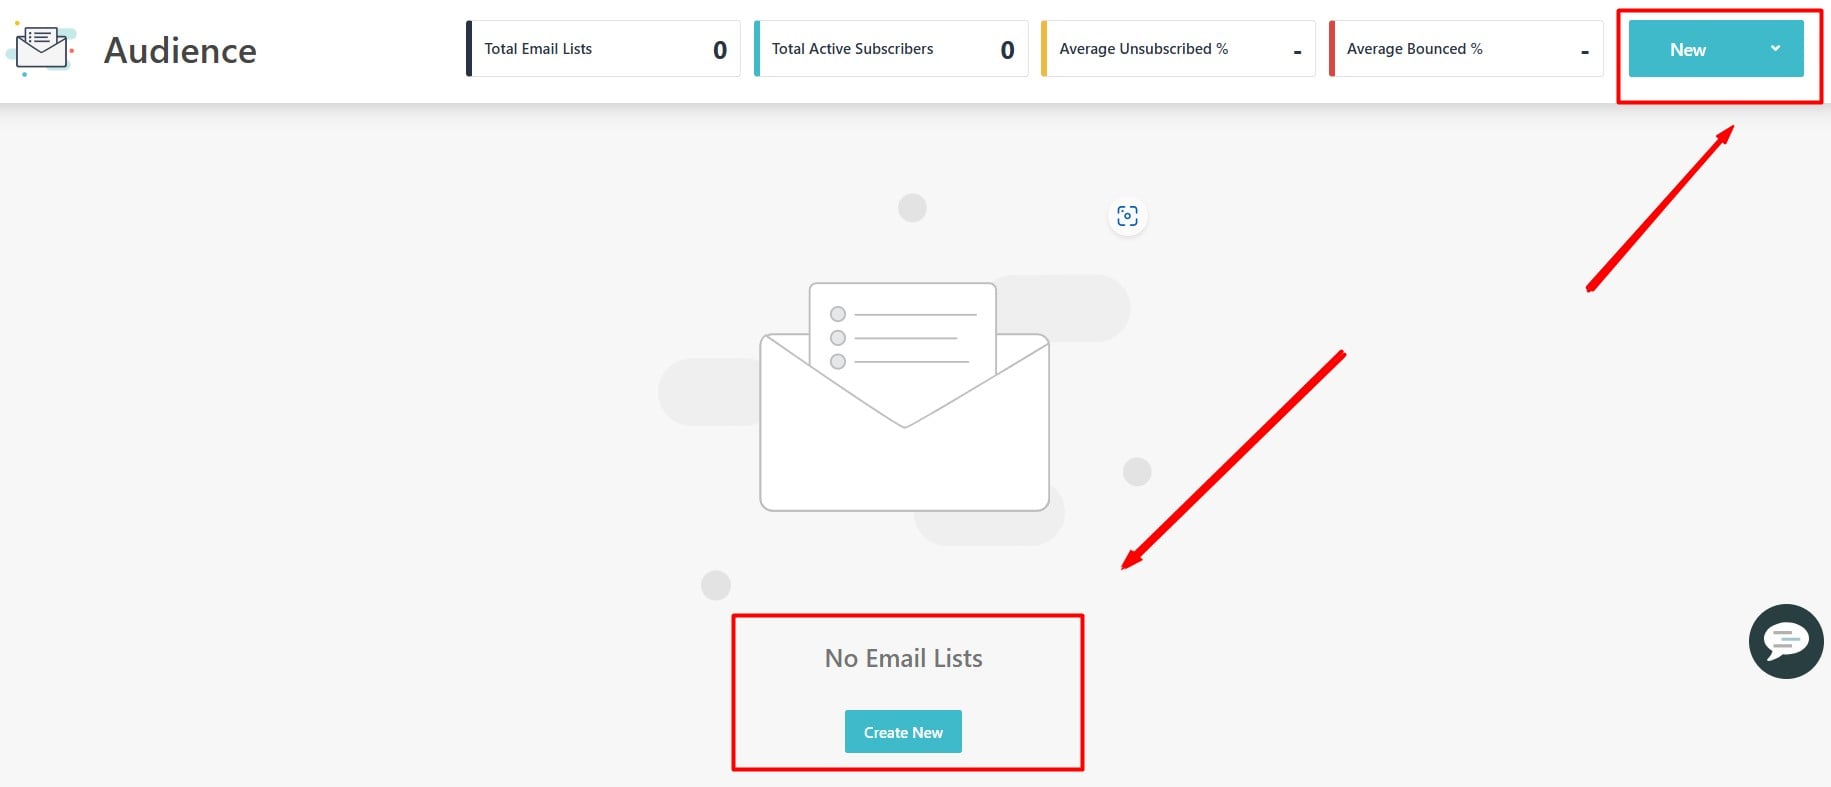
- To create a new list, hit on Create New.
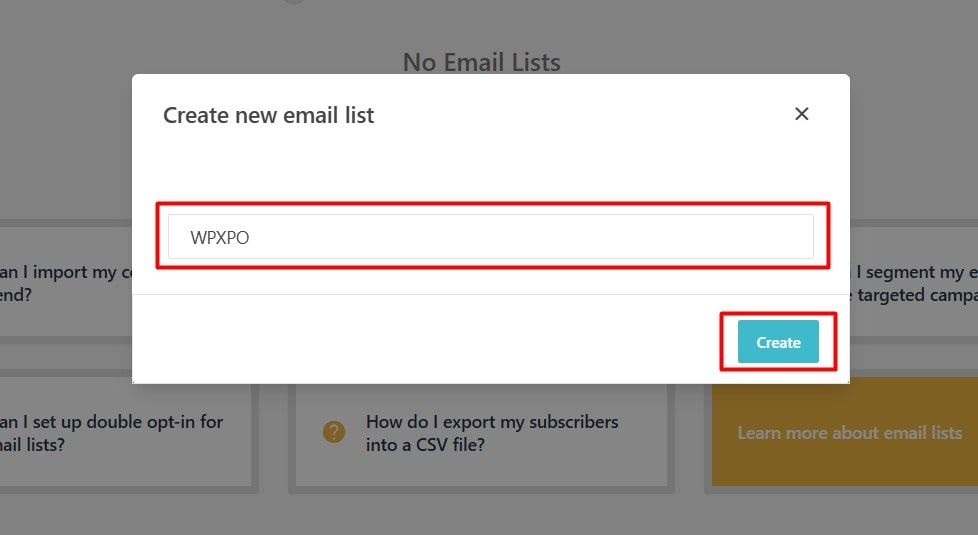
- Give a name for your email list and save it.
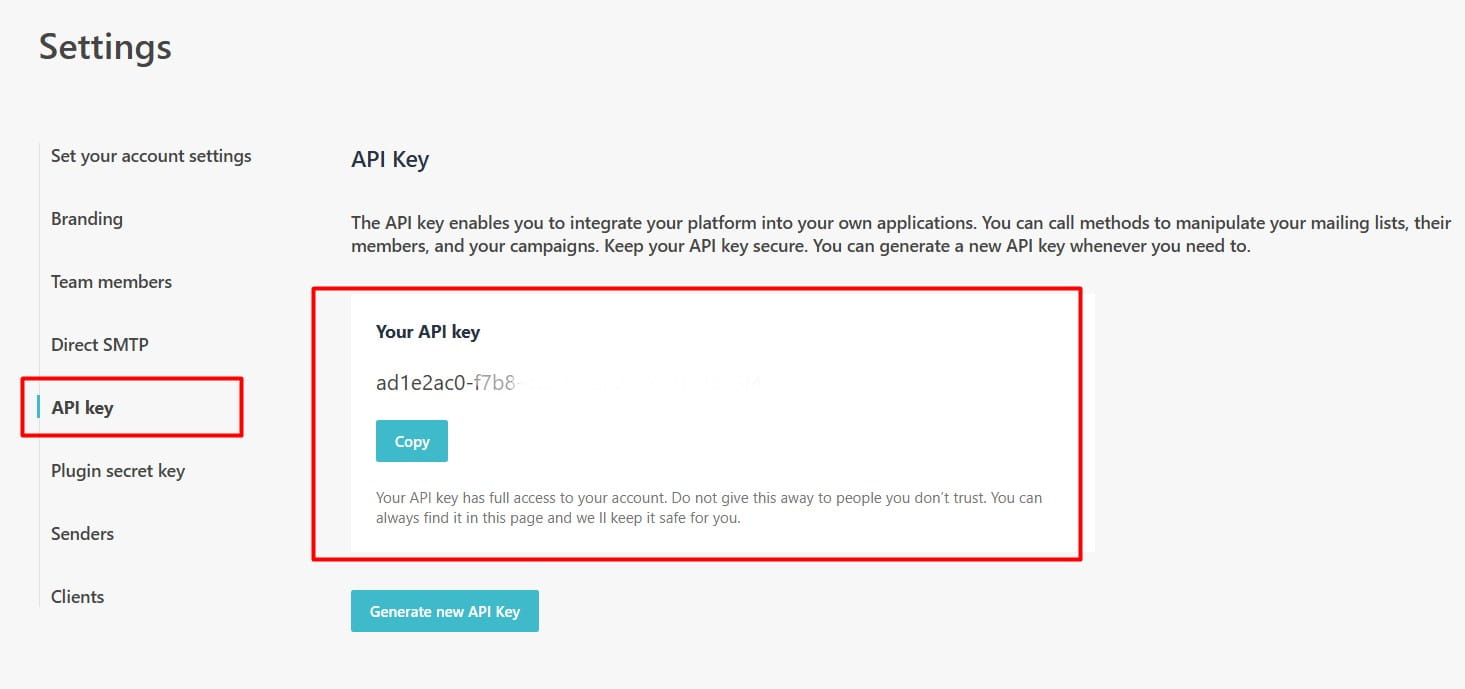
2. Obtain Your Moosend API Key
To connect WowOptin with Moosend, you’ll need your Moosend API key. Here’s how to get it:
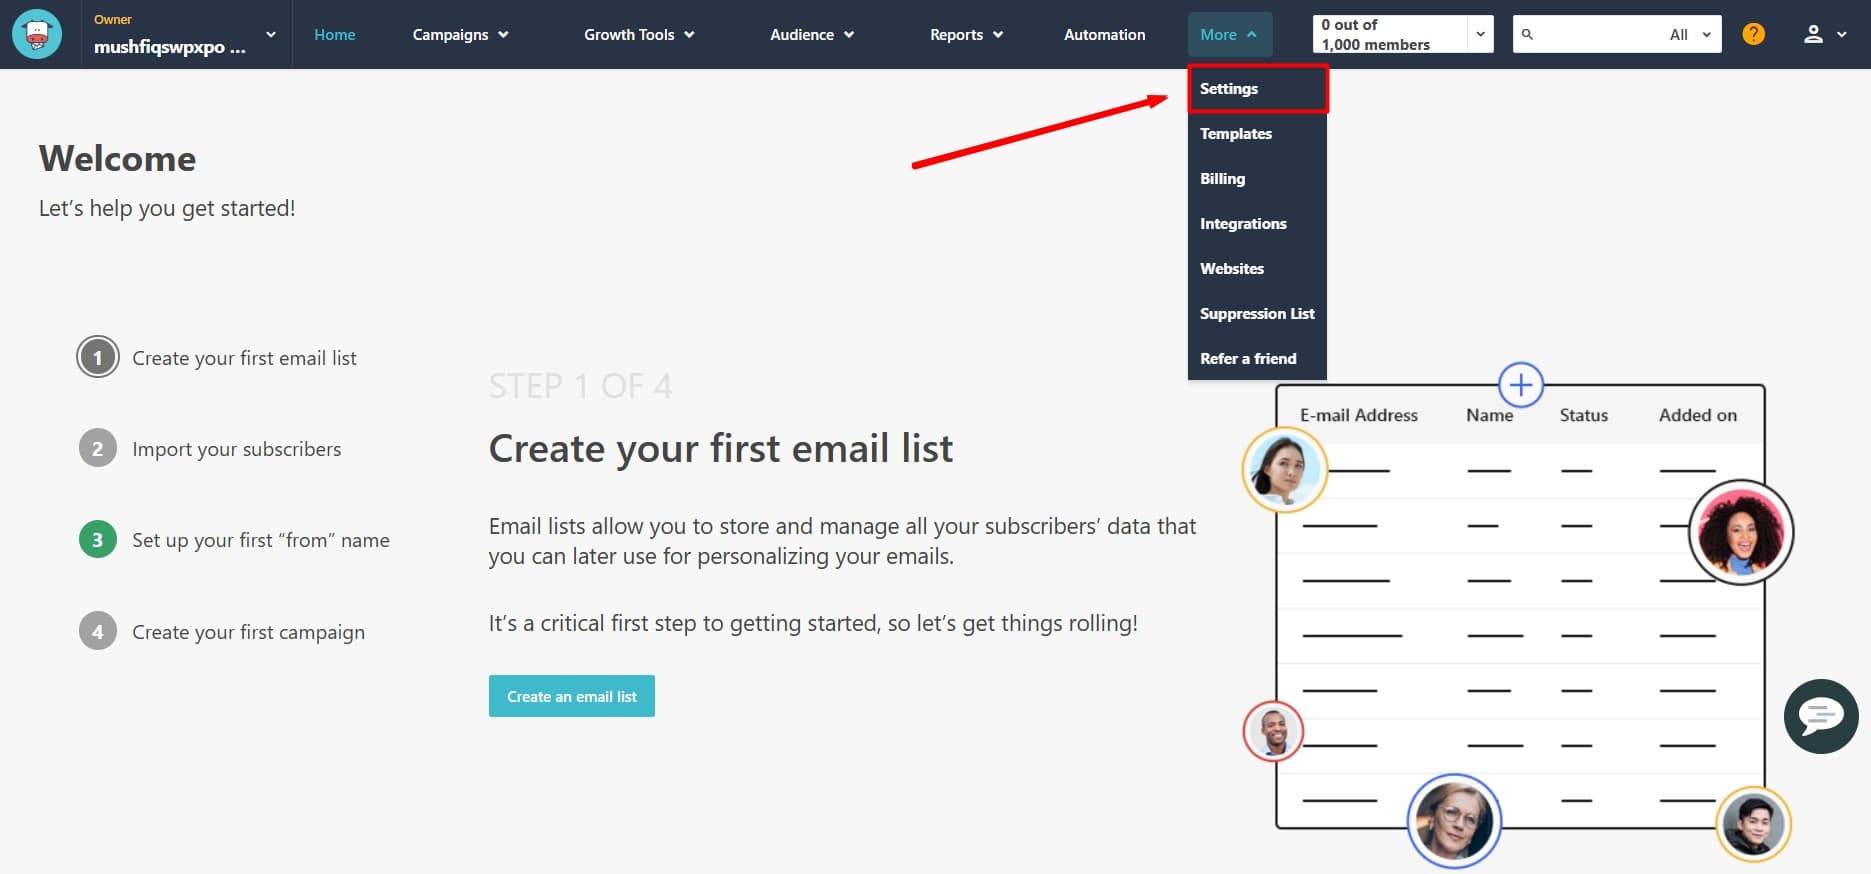
- Go to the More menu in Moosend and navigate to Settings.
- Locate the API Key section.
- Copy the API key.
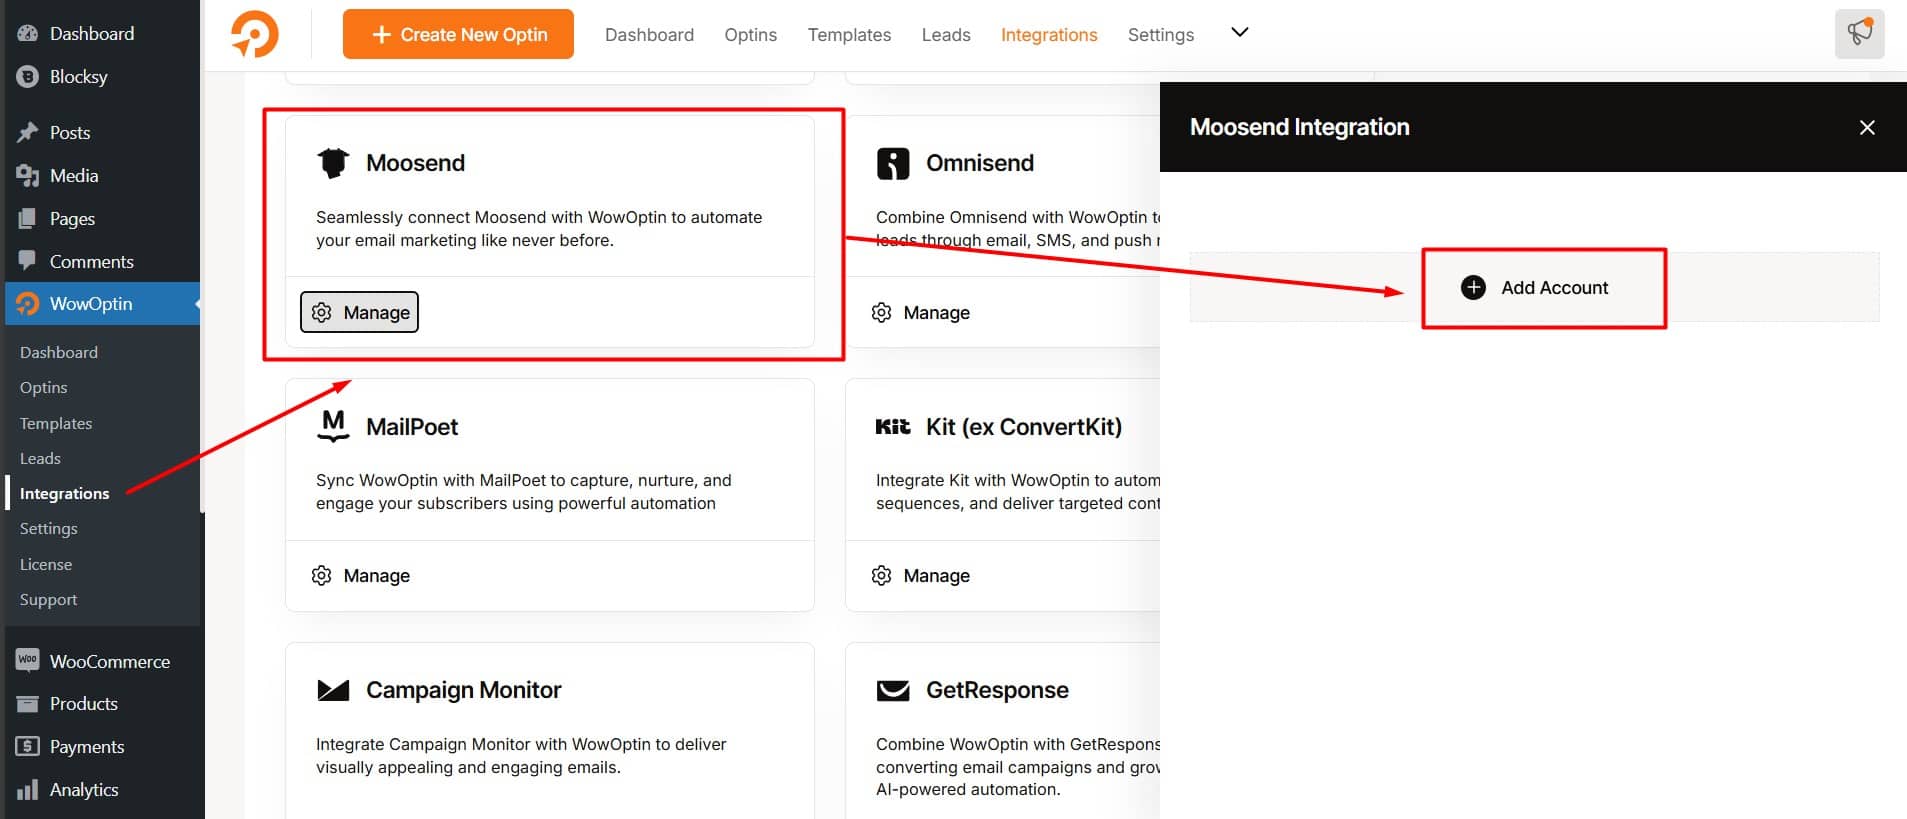
3. Connect Moosend to WowOptin
To set up Moosend on WowOptin, follow these steps:
- Go to the Integration page in WowOptin.
- Search for and select Moosend from the list.
- Click on Manage and then Add Account.
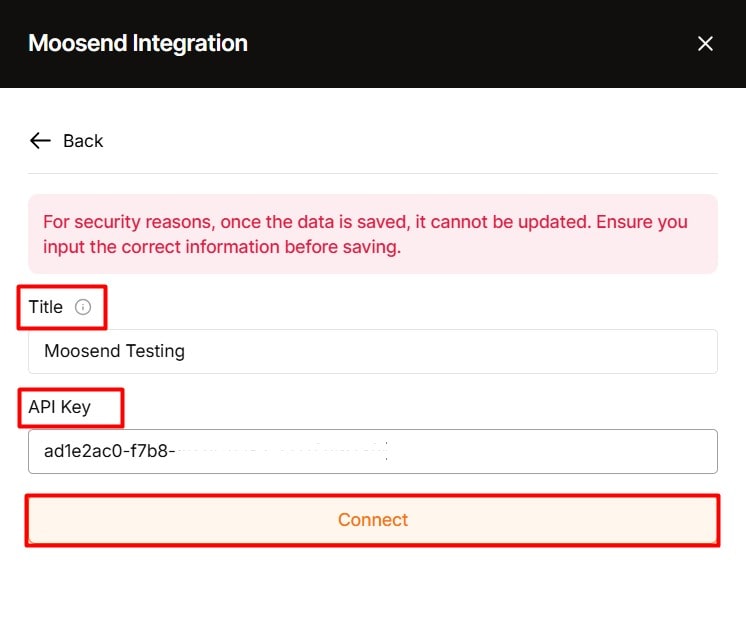
- Give a Title for the account.
- Paste the Moosend API key you copied earlier.
- Click Connect.
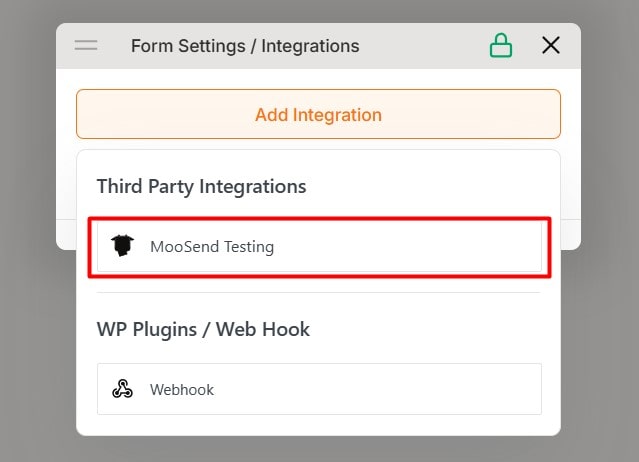
4. Integrate an Optin Form with Moosend
In the WowOptin builder, select your optin form and from the top sticky bar
- Click on the Form Integration Icon
- Click on Add Integration.
- From the list, select the Moosend account you just created.
5. Configure the Integration
Finally, configure the integration form for seamless performance. To do this:
- Click on the dropdown icon.
- Choose the email list you created earlier in Moosend.
- Proceed to the Field Mapping section and map the relevant fields.
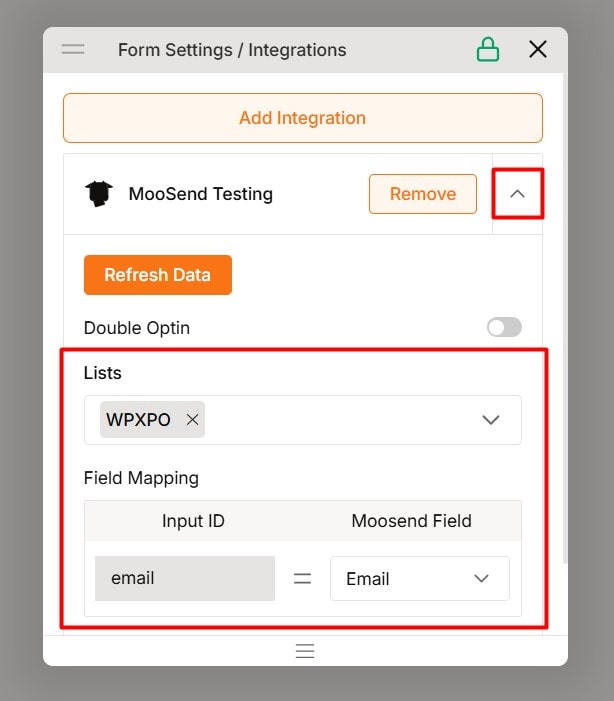
Note: Always remeber to map the exact Moosend fields to your optin form fields.
Default fields are pre-set in Moosend and will be displayed for mapping. But you can add custom fields in the Create Custom Fields tab under the email list settings.
⭐⭐⭐ If you follow these steps correctly, you’ll be able to collect submissions and store your audience data on Moosend.